
-

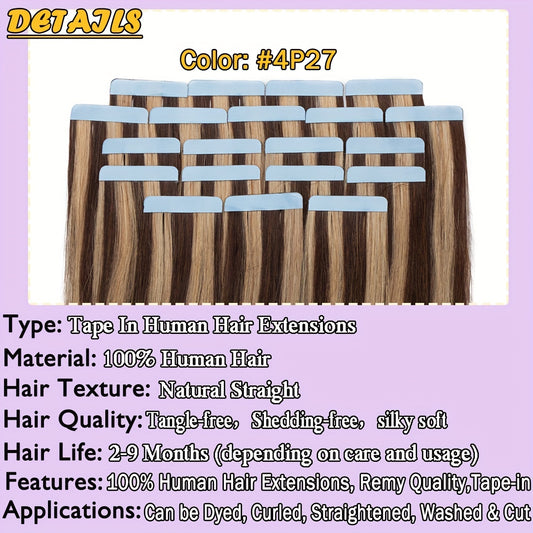
20PCS/50G Tape In 100% Human Hair Extensions
Regular price From $125.54 USDRegular priceUnit price per$25.54 USDSale price From $125.54 USD -
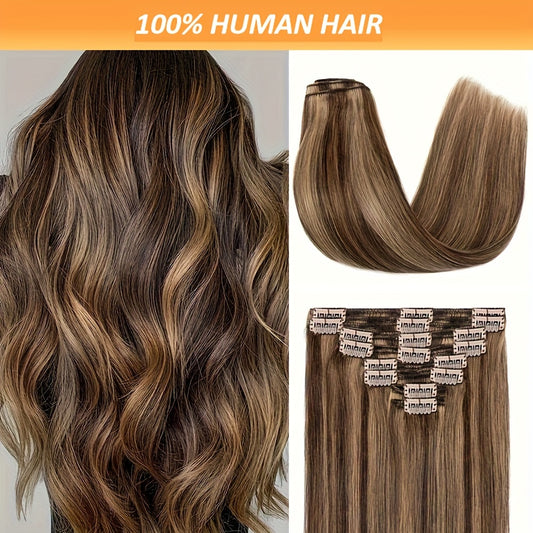
8Pcs Human Hair Clip In Hair Extensions - Chocolate Brown To Caramel Blonde
Regular price From $136.98 USDRegular priceUnit price per$36.98 USDSale price From $136.98 USD -

8pcs/1 Set with 18 Clips Body Wave Human Hair Clip In Extensions 120g
Regular price $259.00 USDSale price $259.00 USDUnit price per -

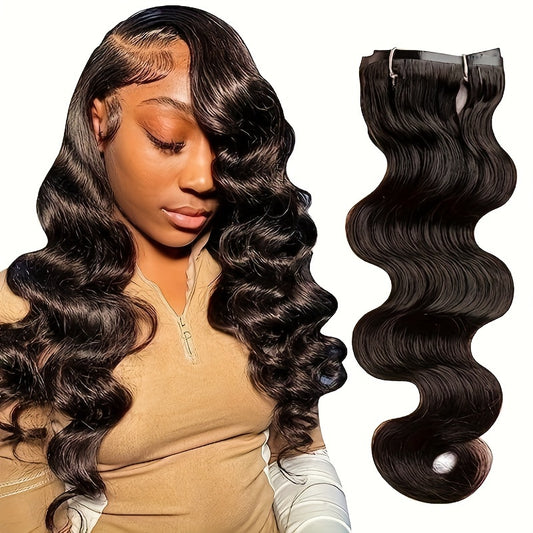
Real Human Hair Body Wave Human Hair Clip In Extensions
Regular price $239.00 USDSale price $239.00 USDUnit price per -

14-20 Inch V-Shaped Real Remy Clip in Human Hair Extensions
Regular price $229.00 USDSale price $229.00 USDUnit price per -


20-34 Inch Brazilian Remy Human Hair Extensions
Regular price $249.00 USDSale price $249.00 USDUnit price per -

Honey Blonde True Length Human Hair Bundles Straight Hair Extensions
Regular price From $152.67 USDRegular priceUnit price per$52.67 USDSale price From $152.67 USD -

20pcs Remy Human Hair Tape In Straight Hair Extensions
Regular price From $121.33 USDRegular priceUnit price per$21.33 USDSale price From $121.33 USD -

8 Pieces Straight Real Human Hair Clip In Hair Extensions | Remy Brazilian Black Human Hair | Double Wefted Clip In Hair Extension
Regular price $182.76 USDRegular priceUnit price per$82.76 USDSale price $182.76 USD -
Straight Clip in Hair Extensions Human Hair
Regular price $357.99 USDRegular priceUnit price per -

Bleach Blonde Human Weft
Regular price $334.99 USDRegular priceUnit price per -

Clip In Hair Extensions Real Human Hair | 18-26 Inch 120 G 8pcs Seamless Clip In Hair Extensions
Regular price $246.36 USDRegular priceUnit price per$46.36 USDSale price $246.36 USD


About Human Hair Weave Wefts Hair Extensions
What a weft is?
A weft is a continuous ribbon of hair stitched or bonded along a narrow header. Installers attach that ribbon to braids or to micro beads placed along a row, creating a track that carries length and volume. The system distributes weight along a line instead of a point, so it feels flat and secure when mapped correctly. Because rows are modular, you can add or remove density, repair a gap, or change shades without rebuilding the entire head.
Why choose a weft system
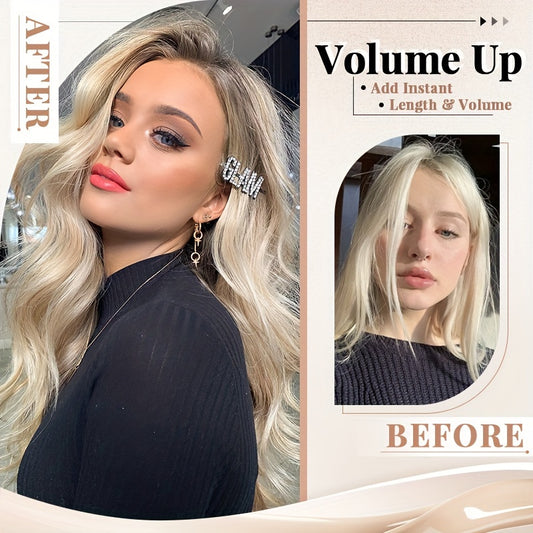
Wefts deliver coverage quickly with clean edges and predictable maintenance. Rows keep hardware away from the part, so the top layer reads soft and natural in bright rooms. The method suits people who want consistent silhouettes, fast styling, and the option to switch lengths or tones seasonally without committing to permanent color. It pairs well with protective routines because daily manipulation at the root is low once a map is set.
Weft constructions compared
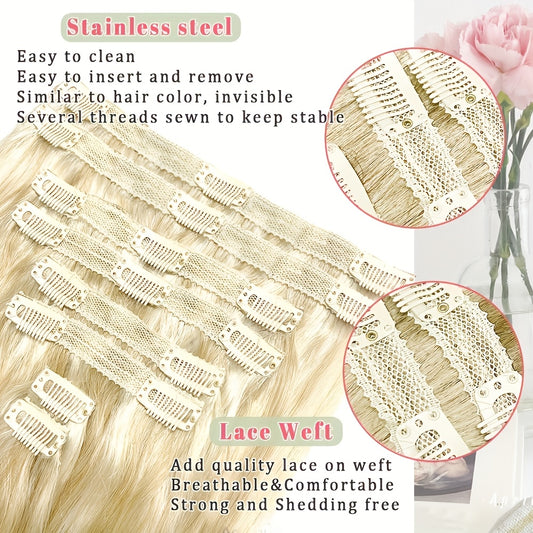
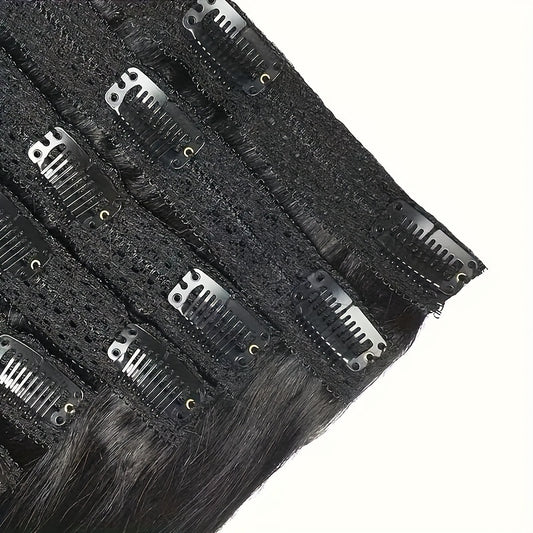
Machine weft: thicker header, robust and trimmable anywhere along the band, ideal for dense hair or bold outlines. Hand tied weft: ultra thin header, cannot be cut between knots without sealing, stacks neatly, excels for fine crowns and layered maps. Genius or hybrid weft: flat like hand tied but trimmable like machine; fewer flyaways, strong edge authority with a slim profile. Flat silk or skin weft: very slim and comfortable, typically pre sized; used to finesse hairlines or sensitive zones.
Construction choice depends on scalp sensitivity, desired density, and the need to trim to custom arcs. Fine crowns favor thin headers and more rows; dense crowns tolerate thicker headers with fewer rows.
Installation paths
Sew in on braids: classic path using cornrow anchors; thread and a curved needle secure the weft to the braid. Beaded row (also called hidden bead, LA weave, or move up methods): micro beads create an anchor line; the weft stitches across beads with thread. Hybrid maps combine a small braid in high stress areas and beads elsewhere. Glue on tracks are not covered here because solvent and heat routines complicate long term fiber life; the focus is stitch based installs with predictable removal.
Braided installs shield the scalp from thread rubbing and can feel very secure; beaded rows reduce tension by distributing load over beads and speed up maintenance. Both can be invisible when the canopy is generous and rows are placed low.
Fabulive lists bundle grams, header types, and daylight end crops so buyers plan coverage instead of guessing.
Track mapping and canopy
Rows should mimic the head’s curves. The lowest row anchors stability near the nape. One or two arcs across the occipital create body. A short upper row or cover strip insures the crown against wind. Always preserve at least one to two finger widths of natural hair above the highest row—the canopy. Canopy is a concealment budget and should not be overspent. If tracks sit too high, light prints seams at parts and in three quarter photos.
Level placement looks boring up close and disappears in motion. Diagonal rows that fight the head curve torque under brushing and invite discomfort.
Leave out strategy
Leave out is the hair you do not cover with wefts. A small, healthy leave out near the part and hairline ensures the top reads native. Match undertone and texture closely so the join dissolves. If your leave out is fragile, use a closure piece or widen the canopy so you do not force daily heat on short fibers. Success is the freedom to skip heat on leave out most days because the blend is already close.
Edge care matters. Do not tension the front hairline trying to chase invisibility; concealment comes from canopy and mapping, not force.
Bundles and grams
Fabulive’s shade grid labels undertone clearly and shows front, side, and back in daylight, which speeds matching for weft maps.
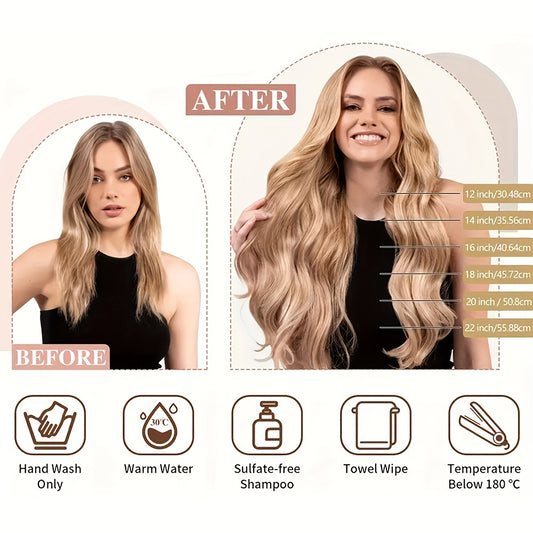
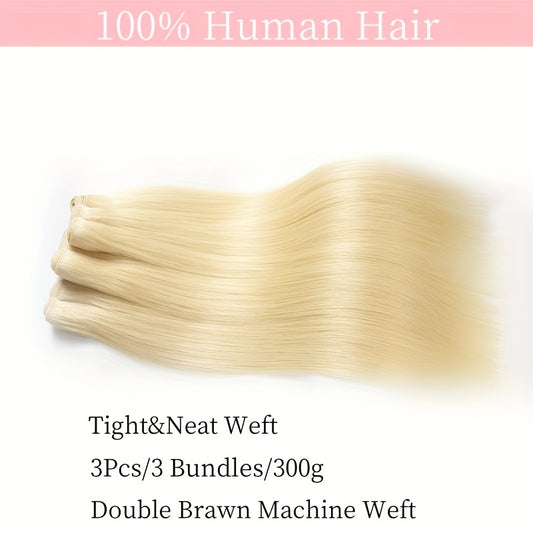
Most human hair wefts are sold in bundles of roughly one hundred grams. Shorter lengths carry more strands per bundle than very long lengths. As a planning ladder, fine to medium hair seeking a soft change often uses one hundred to one hundred fifty grams across two to three rows. Everyday density runs one hundred sixty to two hundred grams across three to four rows. A plush, blunt outline for straight shots or studio light may use two hundred ten to two hundred sixty grams across four to five rows. Very dense natural hair or dramatic length jumps may require more.
Distribute grams where the camera looks first: lowest row for edge authority, occipital for body, and side panels for temple balance. If the front reads thin while the back looks full, increase density near temples or use narrower panels that echo your face frame; adding weight at the nape rarely fixes front balance.
Length by body landmarks
When comparing row counts by length, Fabulive provides numeric ladders rather than adjectives, helping predict hem clarity before purchase.
On many frames, 14 inches touches the collarbone, 16 the upper chest, 18 mid chest, 20 lower chest, 22 near ribs, 24 toward the waist, and 26 into waist or upper hip. Waves read shorter; coils shorter still. The weft outline reads graphic, so choose a landing that cooperates with necklines and seated work. Measure from behind the ear to simulate a row drop rather than from the crown, which overestimates visible length.
If you film seated, confirm the hem does not collapse into your lap. Straight features want slightly more grams than waves; still photos do not forgive a hazy edge.
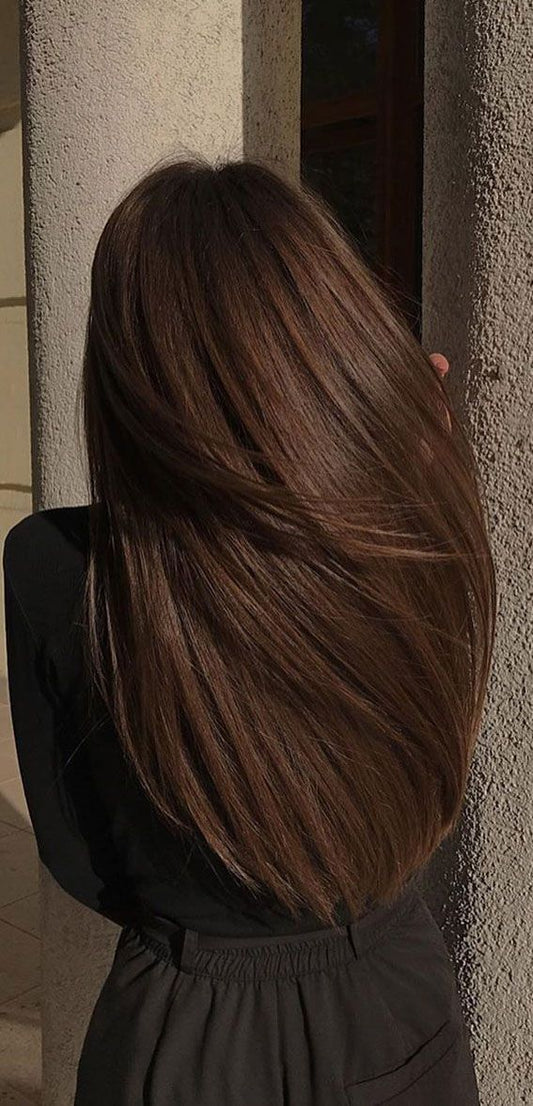
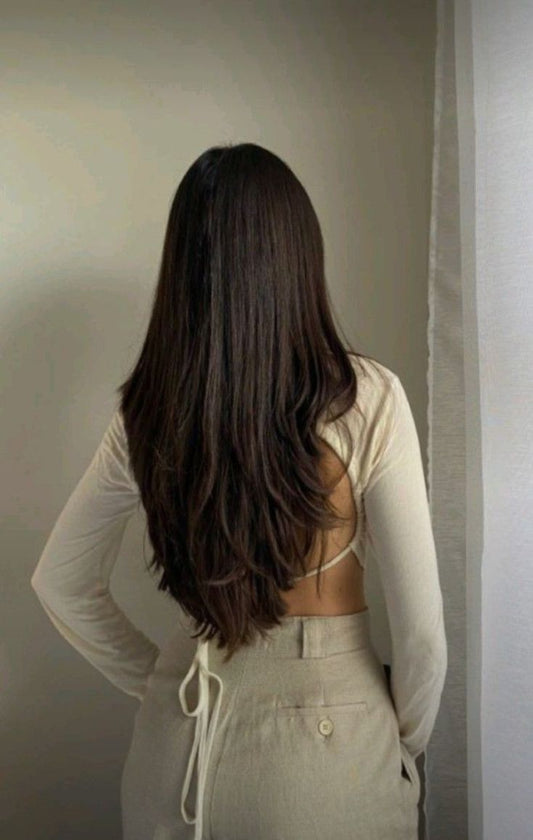
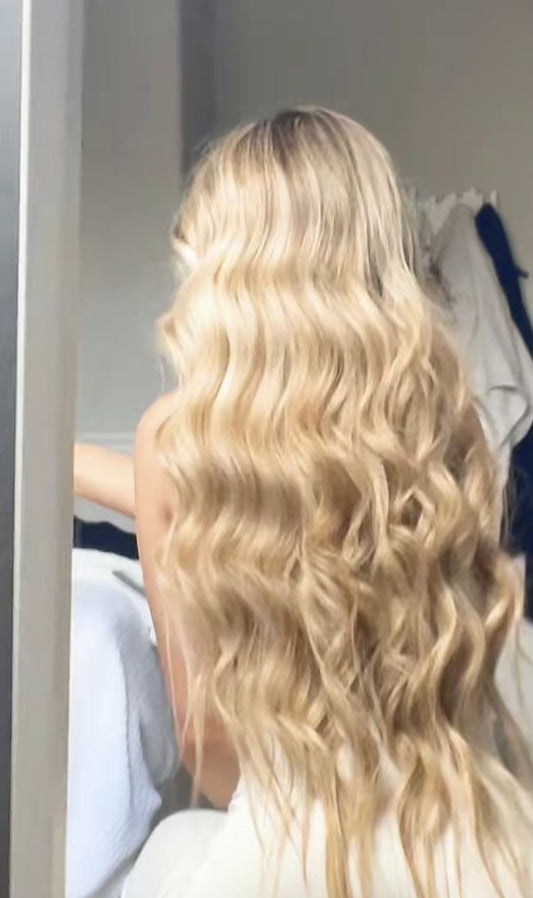
Texture menu
Straight displays the perimeter and rewards low heat plus a small bevel at the ends. Body wave is the universal blender: brush it straight with one pass or set soft bends with full cooling to hide joins. Loose curl and deep wave add pattern; match coil diameter to your own for quick blending. Coily textures deserve lower rows to protect root spring and a generous canopy so the top layer shields headers in motion.
Choose texture by routine and climate rather than trend. If most days are blowouts, straight fits. If you alternate smooth and bend, body wave saves time. If you live in curls, match coil scale and let water shape first, product second. Correct choices lower pass count and preserve fiber life.
Undertone and color logic
Undertone is cool, neutral, or warm, and it controls how color reads in real rooms. Depth is level—darker reflects less, lighter reflects more. Match undertone first and depth second. Verify by a window; indoor bulbs skew yellow or blue. Rooted and balayage wefts blur joins and mimic growth, especially around the face. If you sit between shades, slightly lighter is safer; human hair accepts cooling or deepening later with demi color better than lifting, which raises cuticles and shortens life.
For predictable ownership, Fabulive posts wash cadence and the no sleep guideline in plain language so routines stay simple.
Dimension reads as quality. A slightly deeper row underneath a lighter main tone yields shadow that looks like sunlight rather than dye. Keep notes—shade code, grams, row count—so reorders repeat cleanly.
Seam discipline and stacking
Stacking multiple hand tied wefts on a single beaded row creates density without bulk when headers are flat and threads sit smooth. Machine wefts can be split to reduce header thickness before stacking. Avoid over stacking near the crown; the canopy flattens best when top rows remain light. If you need more hair, add a lower row rather than piling high. The goal is calm edges, not towered roots.
If you mix rooted and balayage options, Fabulive’s product tiles place root depth next to mid and end tones so joins are easy to visualize.
Comfort mechanics
Comfort is load sharing plus clean, even stitches. Beads should match hair diameter and lie level; thread should pull firm but not bite. Braids should be neat and not over tight. Rotate exact bead positions or braid patterns between installs so the same follicles are not loaded repeatedly. Brush with your free hand supporting the row; torque falls and joins last longer. Sleep in a loose low braid to reduce nape friction.
If tenderness appears, remove or lighten an upper row and shift density lower. Comfort is non negotiable; invisible hair is a byproduct of low tension and clean maps.
Tools and materials
Curved needles and strong, smooth weaving thread are standard for sew ins. Silicone lined beads and a quality plier set serve beaded rows. A tail comb, clean sectioning clips, small duckbills, and alligator clips make order simple. For machine wefts, a fray check or adhesive sealant can secure cut points. For hand tied wefts, only cut at designed break points if allowed, then seal immediately. Keep alcohol wipes for tool hygiene and a small pouch for needles and thread to avoid snags.
Quality shows in even bead compression, quiet stitches that glide, and thread that does not fuzz. Loud tools are often sharp tools; smooth edges protect hair.
Application sequence overview
Section clean horizontal arcs following the head’s curve. Create anchor braids or bead lines, keeping spacing consistent. Position the weft just below the section, align the header with the row, and sew with small, even stitches that wrap the bead base or pass through the braid. Secure ends neatly so tails do not poke the scalp. Add rows from low to high, preserving canopy at the top. Trim perimeter on the wearer’s head so the outline echoes their cut and face frame.
Record the map—row count, density per row, and any sensitivity notes—and keep to the same rhythm across cycles. Predictability is the quiet superpower of weft ownership.
Finishing that reads premium
Cap tools at or under one hundred eighty Celsius or three hundred fifty Fahrenheit. One slow pass creates better sheen than several fast ones. Allow complete cooling before brushing into a single pattern; cooling locks shape and preserves cuticle quiet. Mist flexible hold onto the brush rather than directly on hair to avoid product spots at the row line. Finish with a pea of serum on mids to ends only. Browns and brondes repay restraint; shine comes from cuticles and cooling, not from heavy oils at the root.
For wave days, alternate directions in the back and go away from the face at the front, then brush once after cooling. For coily days, define with water first and product second; fluff only when fully dry.
Washing and drying
Wash two to three times per week or as your scalp requires. Keep shampoo at the scalp and let suds run through lengths. Rinse thoroughly. Condition mids to ends and detangle while saturated with a wide tooth comb or fingers; keep conditioner off rows and beads. Blot with microfiber—no wringing. Dry the row line fully to protect stitches and keep thread from wicking moisture. Aim the dryer so air flows down the hair shaft and finish with a cool shot to set shape.
Dry shampoo near the canopy can refresh between washes; avoid powders directly on stitches. Oils belong on ends only. Quiet habits extend fiber life and keep the install calm.
Sleeping, gym, and swimming
Sleep in a loose braid or low pony with a soft tie to reduce friction. For the gym, secure hair so sweat does not saturate row lines repeatedly; salt dries cuticles and can irritate skin. After swimming, rinse promptly with fresh water, condition mids to ends, and dry rows thoroughly. Choose gel or mineral sunscreen near the hairline when possible; oils creep into braids and threads.
Outerwear and seat backs add rub; sweep hair forward before zipping jackets, choose smooth strap bags, and brush once after long seating. Small routines beat big product stacks.
Maintenance rhythm and move ups
Expect move ups or resews every six to ten weeks depending on growth, climate, and routine. Beaded rows slide up and re stitch quickly; sew ins on braids may require braid refresh. Replace tired beads, frayed thread, or stressed headers promptly; hardware is a service part. Rotate row positions a few millimeters so the same follicles are not loaded in the same places every cycle.
Keep a compact record after each appointment: row counts, grams, bead colors, header type, and trim notes. These numbers make results repeatable and shrink appointment time.
Troubleshooting quick list
Row feels tight or pinches: bead too small, stitch too tense, or braid too tight; open, remap, or resew with lighter tension. Weft edge prickles: thread tail or cut header unsealed; tuck and seal. Crown prints under light: top row sits too high or canopy too thin; remove one upper row and lower the map. Hem looks foggy in straight photos: grams too low on the lowest row or draw too soft; add weight low or schedule a micro trim.
Temple hollows visible: add narrow side panels and trim on a diagonal to echo the face frame. Tangling near nape: friction from collars and straps; sweep hair forward before zipping, brush once after removing layers, or shorten length slightly for heavy outerwear season.
Closures, frontals, and leave out alternatives
Closures cover a rectangular area at the crown and end before the hairline; frontals run ear to ear along the hairline. Both reduce leave out and can protect fragile roots. Closures are lower maintenance and easier to balance with weft rows. Frontals deliver dramatic hairlines but demand careful daily care and adhesive routines. If your leave out is strong and you prefer simplicity, a small closure or just a generous canopy with low rows is often enough for most day to day looks.
When using a closure, align its part with your habitual part and keep weft counts modest at the crown to avoid a shelf. The weft map should support, not fight, the top piece.
Photography and optics
Decide once how your hair reads in three scenes: window daylight, warm home bulbs, and office LEDs. Lock white balance when publishing so undertone stays consistent. A still daylight crop of ends at rest tells the truth about grams and draw. If ends look foggy, add weight to the lowest row or request a half inch trim. If rows flash at the part, the top row is too high or the canopy too thin; lower the map and keep the top layer generous.
Rooms tint color. Wood warms, white walls cool, and stainless neutralizes. Plan content spots and your hair will look expensive with less product and less heat.
Ownership economics
Weft systems reuse hair for many cycles with modest adjustments. Install and maintenance take calendar time, but cost per wear spreads across months because you replace only thread, beads, and occasional headers. People who value predictable mornings and a steady silhouette under cameras often find the time investment returned in fewer daily passes and fewer product experiments. Measured heat, clean rows, and tidy records are the core of low stress ownership.
Because removal is stitch based, shedding and scalp stress are controlled when handled calmly. The ability to shift density forward for a season or brighten a face frame without permanent color is a practical advantage over single piece methods.
Glossary
Weft: a ribbon of hair stitched or bonded along a slim header. Row: the path along which a weft is sewn or stitched. Canopy: the unwefted top layer that hides hardware. Header: the stitched edge of a weft; thinner on hand tied, thicker on machine. Bead line: micro beads placed along a row to anchor a weft. Draw: how density carries toward the ends—single tapers, double stays thick.
Occipital arc: the back curve of the head where structural rows sit. Bevel: a small inward curve at the ends that reads like a fresh cut. Cooling rule: let heat shaped hair cool fully before brushing so shape sets and shine stays natural. Cover strip: a slim upper row used as wind insurance. Move up: a maintenance visit that slides beaded rows closer to the scalp and re stitches.
Summary
Human hair weave wefts succeed when rows sit low under a generous canopy, grams match the finish goal, undertone is confirmed in daylight, stitches are even, and finishing respects capped heat with complete cooling. Treat side panels as face balancing tools, keep row lines clean and comfortable, and record shade codes, grams, row counts, header types, and settings so results repeat quickly. The outcome is a flat laying, camera calm silhouette that looks like your hair on its best day with less effort and less product.
If any step becomes unclear, return to the sequence: section in arcs, build low, stitch even, preserve canopy, cap heat, cool fully, brush once. Small, repeatable moves beat hacks every time.
Mechanical view of rows on a curved surface
A row functions like a flexible beam stitched along a curved substrate. Stability rises when header thickness matches the curve and stitches land at regular intervals; torque during brushing falls when you support the row with a free hand. Low placement preserves the canopy so light cannot print seams under LEDs or sun. These mechanics explain why even, level rows feel lighter and remain invisible longer than aggressively stacked crown builds.
Customer reviews
- Sew in on braids with two hand tied rows and a light cover strip gave me a clean outline and zero printing at the part. — Mia Robinson, USA ⭐⭐⭐⭐⭐
- Bundle grams matched the page and the hem looks deliberate after a half inch trim; beaded move up at week seven was quick. — Oliver Scott, United Kingdom ⭐⭐⭐⭐⭐
- I’m tender headed and thin headers felt comfortable; sleeping in a loose braid kept the nape calm. — Ava Martin, Australia ⭐⭐⭐⭐
- Neutral brown with a soft root blended instantly; two narrow side panels filled my temple hollows for photos. — Noah Tremblay, Canada ⭐⭐⭐⭐⭐
- Machine weft split and sealed stacked perfectly on beads; the back looks full without crown puff. — Emilia Rossi, Italy ⭐⭐⭐⭐⭐
- Shipping took a day longer so four stars, but the thread glides and stitches sit flat with no prickle. — Lucas Müller, Germany ⭐⭐⭐⭐
- On Zoom the part stays clean and rows are invisible; mapping low and preserving canopy made the difference. — Sophie Dubois, France ⭐⭐⭐⭐⭐
- Wind on the pier and a tiny part shift still hid everything; notes on row counts helped us repeat the exact map. — Liam O’Connor, Ireland ⭐⭐⭐⭐⭐
- First weft install and the section–stitch–cool rhythm clicked; I logged grams, header type, and trim notes for next time. — Aria Kim, South Korea ⭐⭐⭐⭐⭐
- Gym to dinner same day; a single brush resets the hem and tangles stay minimal with a low braid at night. — Daniel Jensen, Denmark ⭐⭐⭐⭐⭐