
-

Thick Clip In Long Wavy Synthetic Hair Extensions - 24 Inch Balayage Brown Black Double Weft Fiber Hidden Wire Hairpieces for Women - Easy to Style, Natural Looking, And Long-Lasting Hair Enhancement
Regular price $212.89 USDRegular priceUnit price per$0.00 USDSale price $212.89 USD -

Ombre Colored 24-Inch Long Wavy Curly Synthetic Hair Extensions with a Clip Design
Regular price From $205.02 USDRegular priceUnit price per$0.00 USDSale price From $205.02 USD -

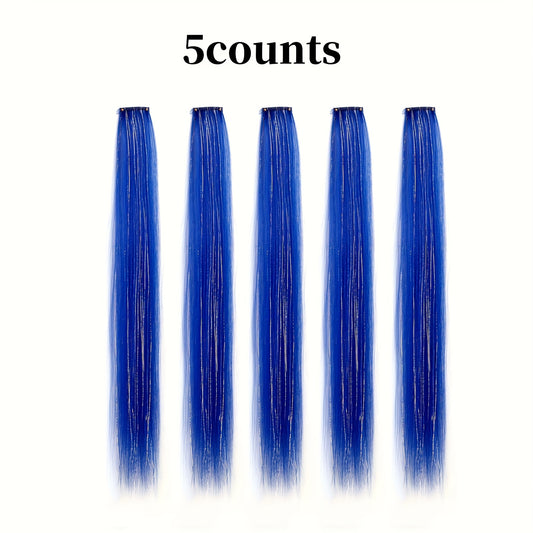
Wire Color Hair Extensions - Easy to Clip in (18 Inch 5pcs), Colored Synthetic Hair Strands, Suitable for Women, Perfect for Christmas Parties Halloween Style
Regular price $205.90 USDRegular priceUnit price per$0.00 USDSale price $205.90 USD -

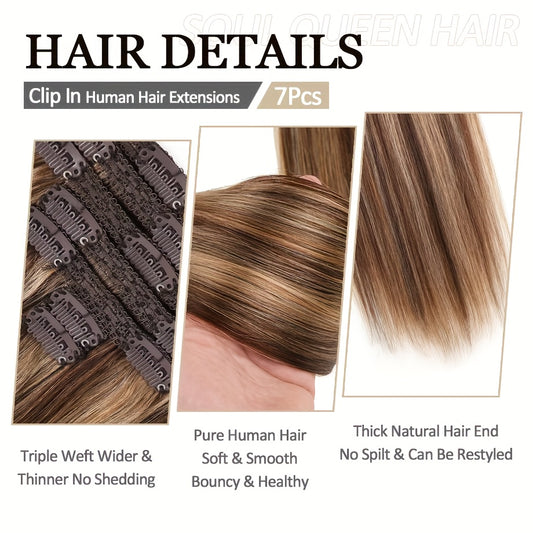
Set of 8pcs of Straight Human Hair Extensions with Double Weft, Featuring 18 Clips, Available in Lengths from 8 to 26 Inches, Color #12P613
Regular price $280.18 USDRegular priceUnit price per$0.00 USDSale price $280.18 USD -

Human Hair Clip-In Extensions in Medium Brown to Caramel Blonde, Featuring Natural Straight Strands. This Set Includes 8pcs with Color 4/27, Designed for Women. These Weft Extensions Are Suitable for Everyday Use And Come in
Regular price From $231.00 USDRegular priceUnit price per$0.00 USDSale price From $231.00 USD -


12-16 Inch Real Hair Clip In Hair Extensions Real Hair Clips Invisible Hair Extensions 3pcs/Pack, Real Hair Wigs, Hair Extensions For Women
Regular price From $215.60 USDRegular priceUnit price per$0.00 USDSale price From $215.60 USD -

50 Strands of DNE Hair Microlink Human Hair Extensions Ranging from 14 to 24 Inches in Light Brown And Blonde, Featuring Straight Hair with Cold Fusion Micro Loop Invisible Seamless Bead Extensions Designed for Women. Made fr
Regular price From $225.49 USDRegular priceUnit price per$0.00 USDSale price From $225.49 USD -

24-Inch Clip-In Hair Extensions, Real Human Hair Double Weft, 100% Remy Design for Women
Regular price $249.00 USDSale price $249.00 USDUnit price per -

Clip In Hair Extensions Real Human Hair | 18-26 Inch 120 G 8pcs Seamless Clip In Hair Extensions
Regular price $246.36 USDRegular priceUnit price per$46.36 USDSale price $246.36 USD -

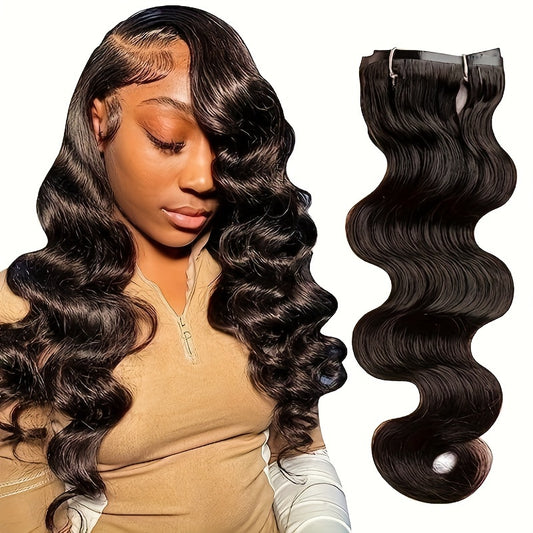
8pcs/1 Set with 18 Clips Body Wave Human Hair Clip In Extensions 120g
Regular price $259.00 USDSale price $259.00 USDUnit price per -

Clip In Hair Extensions Real Human Hair | Remy Human Hair Extensions Clip Ins For Women
Regular price $229.00 USDSale price $229.00 USDUnit price per -

4pcs Thick Clip In Long Wavy Synthetic Hair Extensions
Regular price From $114.84 USDRegular priceUnit price per$14.84 USDSale price From $114.84 USD


18 Inch Clip In Hair Extensions: Editorial Guide to Seamless Blending, Everyday Glam, and Smart Buying
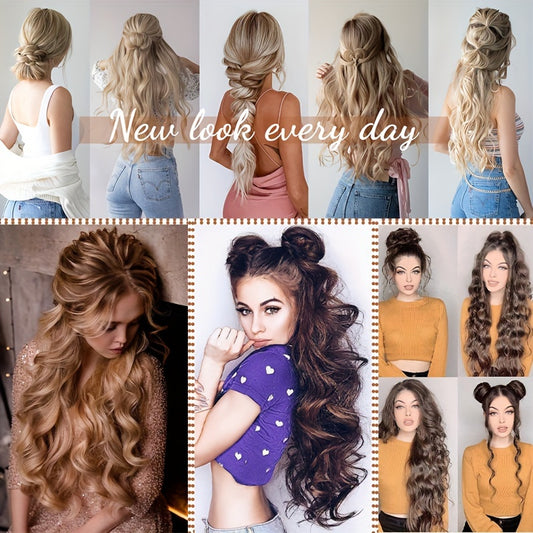
There’s a reason 18 inches is the length people remember after they try it once. It’s long enough to feel like a true upgrade—noticeable in the mirror, flattering in photos, and instantly more “finished” in everyday life—yet still practical enough to wear without turning hair into a full-time project. In the world of clip-ins, 18 inches sits at the point where volume looks luxurious, waves look intentional, and ponytails finally have that healthy thickness that makes a style read polished rather than rushed.
If you’re browsing this category because you want hair that looks like it belongs to you—just better—start with the 18 inch clip in hair extensions collection for a balanced length that feels glamorous but still wearable. And if you’re the kind of shopper who likes seeing the whole ecosystem before deciding, you can explore Fabulive’s official homepage for all extension types, color options, and collection navigation as a reference point for what’s possible across lengths, finishes, and styling goals.
This guide is written as a long-form editorial resource meant to sit below a product grid: not salesy, not repetitive, and not built on generic advice. Instead, it’s designed to help you choose a set that blends in daylight, feels comfortable for real wear, and performs across the situations you actually live in—workdays, weekends, events, travel, and the in-between moments where you want your hair to look like you had more time than you did.
What This Collection Is and Who It’s For
18 inch clip-in hair extensions are removable wefts (or pieces) that attach to your natural hair with small clips, adding length, density, and shape without permanent installation. This length typically falls around the mid-back on many people (depending on height and placement), creating an elongated silhouette that still feels believable. The goal is not “new hair” so much as “better hair”: fuller ends, improved movement, and a cleaner overall outline that looks intentional in mirrors and photos.
This collection is especially useful for people whose natural hair feels thin at the bottom, for anyone growing out a lob or layered shoulder cut, and for those who love medium-to-long styling but don’t want the maintenance that comes with ultra-long lengths. If you’ve ever styled waves and felt like they disappear because there’s not enough hair to hold the pattern, 18 inches often solves that immediately.
Who tends to love 18 inches the most
People with medium hair often feel the most dramatic improvement because 18 inches adds length while also correcting the most common mid-length problem: see-through ends. Those with fine hair love it when it’s installed lightly and strategically, because it creates density where it matters without making the crown bulky. And for anyone who values photo-ready hair, this length provides enough fall and movement to look luxurious without swallowing your outfit.
How to choose 18 inch clip-ins for thin hair right now
If your hair is fine, your best results come from controlled coverage rather than maximum density. Focus on building fullness through the mid-lengths and ends while keeping the crown light so clips stay hidden. Use fewer wefts but place them precisely, and choose a texture that blends without requiring heavy heat styling.
What 18 inch clip-ins look most natural in daylight
Daylight reveals undertones, shine differences, and texture mismatch. For the most natural look, match your mid-lengths and ends (not your roots), align your texture choice with your real hair pattern, and style your natural hair and extensions together as a single unit so movement is consistent from top to bottom.
How many pieces do you actually need for a full look
Most people need fewer pieces than they think. Start with a base row at the nape to create shape, then build gradually. Add side pieces only if the front looks sparse. If clips show or your head feels heavy, the fix is usually fewer pieces, better spacing, and lower placement—rather than more hair.
Why This Category Matters Now
Beauty trends have shifted toward believable results that can be repeated in real life. Instead of chasing dramatic transformations that only work for one night, people are choosing styling tools that fit modern schedules: fast, flexible, and consistent. Clip-ins are a perfect fit for this era because they offer transformation without long-term commitment, and 18 inches offers that transformation without becoming high-maintenance.
This category also matters because it supports healthier habits. Many people use clip-ins to reduce daily heat styling, to avoid frequent chemical services, or to look polished while their natural hair recovers from stress. When the goal is to look “finished” without pushing your natural hair too hard, 18 inches becomes one of the smartest, most wearable solutions.
Why 18 inches is the most reliable “glam without the drama” length
Shorter lengths can be subtle and easy, but they don’t always deliver the elegant fall people want for photos and events. Ultra-long lengths can be stunning, but they ask more from your time and patience. Eighteen inches is the length that feels like a real upgrade while remaining manageable enough to wear often.
Best option for daily wear vs special occasions
For daily wear, choose lighter coverage and a finish you can blend quickly. For special occasions, add a touch more density or style a more defined wave pattern so the hair reads dimensional in photos. The most effective approach is to build a repeatable “everyday install,” then add one extra piece when you want a bigger statement.
How to Choose the Right Option
Choosing clip-ins is not about buying the “best hair” in the abstract. It’s about selecting the right match for your lifestyle: your hair’s undertone, your preferred styling habit, your comfort level, and the amount of maintenance you can realistically tolerate. When these align, extensions feel empowering and easy—something you reach for because it works, not because you want to struggle with it.
Decision Framework
- Goal → fuller ends, longer silhouette, or event-ready polish
- Shade/undertone → match mid-lengths and ends in natural light
- Texture/finish → choose a pattern you can recreate easily
- Construction/type → consider comfort, scalp sensitivity, and stability
- Weight/coverage → daily lightness vs maximum fullness
- Occasion/frequency → how often you plan to wear your set
- Care tolerance → detangling, washing, heat styling, storage
- Budget/value → invest based on repeat wear and longevity goals
How to match undertones without overthinking it
Warm tones lean honey, caramel, and golden brown; cool tones lean ash, beige, and neutral browns; neutral sits between. Match the dominant tone visible through your mid-lengths and ends. The closer your undertones align, the less you’ll need to rely on heavy styling to “force” a blend.
How to pick a texture that won’t increase your daily workload
Choose the texture you naturally default to. If you rarely curl your hair, don’t buy a pattern that requires daily heat to blend. If your hair has natural wave, lean into soft movement because it hides minor mismatches and reads more realistic in daylight and photos.
How to choose a faster method if you’re always short on time
If your schedule is packed, your best extensions are the ones you can apply quickly and still trust to look good. For a practical mindset shift toward speed and repeatability, reference clip hair extensions as the quickest way to transform your look in minutes.
How to reduce stress when learning clip-ins for the first time
Keep your first routine simple: fewer wefts, lower placement, and a soft finish that blends naturally. Don’t aim for perfection—aim for repeatability. If you want a human, relatable approach to common mistakes and how to avoid them, read clip-in comedy and mastering the art without the drama for everyday confidence.
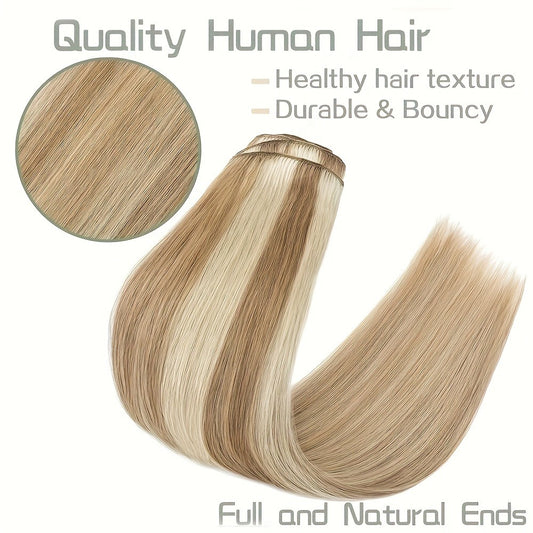
Shade, Undertone, and Finish Selection
Shade matching is where a “nice result” becomes an undetectable one. The biggest rule is also the simplest: match where the extensions live. Clip-ins sit through your mid-lengths and ends, so matching only to the roots can create that subtle mismatch that looks fine indoors but obvious in daylight and photos.
If your hair has highlights, balayage, or sun-dimension, the most natural look usually comes from multi-tonal hair that mirrors that variation. Flat, single-tone hair can look like a separate layer sitting on top of your real hair. The goal is to choose a finish that looks like it grew from your head, not like it was “added.”
How to blend multi-dimensional hair without creating a harsh line
When your hair has variation, choose extensions that also carry variation. Then style in soft waves or a gentle bend so the tones merge visually. Dimensional color plus movement is one of the easiest routes to an expensive-looking blend.
How to pick balayage-style clip-ins for natural depth
If your hair includes lighter pieces through the mid-lengths and ends, a multi-shade option often blends more seamlessly than trying to match one exact shade. Explore balayage clip-in hair extensions for realistic multi-tone blending if you want a finish that looks like natural dimension rather than a single block of color.
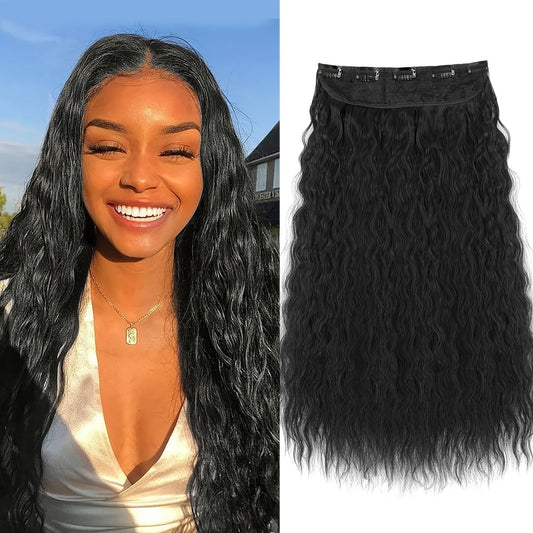
How to match black hair when “black” isn’t just one shade
Black can be blue-black, soft black, neutral black, or espresso. Even small undertone differences can make extensions look separate. If you wear dark hair, use black clip-in hair extensions for the ultimate guide to seamless blending to match depth and undertone with more precision.
What to do if your extensions look too shiny
Shine mismatch is a common giveaway. A soft wave and brushed movement can make shine look more natural by breaking up reflection. Avoid heavy silicone serums that create uniform gloss, and style your hair and extensions together so the surface finish is consistent.
Texture and Blend Strategy
Texture is the silent driver of realism. Even perfect color can look wrong if your hair moves differently than the extensions. The simplest blending strategy is to match your natural texture first, then refine with light styling to unify movement.
For many people, the most natural-looking result is not “perfectly straight” or “perfectly curled,” but softly styled hair with movement—waves that look lived-in rather than overly set. This movement hides minor differences and makes the hair look cohesive under changing light.
How to blend 18 inches with a blunt cut
Blunt cuts can create a “shelf” where your natural hair stops suddenly. Use a soft bend or waves to taper the outline so your natural hair and extensions merge. Keep denser wefts lower and leave enough top hair to cover clips.
How to blend 18 inches with layered hair
Layers blend best with movement. Style a soft wave and brush lightly to unify sections. If your front layers are short, keep side pieces minimal and focus density through the back so the silhouette looks balanced rather than bulky near the face.
What to do if the blend line shows at the ends
If you see a line, it’s usually texture mismatch or density imbalance. Add soft movement, brush out curls, and make sure the extensions are not sitting too high. In most cases, a better finish solves the problem faster than adding more hair.
How to choose weft construction for comfort and fullness
Weft type affects how the hair sits and how heavy it feels. If you want to understand how construction impacts comfort and durability, read double weft vs single weft and which clip-in build is better before deciding how much density you want.
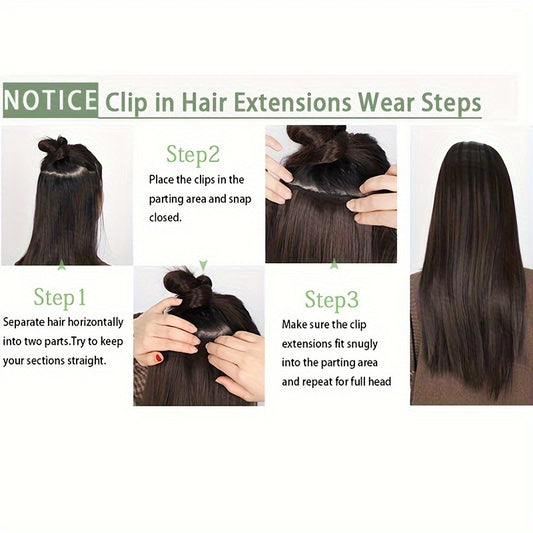
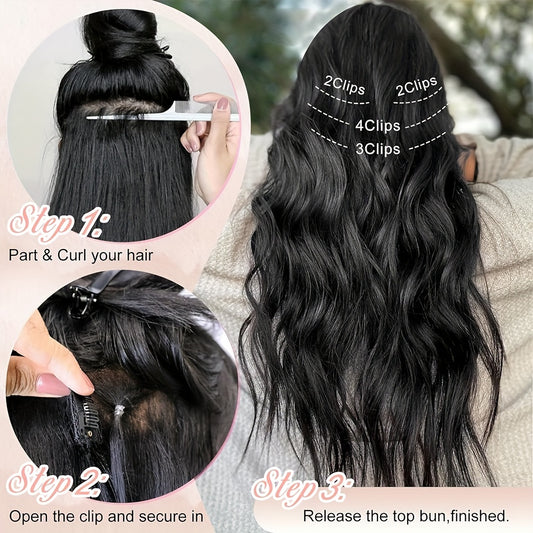
How to Apply 18 Inch Clip-Ins for a Natural Shape
Application is where comfort and realism are decided. The goal is to create fullness through the lower half while keeping the surface natural. With 18 inches, you rarely need heavy crown volume; you need a clean outline and balanced distribution so the hair falls like it naturally grew that way.
A simple placement method that works for most head shapes
Start at the nape with a wider weft to build the base. Add the next rows slightly above, staying below the crown. Use side pieces sparingly. Leave enough natural hair on top to cover clips, then blend with a light brush and cohesive styling.
What to do if clips feel uncomfortable after a few hours
Discomfort often means the sections are too thin or clips are stacked in the same pressure zones. Reinstall with slightly thicker sections, offset rows so clips aren’t directly above each other, and keep the crown lighter. Comfort matters because it determines whether you’ll actually wear your set often.
How to get grip without aggressive teasing
You don’t need to tease your whole head. Add gentle grip only at the attachment points. This anchors clips while keeping the surface smooth and realistic. The most natural results tend to have a calm top and fuller mid-lengths and ends.
Styling Ideas: Daily Looks and Photo-Ready Moments
Eighteen inches is a styling playground because it holds shape without feeling overwhelming. It supports sleek finishes, soft waves, ponytails, half-up styles, and braids that look dimensional. The key is to decide what the “headline” is: if your length is the statement, keep styling controlled; if styling is the statement, keep the silhouette cohesive so it doesn’t become too much all at once.
Quick look: the polished blowout that reads expensive
A smooth finish with a soft bend at the ends looks refined and modern. It’s also one of the easiest ways to keep 18 inches feeling wearable because it doesn’t require constant reshaping. Keep the top sleek and let the ends look dense and healthy.
Quick look: brushed-out waves for soft, modern texture
Loose waves brushed into softness create the illusion of thickness and make the blend forgiving. This is one of the best “everyday glam” options because it looks natural in daylight and flattering in photos. It also reduces the chance of visible lines at the ends.
Quick look: thicker ponytails without going ultra-long
Many ponytails don’t need more length—they need more density. Clip-ins can build fullness, and ponytail pieces can deliver a fast, controlled finish for busy days. If you want a sleek wrap option for a refined look, consider an 18-inch wrap-around clip-in ponytail for a clean, elevated silhouette.
Photo-ready look: event styling that works beautifully with 18 inches
Event hair looks best when it’s polished and cohesive, not overbuilt. Soft waves, half-up volume, and low buns with texture can all look luxurious at 18 inches. For adaptable inspiration that translates to real-life occasions, explore 10 gorgeous prom hairstyles for medium-length hair that also work for modern events.
Style cues that feel wearable, not costume-like
Celebrity hair inspiration can be useful when it’s interpreted for real life: controlled volume, consistent texture, and a silhouette that matches the outfit. For ideas you can adapt without overdoing it, read 11 celebrity hairstyles that stole the show with practical takeaways.
Accessory styling: bandanas and scarves that look intentional
Accessories often rely on volume to look styled. Clip-ins create the base that makes a bandana, scarf, or clip feel editorial rather than improvised. For ideas that pair well with longer hair, explore 11 cute bandana hairstyles you need to try for elevated accessory looks.
Volume Without the Puffy Look
The most flattering volume looks like healthy density—hair that moves, reflects light naturally, and holds shape. With 18 inches, the best volume usually happens through the lower half. Too much crown volume can make the look feel obvious or heavy, while subtle lift at the roots and fullness at the ends reads natural and expensive.
How to build fullness that still looks realistic
Think in layers: a stable base at the nape, a supportive mid-level row, then minimal pieces near the top. Smooth the surface and focus density through the mid-lengths and ends. If you want a structured set of tactics that keep volume believable, read 10 techniques to enhance volume with clip-in hair extensions without obvious bulk.
What to do if your hair looks wide instead of full
If hair looks wide rather than full, you likely placed too many wefts too high or added too much density near the sides. Rebalance by focusing fullness through the back and lower half. A cohesive wave can also refine the outline so it looks soft and intentional rather than bulky.
Care, Maintenance, and Longevity
Longevity is a direct result of how you handle the hair between wears. Most damage happens from friction, rough brushing, overwashing, and messy storage. The good news is that 18 inches is manageable: it’s long enough to feel glamorous but still short enough to avoid the worst tangling patterns associated with very long hair.
How often should you wash clip-ins
Wash only when there’s noticeable product buildup or when the hair loses movement. Overwashing can dry the hair and reduce lifespan. Between washes, gentle brushing and clean storage preserve softness and shine.
How to detangle without shedding and breakage
Always start at the ends and work upward, in small sections. Avoid aggressive pulling. Detangle before and after wear, especially if you used hairspray or texture products. Most tangles are preventable if you store the hair neatly rather than letting it rub and knot.
How to store extensions so they stay wearable
Store them flat or neatly aligned so they don’t crease, knot, or fray. A consistent storage habit is one of the fastest ways to make extensions last longer because it reduces friction and keeps the ends healthy.
Comparing Nearby Lengths: Shorter vs Longer
Length is a lifestyle decision. Eighteen inches is balanced, but adjacent lengths can be better for specific goals. Shorter lengths often feel lighter and blend faster; longer lengths can create a bigger statement but ask more from your routine. Many experienced wearers keep two lengths: one for daily polish, one for events.
When a shorter length is the smarter choice
If you prioritize realism and easy blending, a shorter set can be ideal. For subtle enhancement that supports bobs and lobs, explore 10 inch clip-in hair extensions for discreet fullness on shorter cuts.
When collarbone length feels like the perfect everyday upgrade
If you want a compact shape that still feels polished, 14 inches is often the sweet spot for a lob-style upgrade. Explore 14 inch clip-in hair extensions for a collarbone-friendly silhouette.
When 15 inches is the “quiet upgrade” that still looks different
If you want a subtle but noticeable step up without moving fully into long hair, 15 inches can be a perfect bridge. Explore 15 inch clip-in hair extensions for a refined mid-length transformation.
When 16 inches is the most repeatable everyday long look
If you love long hair but want a slightly lighter routine than 18 inches, 16 inches can be the most wearable daily option. Explore 16 inch clip-in hair extensions for natural length with less maintenance.
When longer lengths are worth it for statement moments
If your goal is high-impact glamour, longer lengths can be the right move for weddings, vacations, and big nights. Explore 22 inch clip-in hair extensions for statement length, 24 inch clip-in hair extensions for dramatic long hair, and 26 inch clip-in hair extensions for maximum-length impact if you want the hair to be part of the outfit.
Buying Guidance and Common Mistakes to Avoid
The best clip-ins are not the ones with the most hair. They’re the ones that fit your real life. The most common disappointments come from buying too much density, choosing the wrong undertone, or selecting a texture that requires too much work to blend. Eighteen inches is forgiving, but the best results still come from smart selection and thoughtful installation.
Common mistake: matching to roots instead of mid-lengths
Roots can be darker, cooler, or more grown out. Clip-ins live through the mid-lengths and ends, which are often lighter and more dimensional. Matching to roots can lead to a subtle mismatch that shows up clearly in daylight. Always match where the extensions sit.
Common mistake: buying too much density and placing it too high
Too much hair near the crown can cause visible clips and an unnatural outline. Keep the top light and focus fullness lower. When the silhouette is balanced, the result looks like natural thickness rather than “added hair.”
Common mistake: over-styling to hide a mismatch
If you need excessive curling, teasing, and product to make the extensions work, the set may not be aligned with your hair type. Choose a texture and undertone match that blends with minimal effort. The most expensive-looking hair is usually the easiest to repeat.
How to shop intelligently if you’re new to clip-ins
If you want a complete primer—from shades to weft counts to what to expect—use clip-in hair extensions everything you need to know before buying for a confident first purchase as a reference so you avoid the most common beginner mistakes.
Why short hair wearers often get the biggest confidence boost
Short hair can be powerful, but sometimes you want versatility—waves, length, and fullness that changes how outfits look. If you want the practical reasons clip-ins change everything for shorter cuts, read 10 reasons hair extensions are a game-changer for short hair.
How to decide between halo and clip-ins when comfort matters most
Halos can feel lighter and faster for some, while clip-ins offer more customization and security. If you’re weighing daily comfort and realism, read halo hair extensions vs clip-ins and which one you should choose for your routine to decide based on lifestyle rather than hype.
Featured Picks and Use-Case Recommendations
Even within one length category, different products solve different needs: some are built for full coverage, some for textured dimension, and some for fast styling. Think of this as building a small wardrobe rather than chasing one perfect item. A core set for everyday wear plus one option for events gives you range while protecting your main set from overuse.
For range-focused shoppers comparing length outcomes
If you like evaluating multiple lengths within a consistent product format, explore a seamless real human hair clip-in set spanning 18 to 26 inches for side-by-side comparison.
For a soft body-wave finish that blends easily
Body wave is one of the easiest textures to blend because it looks natural, photographs well, and hides minor mismatches. Consider an 8-piece body wave human hair clip-in set with 18 clips for full coverage styling if you want movement that still feels realistic.
For a polished ponytail that looks intentional in minutes
A structured ponytail can be the fastest route to “done” hair. Consider a straight wrap-around clip-in ponytail for sleek, elevated pulled-back styling when you want speed without sacrificing polish.
For longer waves when you want extra movement for photos
If you want a longer wave option that feels camera-friendly, consider 20 inch wavy clip-in hair extensions for women who love soft, flowing movement as a special-occasion upgrade.
For full-head coverage when you want maximum impact
When you want the most dramatic transformation—thickness plus length—a full-head set can deliver the boldest result. Consider 22 inch full head clip-in hair extensions for complete coverage volume for nights when you want your hair to be the main event.
For a deep shade with premium construction and a sleek finish
If you want a deep 1B tone with a refined build designed for a polished result, consider 24 inch Remy human hair clip-ins in 1B with double-weft seamless design as a long-length option built for smooth styling.
FAQ: 18 Inch Clip In Hair Extensions
Where do 18 inch clip-ins usually fall on the body
On many people, 18 inches lands around mid-back depending on height and placement. It’s long enough to create a noticeable change without moving into the most high-maintenance length category.
Are 18 inch clip-ins comfortable for all-day wear
Yes, when installed correctly. Comfort improves when wefts are spaced evenly, placed below the crown, and attached to sections that aren’t too thin. If discomfort happens, it’s usually an install issue rather than a length issue.
Do 18 inch clip-ins look better straight or wavy
Soft waves tend to look the most natural because they blend texture and hide minor differences. Straight styles can look extremely polished, but they require more precise shade and finish matching to stay seamless in daylight.
What should I do if my clips show through fine hair
Place wefts slightly lower, use thicker sections at the clip, and leave more natural hair on top for coverage. Avoid stacking too many pieces near the crown. A lighter crown often looks more natural and feels more comfortable.
How can I reduce tangling at the ends
Brush gently from ends upward, avoid sleeping in clip-ins, and store them neatly after wear. Tangling usually comes from friction and messy storage. A soft wave finish can also reduce friction compared to tighter curls.
Is it better to choose 16 inches, 18 inches, or 22 inches
Choose based on lifestyle. Sixteen inches is slightly lighter and extremely wearable, eighteen inches is the best balance of impact and manageability, and twenty-two inches is statement length with higher maintenance. If you want the most reliable everyday glam, 18 inches often wins.
Can I wear 18 inch clip-ins in a ponytail
Yes, especially if you want thickness and a longer fall. Build density through the base and ensure the top layer covers attachment points. A sleek ponytail can look especially refined when the ponytail has healthy fullness.
How do I avoid looking “overdone” with 18 inches
Keep the silhouette cohesive: smooth crown, fullness through the lower half, and one clear styling direction. If your length is the statement, keep accessories and texture controlled. The most wearable glam looks like a natural upgrade, not a costume.
Conclusion: The Most Wearable Way to Look Instantly Polished
Eighteen inches is the length that consistently delivers what most people actually want: hair that looks fuller, healthier, and more intentional without demanding an unrealistic routine. When you match undertones, choose a texture you can repeat, and install with balance, the result looks like your own hair on its best day—every day you choose to wear it. If you want a transformation that still feels believable in daylight and effortless in real life, 18 inch clip-ins are one of the most dependable categories to build into your beauty toolkit.