
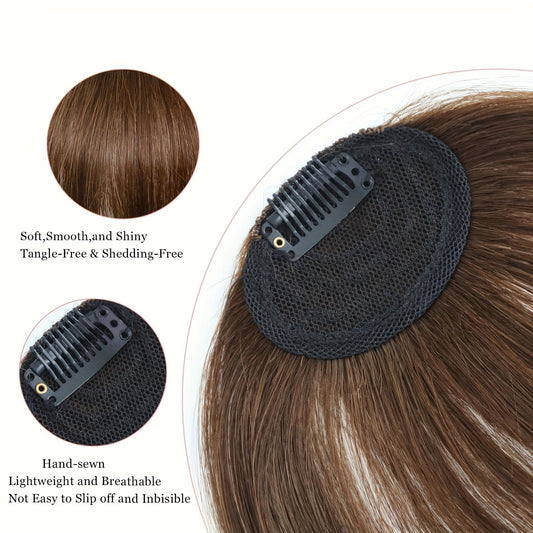
-

Thick Clip In Long Wavy Synthetic Hair Extensions - 24 Inch Balayage Brown Black Double Weft Fiber Hidden Wire Hairpieces for Women - Easy to Style, Natural Looking, And Long-Lasting Hair Enhancement
Regular price $212.89 USDRegular priceUnit price per$0.00 USDSale price $212.89 USD -

Ombre Colored 24-Inch Long Wavy Curly Synthetic Hair Extensions with a Clip Design
Regular price From $205.02 USDRegular priceUnit price per$0.00 USDSale price From $205.02 USD -

18 Inch Long Curly Clip-in Hair Extensions - Women's Versatile 4 Clip Design, Multi-color Optional, Suitable for Halloween and Christmas, New Year and other festive occasions, Easy to use
Regular price From $202.79 USDRegular priceUnit price per$0.00 USDSale price From $202.79 USD -

Wire Color Hair Extensions - Easy to Clip in (18 Inch 5pcs), Colored Synthetic Hair Strands, Suitable for Women, Perfect for Christmas Parties Halloween Style
Regular price $205.90 USDRegular priceUnit price per$0.00 USDSale price $205.90 USD -

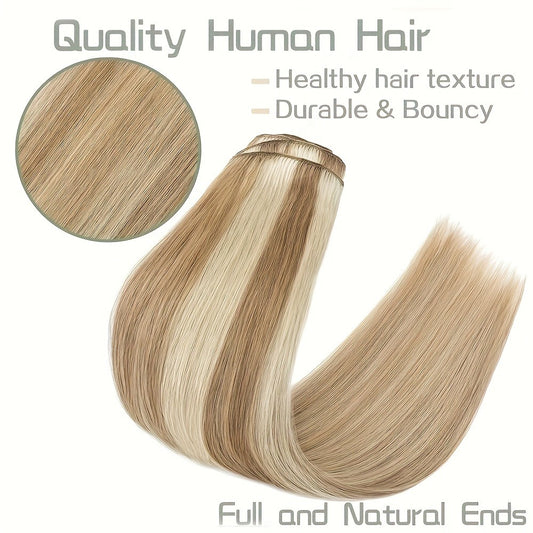
Set of 8pcs of Straight Human Hair Extensions with Double Weft, Featuring 18 Clips, Available in Lengths from 8 to 26 Inches, Color #12P613
Regular price $280.18 USDRegular priceUnit price per$0.00 USDSale price $280.18 USD -

Human Hair Clip-In Extensions in Medium Brown to Caramel Blonde, Featuring Natural Straight Strands. This Set Includes 8pcs with Color 4/27, Designed for Women. These Weft Extensions Are Suitable for Everyday Use And Come in
Regular price From $231.00 USDRegular priceUnit price per$0.00 USDSale price From $231.00 USD -


12-16 Inch Real Hair Clip In Hair Extensions Real Hair Clips Invisible Hair Extensions 3pcs/Pack, Real Hair Wigs, Hair Extensions For Women
Regular price From $215.60 USDRegular priceUnit price per$0.00 USDSale price From $215.60 USD -

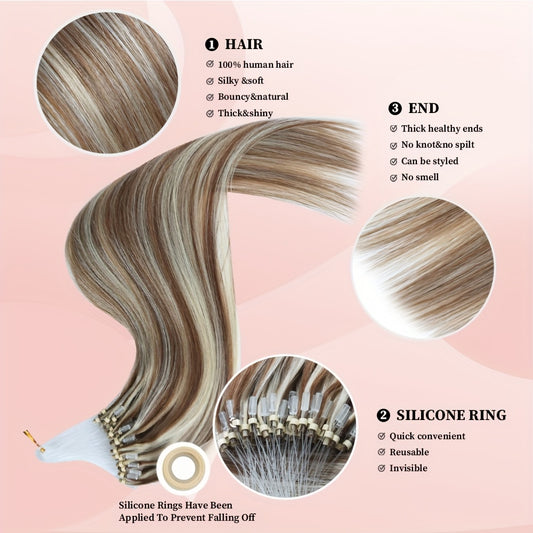
50 Strands of DNE Hair Microlink Human Hair Extensions Ranging from 14 to 24 Inches in Light Brown And Blonde, Featuring Straight Hair with Cold Fusion Micro Loop Invisible Seamless Bead Extensions Designed for Women. Made fr
Regular price From $225.49 USDRegular priceUnit price per$0.00 USDSale price From $225.49 USD -

Clip In Hair Extensions Real Human Hair, Seamless Clip InsReal Human Hair for Women, Remy Human Hair Clip InExtensions, Double Weft 8pcs 14-24 Inch Light BlondeHighlighted Golden Blonde
Regular price From $252.08 USDRegular priceUnit price per$0.00 USDSale price From $252.08 USD -

1pc Women'S Natural Brown Human Hair Clip-In Bangs Wig - Soft Wavy with Straight Ends, Secure Clip-In Design, Natural Hairline & Easy Wear
Regular price From $206.73 USDRegular priceUnit price per$0.00 USDSale price From $206.73 USD -

24-Inch Clip-In Hair Extensions, Real Human Hair Double Weft, 100% Remy Design for Women
Regular price $249.00 USDSale price $249.00 USDUnit price per -

Clip In Hair Extensions Real Human Hair | 18-26 Inch 120 G 8pcs Seamless Clip In Hair Extensions
Regular price $246.36 USDRegular priceUnit price per$46.36 USDSale price $246.36 USD


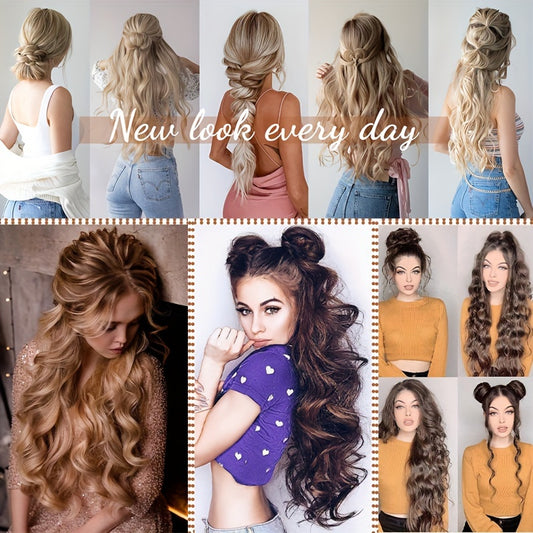
18 Inch Hair Extensions: The Sweet-Spot Length for Natural Volume, Soft Glam, and Everyday Versatility
If you’re shopping for 18 inch hair extensions, you’re in the “balanced length” zone: long enough to feel like a real upgrade, but still practical for daily wear, commuting, and quick styling. This length is popular because it can add fullness through the mid-lengths and give you that polished, finished silhouette—without the extra tangling and time demands that often come with ultra-long hair. Use the guide below to choose shade, undertone, texture, and construction with confidence, then refine your pick based on how often you’ll wear them and how you like to style.
To compare textures, colors, and installation types across the brand’s range, start at Fabulive’s official storefront for hair and beauty essentials.
What this collection is and who it’s for
18-inch extensions typically fall around mid-back on many people, though the exact placement depends on height and torso length. That mid-back landing is the reason this category feels so wearable: it reads as “long hair” in photos and mirrors, but it still behaves like hair you can live in—easy to brush, easy to style, and less prone to constant tangling than longer lengths.
This category tends to suit three broad needs: adding length, adding volume, or adding a new tone (including fashion shades) without permanent color. It also works especially well for building a “hair wardrobe,” where you rotate between sleek, wavy, and more defined textures depending on the day.
Who benefits most from 18 inches if you want a believable transformation
18 inches is a strong fit if your natural hair is anywhere from shoulder length to mid-back and you want extra density and length that still looks realistic in daylight. If your hair is shorter than shoulder length, 18 inches can still work—especially with textured styling—but you’ll want to focus more on blending strategy and distributing weight so the transition looks intentional.
How 18 inches looks on different heights and body proportions
The same length can read differently depending on your height. On petite frames, 18 inches can feel dramatic and almost “extra-long,” while on taller frames it often reads as classic long hair. The best mental shortcut is to think in “finish point”: where you want the ends to land on your back and how you want your ponytail to look from the side.
Why 18 inches is a confidence length for first-time wearers
First-timers often worry that extensions will look obvious. 18 inches helps because it’s long enough to make a difference, but not so long that it creates an unrealistic contrast with common everyday haircuts. It also supports a wide range of styles—from casual half-up looks to more formal waves—without needing constant “perfect” styling to look good.
When 18 inches makes the most sense for short hair goals
If you’re starting with shorter hair, your biggest win is usually volume plus shape, not just length. A helpful mindset shift is to treat extensions as a styling tool that expands what you can do. If you’re exploring that idea, read why extensions can be a game-changer for short hair routines and apply the concepts to your own cut and day-to-day styling habits.
Why this category matters now
Trends have been moving toward hair that looks healthy, dimensional, and touchable—less “overdone,” more effortlessly polished. 18 inches fits this moment because it supports volume, movement, and styling versatility without forcing you into high-maintenance habits. It’s also a practical length for people who want a transformation for events but still need hair that works for everyday life.
Another reason this category is relevant: more people want flexible beauty. Extensions let you shift your look for a weekend, a wedding, or a photo shoot, then return to your natural routine. That flexibility is especially appealing when you want to avoid permanent color, long grow-out phases, or major haircuts.
Why 18 inches is often the most wearable “soft glam” length
Soft glam is about shape and finish: smoother roots, gentle volume through the mid-lengths, and ends that look full rather than wispy. 18 inches is long enough to create that elegant fall of hair, but it’s still manageable for brushing and restyling—two realities that matter when you’re wearing hair for a full day.
What changes the look most: length, density, or texture
Most people assume length is the main “wow factor,” but density and texture often do more work. A slightly fuller, well-blended 18-inch set can look more natural and more expensive than a longer length that tangles quickly or doesn’t match your hair’s surface finish.
How to choose the right option
Decision Framework
Use this quick, scannable method to choose an option that fits your hair and your routine:
- Goal → Do you want length, volume, color, or a mix?
- Shade/undertone → Match undertone first, then depth and dimension.
- Texture/finish → Choose straight/wave/curl and a realistic shine level.
- Construction/type → Clip-in for flexibility, weft for fuller installs, nano/tape for longer wear.
- Weight/coverage → Pick coverage that your hair and scalp can comfortably support.
- Occasion/frequency → Daily wear needs comfort; event wear can be more dramatic.
- Care tolerance → Choose what you can realistically brush, wash, and store properly.
- Budget/value → Prioritize match and comfort; performance depends on fit and maintenance.
Start with the blend zone, not the product title
Your best match is the one that disappears into your haircut. Before choosing a method, identify where your natural hair is thickest and where it thins out (often at the ends or around the nape). The goal is to add density where you lose it, then extend the silhouette downward so the final shape looks cohesive.
How to choose 18-inch extensions for fine hair without weighing it down
Fine hair does best with balanced distribution. Rather than placing all the weight low on the head, spread coverage across the mid-back area so your natural hair can drape over the base. If you’re aiming for a mid-length upgrade that keeps hair feeling light, the principles in this guide to mid-length upgrades for fine hair translate well to 18 inches: prioritize comfort, avoid overcrowding the crown, and use texture to help everything blend.
What looks most natural in daylight versus indoor lighting
Daylight reveals undertone and shine differences. Indoors, shape and overall silhouette matter more. To look natural outside, match undertone carefully and avoid overly glossy finishes if your natural hair is more matte. Indoors, keep texture consistent so the hair reads as one continuous style.
How many pieces or rows do you actually need for realistic fullness
More hair isn’t always better. A believable result comes from filling sparse zones, not stacking density in one area. Layered cuts often need fewer pieces because the shape is already softened, while blunt cuts may need more distribution so the ends don’t look abruptly thicker than your natural perimeter.
Best option for daily wear versus special occasions
For everyday wear, choose comfort and quick blending: secure placement, manageable density, and a texture you can maintain without constant heat. For special occasions, you can go fuller or more dramatic because you’ll likely style more intentionally and wear the look for fewer total hours.
How to pick a method based on how often you’ll wear extensions
If you’ll wear them occasionally, prioritize ease of use and simple storage habits. If you’ll wear them frequently, prioritize comfort and a method that holds up well to repeated styling. Your routine should be the deciding factor—because the most beautiful option on paper won’t help if it’s annoying to wear.
Shade, undertone, and finish selection
Most “obvious extensions” issues come from shade and finish mismatch. Shade mismatch is usually undertone mismatch, not just being a little lighter or darker. Finish mismatch is usually shine mismatch, where the extensions reflect light differently than your natural hair.
How to match undertones without overthinking it
Stand near a window and look at your mid-lengths. If your hair reads golden, honey, or caramel, it’s warmer. If it reads smoky, ash, or cool brown, it’s cooler. If it seems balanced and changes depending on lighting, it’s likely neutral. Matching undertone first makes everything else easier.
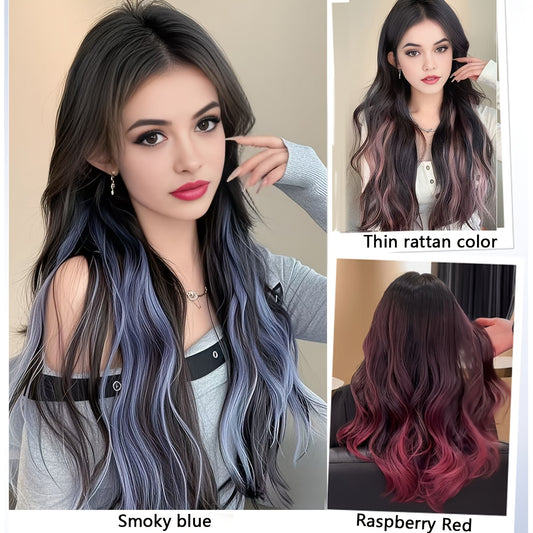
How to handle highlights, balayage, and multi-dimensional color
Multi-tonal hair is easier to match than people think. Choose extensions that match the “average” tone of your hair, then let your natural highlights and lowlights create dimension. If your hair is highly dimensional, a slightly varied extension shade often looks more realistic than a perfectly flat match.
How to choose a fashion shade without looking costume-like
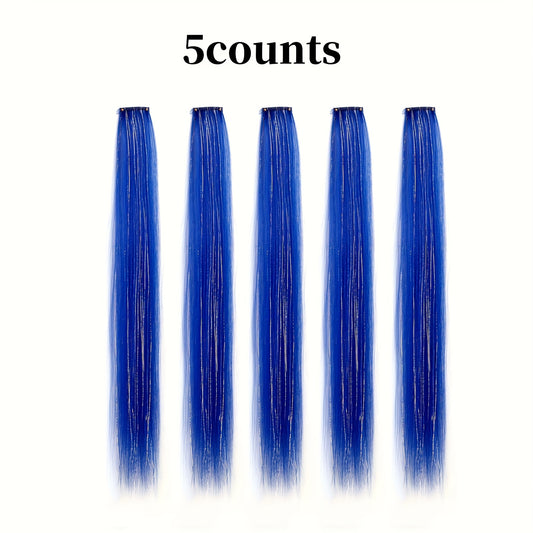
If you want color that still looks editorial and wearable, placement matters. Peekaboo placement under the top layer can look intentional and chic, especially when styled in waves. For a dedicated shade option, explore 18-inch blue hair extensions for bold-but-wearable color moments and consider using them as a lower layer that shows in movement rather than as a full-head block of color.
How to choose finish so extensions don’t look “too shiny”
Some finishes reflect more light than natural hair. If your hair is low-shine, choose a softer finish and add shine only as needed. If your hair is naturally glossy, you can match that—but keep shine concentrated through the mid-lengths, not the roots, so the look stays believable.
Texture and blend strategy
Texture is your blending shortcut. Even a perfect shade match can look “separate” if texture doesn’t align. Plan your extension texture around how you will actually wear your hair most days: straightened, naturally wavy, or curled.
How to blend with blunt haircuts so the ends don’t look stacked
Blunt cuts can create a visible shelf where your hair ends. To soften it, distribute extensions across more than one section so the thickness increases gradually. Then add a gentle bend or wave so the perimeter looks diffused instead of sharply layered.
How to blend with layered haircuts for seamless movement
Layers are extension-friendly because they naturally taper. Place extensions a bit higher (still below the crown) so the added hair follows the same flow. Styling with a soft wave helps everything behave like one haircut.
How to blend when you’re bridging a shorter-to-longer gap
If your natural hair is shorter, texture becomes essential. Waves and curls break up the line where your hair ends and the extensions begin. For practical, shorter-length blending ideas you can adapt to 18 inches, see short-chic styling approaches that improve blend realism and apply the same principles: texture, distribution, and controlled volume at the transition zone.
What to do if the blend line shows at the back of your head
A visible blend line usually means the pieces are too low, too concentrated, or your natural ends are too thin. Move extensions slightly higher, add a smaller piece near the blend zone, and style with texture. A half-up style can also hide the transition while keeping the length visible.
What to do if the top looks bulky or “helmet-like”
Bulky tops happen when too much hair is placed too high. Keep the crown light, focus fullness through mid-sections, and leave enough natural hair on top to cover attachment points. If you want lift, use light teasing and then smooth the surface instead of adding more extension weight.
How to add volume with clip-ins without making hair feel heavy
Volume should be built like architecture: distribute, then refine. Place larger pieces where your hair naturally supports weight, then add smaller pieces to fill gaps rather than stacking density in one row. For technique-driven guidance, use these clip-in volume techniques as a checklist and prioritize comfort, balance, and a smooth surface layer.
Choosing the right construction for your routine
Construction determines how quickly you can install, how secure the hair feels, and how your scalp responds over time. Two people can choose the same length and get completely different experiences depending on method and placement.
When clip-ins are the right call for flexibility and quick styling
Clip-ins are ideal if you want to switch your look without a long-term commitment. They’re especially useful for events, travel, and days when you want extra fullness in minutes. If that’s your priority, browse 18-inch clip-in hair extensions for fast, removable volume and focus on piece distribution and texture match for the most natural result.
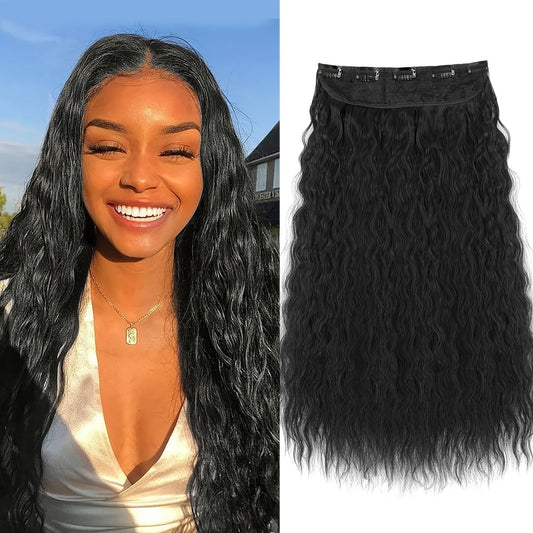
When wefts make sense for fuller installs and strong blending
Wefts are a great choice when you want a fuller “curtain” effect and more continuous density across the head. They can be particularly helpful if your natural hair is medium-to-thick or you want a more consistently full finish. Explore 18-inch human-hair weft extensions for fuller, install-friendly coverage to compare options built for more robust results.
How to decide between flexible wear and longer-wear methods
If you want the freedom to remove hair nightly and adjust for different styles, go with flexible wear. If you want consistent length day after day, longer-wear methods can be worthwhile—especially if you’re committed to the maintenance routine and prefer a “wake up with it” feel.
Styling ideas for daily life and events
18 inches works for both low-effort and high-impact styling. The key is to choose a style that supports blending: smooth surfaces for sleek looks, or consistent curl patterns for waves and curls. The more uniform the texture from root area to ends, the more seamless the result will look.
Quick looks that still feel polished
- Low ponytail with a wrapped base for a clean finish.
- Half-up twist with soft face-framing pieces.
- Loose brushed-out waves for everyday softness.
- Sleek straight lengths with tucked-behind-ear symmetry.
Photo-ready looks that hold up for parties and formal events
For camera-friendly hair, structure matters. Set curls, let them cool fully, then brush into waves so the surface looks smooth and expensive. If you want event inspiration that adapts well when you add length and fullness, use these prom hairstyle ideas for medium-length hair and translate the shapes into fuller versions with extensions.
How to create a blowout effect that doesn’t fall flat after an hour
A blowout look holds best when you build lift at the roots and create a consistent bend through the mid-shaft. Let hair cool in shape before brushing. Avoid heavy oils early; instead, use lightweight finishing products so the style keeps movement rather than collapsing into straightness.
Accessory styling that looks intentional, not like a cover-up
Accessories can elevate your look fast, but the base has to look clean. Smooth the top layer, then add your accessory so it looks like a styling choice rather than a disguise. For practical, wearable ideas, try these bandana hairstyle concepts and keep the extension blend smooth at the sides and back.
How to get “celebrity hair” movement without over-styling
Movement comes from shape, not constant heat. Use a consistent curl pattern, brush it out into waves, and keep the surface polished. If you’re collecting reference looks, pull ideas from these celebrity hairstyle moments and focus on what makes them work: uniform texture, controlled volume, and clean framing around the face.
Care, maintenance, and longevity
Extensions last longer when you treat them like delicate fabric: gentle brushing, minimal washing, and careful storage. Most damage comes from friction, dryness, and aggressive detangling. A few consistent habits can make the difference between hair that stays soft and hair that turns dull and tangly.
How often should you wash extensions for best softness
Wash only when there is visible buildup or the hair feels heavy and doesn’t respond to brushing. Over-washing can dry hair out and shorten lifespan. When you do wash, use lukewarm water, gentle products, and condition primarily from mid-lengths to ends.
Brushing rules that prevent matting at the nape
The nape is where friction happens—scarves, collars, and movement. Brush in sections starting at the ends, hold the hair near the base, and work upward slowly. If you store extensions, keep them dry, detangled, and protected from compression.
Heat styling habits that preserve feel and reduce breakage
Use heat protectant, keep temperature moderate, and limit repeated passes. If you love curls, set them once, then refresh lightly rather than re-curling from scratch each time. The less heat you use overall, the longer your extensions typically stay smooth.
Comparing nearby categories: shorter vs longer and adjacent types
18 inches is often the “best of both worlds,” but comparing it to nearby lengths helps you make a more confident decision. Think of lengths as lifestyle choices: how much styling time do you want to invest, and what silhouette do you want your hair to have day to day?
Shorter lengths: lighter feel, bouncier movement, often easier blending
Shorter options can be ideal if you want a subtle upgrade, your hair is very fine, or you prefer low-maintenance styling. They also help if you want a “my hair but better” result rather than a visible transformation. If you’re exploring shorter categories to compare, consider 12-inch hair extensions for short-chic volume and shape as a reference point for how much realism you can get with less length.
Neighbor lengths: small changes that shift the vibe
Moving one or two inches can change how your hair reads in photos and how quickly styles come together. If you want something slightly lighter than 18 inches but still visibly longer than many natural cuts, explore 15-inch hair extensions for a soft, wearable upgrade and notice how the ends sit and how the hair behaves in ponytails.
How to decide if you should go a bit shorter for daily wear comfort
If you rarely heat-style and prefer wash-and-go texture, slightly shorter lengths can feel easier to blend and maintain. A helpful comparison is to read why 16 inches is often ideal for everyday wear and then ask yourself: do you want that effortless baseline, or do you want the extra length presence that 18 inches gives?
Longer lengths: more drama, more maintenance, bigger event payoff
If you want hair that reads distinctly glamorous, longer lengths can deliver. But with more length comes more brushing, more friction, and more styling time. If you’re deciding whether to go beyond 18 inches, review how 20 inches changes the overall glam effect and consider how often you’ll realistically wear that level of length.
What changes when you move into tape-in length territory
Longer-wear methods can feel very natural, but they require consistent maintenance habits. If you’re curious about longer, luxe results through a tape-in approach, see how 22-inch tape-ins create a luxe length profile and weigh the tradeoff between convenience and care.
What to expect from ultra-long hair in real life
Ultra-long extensions look stunning, but they are more prone to tangling and dryness because the ends are older and experience more friction. If you’re tempted by maximum length, use these realistic references: how to manage ultra-long hair day to day, what makes 24-inch hair look truly luxurious, and when maximum-impact length is worth the upkeep.
Featured picks and use-case recommendations
Rather than choosing by specs alone, it helps to shop by outcome. Below are common “use cases” and what to prioritize for each, so you can pick a set that fits your lifestyle and styling habits. Think of this as a practical map: choose the scenario that matches your routine, then refine shade and texture.
Best for first-timers who want a natural feel with flexible styling
If you want a comfortable, beginner-friendly option that aims for a seamless finish, consider seamless human-hair clip-ins designed for a discreet blend. Focus on matching undertone, then use gentle waves to help the hair move as one.
Best for soft, consistent waves that make blending easier
If your everyday style leans wavy, a body-wave pattern can reduce the need for perfect styling and make blending forgiving. A practical option to consider is a body-wave human-hair clip-in set for quick fullness, especially if you want volume through the mid-lengths without spending a long time curling.
Best for ponytail lovers who want a clean, polished silhouette
For sleek ponytail days, a wrap-around piece can deliver instant length and a tidy finish without a full-head install. Look at a straight wrap-around ponytail extension for a refined look and focus on smoothing your base hair so the join point reads seamless.
Best for trying a defined wave pattern with low daily effort
If you want a consistent curl or wave shape without styling it from scratch each time, a fiber-based option can hold pattern well. If that matches your goal, consider a defined curly-wave fiber extension for easy texture, then keep finish realistic by controlling shine and avoiding heavy product buildup.
Best for longer-wear installs with a low-profile feel
If you prefer a method intended for longer wear cycles and a discreet, strand-by-strand look, nano beads can be appealing. For that direction, explore highlight-toned nano bead hair extensions for a subtle install and prioritize professional placement and consistent maintenance to keep the result natural and comfortable.
Best for shoppers considering longer lengths with premium hair behavior
If you’re curious about going longer than 18 inches and want hair that still moves well and styles smoothly, compare how longer lengths behave with Brazilian Remy hair extensions for extended length options. Longer hair can look incredible, but it rewards careful brushing, moisture, and storage habits.
Buying guidance and common mistakes to avoid
Most extension regret comes from a mismatch between expectations and routine. The right choice should feel comfortable, look believable in your usual lighting, and match how you actually style your hair—not an idealized version of your routine.
Common mistake: matching ends instead of matching mid-lengths
Your ends are often lighter from sun exposure and heat styling, so matching them can make the mid-length match look wrong. Match mid-lengths first, then let your natural ends blend into the extension ends through styling and texture.
Common mistake: placing everything too low for “maximum length”
Low placement can create a visible line when you move or turn your head. Instead, place pieces so there’s enough natural hair above them to cover attachments, then distribute density gradually for a smooth silhouette.
Common mistake: choosing the wrong texture for your everyday routine
If you air-dry your hair most days, a perfectly straight texture may require more work to match. If you heat style frequently, you’ll want a texture that responds well to reshaping. The easiest way to avoid mismatch is to choose the texture you can maintain consistently.
Common mistake: expecting one set to replace a haircut
Extensions add hair; they don’t automatically create a flattering shape. If your cut is very blunt or has uneven layers, you may need to style thoughtfully or trim the ends for harmony. The goal is a cohesive silhouette that looks like it belongs to you.
FAQ
Do 18-inch hair extensions look natural for everyday wear?
Yes, they can look very natural when undertone, finish, and texture match your hair. This length is common enough to read believable, especially when you distribute the hair evenly and avoid overloading the crown. Soft waves often improve realism because they blur tiny differences in density.
How long do 18-inch extensions typically last?
Lifespan depends on how often you wear them and how you care for them. Gentle brushing, minimal washing, and careful storage tend to extend softness and reduce tangling. Frequent heat styling can shorten lifespan if temperatures are high and protectant isn’t used consistently.
What’s the best method if I only wear extensions on weekends?
Clip-ins are usually the most practical option for occasional wear because they’re quick to install and remove. They also let you change density depending on the look you want. For weekend wear, prioritize comfort and piece distribution over maximum thickness.
Are 18-inch extensions too heavy for fine hair?
Not necessarily. Fine hair often does best with moderate coverage placed strategically, rather than maximum density. If you’re careful about distribution and keep the crown light, 18 inches can feel comfortable while still giving a visible upgrade.
How do I keep the blend seamless if my natural hair is short?
Use texture, not perfection. Waves and curls break up the transition line, and placing smaller pieces near the blend zone helps your ends merge into the added length. A half-up style can also hide the transition while still showing the length payoff.
What if the extensions look shinier than my natural hair?
Shine mismatch is common and easy to fix. Use a light dry texture spray to soften reflection, and avoid heavy oils on the surface. Matching finish is often just as important as matching shade.
How do I prevent tangling during the day?
Brush lightly in sections, especially at the nape where friction occurs. Keep hair forward when wearing scarves or high collars, and avoid layering too many sticky products. Storing hair detangled and dry helps prevent knots from forming before the next wear.
Should I choose straight or wavy texture if I want the easiest blend?
Wavy textures are often more forgiving because they hide small differences in density and haircut shape. Straight textures can look extremely polished, but they reveal shade and thickness mismatches more easily. Choose the texture you can maintain consistently with your normal styling habits.
What’s the most common reason extensions look obvious in photos?
Undertone mismatch and inconsistent texture are the two biggest culprits. In photos, lighting exaggerates differences in color cast and shine, and a mismatch in wave or curl direction can make the hair look like separate sections. Styling your natural hair and extensions together usually solves this quickly.
How can I choose between 18 inches and a shorter “starter” length?
Choose 18 inches if you want a clearly longer look and more styling versatility for waves, ponytails, and event hair. If you want the lightest maintenance and the most subtle result, a shorter category can feel more effortless. Think about how often you’ll wear the hair and how much styling time you want to commit.
Related collections
If you’re building a tighter shopping shortlist, these related categories can help you compare length and silhouette while staying within a cohesive internal “hair extensions” silo:
- 10-inch hair extensions for subtle volume and a low-maintenance finish
- 14-inch hair extensions for a natural mid-length look
- 16-inch hair extensions for an everyday-friendly length profile
Conclusion encouraging browsing the collection
18-inch hair extensions sit in the ideal middle ground: long enough to elevate your silhouette, full enough to upgrade ponytails and waves, and still manageable for real life. If you match undertone, choose a texture you can maintain, and distribute weight thoughtfully, the result can look seamless in daylight and in photos. When you’re ready to compare options side by side—by shade, texture, and method—browse the full collection at 18-inch hair extensions for a balanced, versatile length and use the Decision Framework above to keep your choice simple and personal.