
-


Brown Fringes Hair pieces Air Bangs
Regular price $114.99 USDRegular priceUnit price per -


Synthetic Neat Fringe Blunt Bangs Clip In On Hair Extension | 6"Bang + 9"Temples Hairpieces
Regular price $107.95 USDRegular priceUnit price per$7.95 USDSale price $107.95 USD -

Dark Brown Human Hair Bangs Side Fringe for Women
Regular price From $212.99 USDRegular priceUnit price per -
Clip In Bangs | Human Hair Wispy Bangs | Hair Clip Human Hair Bangs
Regular price $209.00 USDSale price $209.00 USDUnit price per -
Clip In Bangs Real Human Hair Wispy Bangs Fringe With Temples Bangs Clip In Hair Extensions
Regular price $209.00 USDSale price $209.00 USDUnit price per -


Brown Hair Fringe Clip Bangs
Regular price $105.99 USDRegular priceUnit price per -

Black Hair Fringe Clip Bangs
Regular price $103.99 USDRegular priceUnit price per -

Black Fringes Hair pieces Air Bangs
Regular price From $103.99 USDRegular priceUnit price per -
Black Blunt Cut Fringe
Regular price From $113.69 USDRegular priceUnit price per


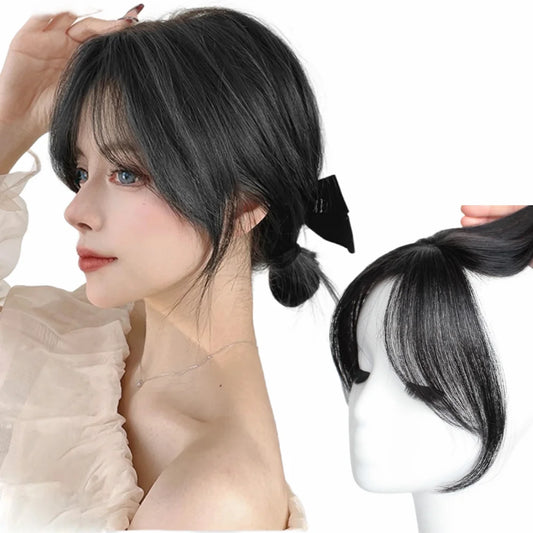
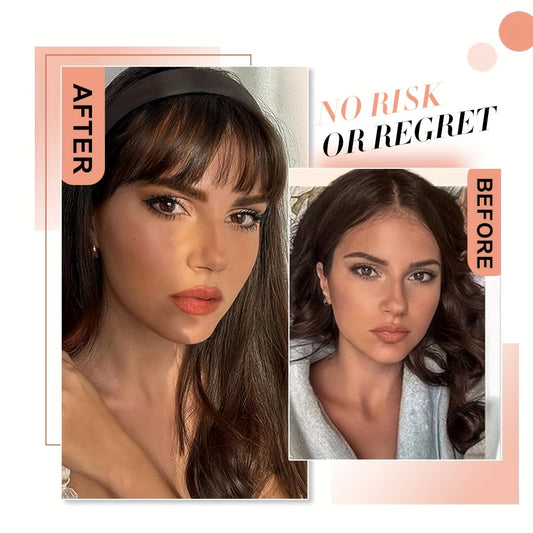
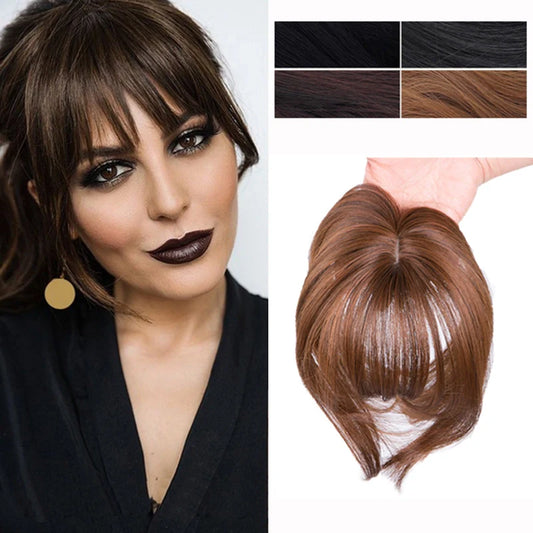
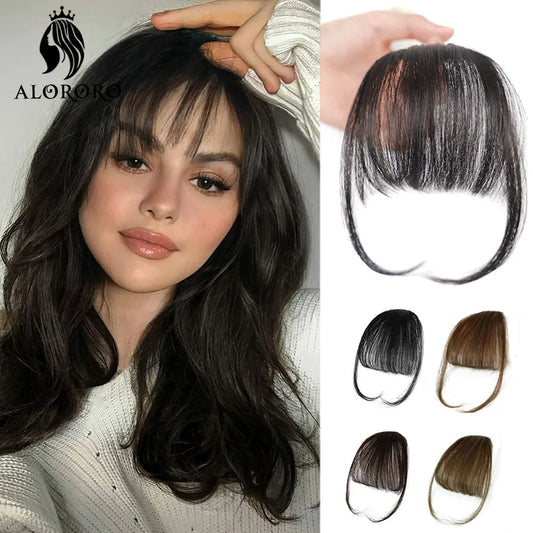
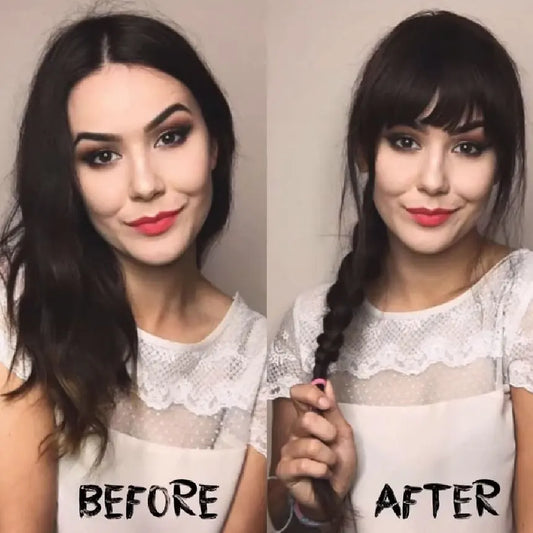
About Fringe Clip In Hair Extensions
Unlike full length sets, a fringe piece is about the first two inches of the hairline. Small choices decide realism: base width matches your brow arc, root shadow reads like growth, fiber density matches your strands, side wings land at the right point on the cheek, and the part or swirl is respected rather than forced flat. When those details align, fringe reads like a cut rather than an add on and the camera treats it as your own hair.
What a fringe clip in does
A fringe piece delivers a controlled front view. It can soften a forehead, sharpen eye focus, cover a high hairline, or add dimension to a straight style without commitment. It also protects natural hair from repeated heat passes at the front because you style the piece off the head and then install it. For people growing out a fringe, a clip in fills the in between months with a neater outline that photographs better than pins or heavy product.
A typical unit includes a center panel that forms the bang and two side wings that integrate into the temples or face framing layers. Clips sit along the base so load spreads and the piece stays flat. Because the piece sits near the hairline, color undertone and root realism matter more than length; the viewer’s eye lives on the front inch.
Base shapes and coverage
Base shapes follow brow arcs. Oval bases mirror a soft brow curve and suit curtain and bottleneck fringe. Slightly rectangular bases with rounded corners read classic straight bangs. Tapered teardrop bases focus density at the center and fade toward temples, ideal for wispy fringes that open in the middle. The base should extend just past your natural recession points to anchor on stable hair while letting the wings slide under your top layer.
Coverage planning begins with your goals. If you want full coverage across the brow, select a base that spans outside brow tails and choose a medium to firm density center. If you want a soft veil, choose a narrower base with lighter density and longer wings that blend at the cheekbone. The best pages provide base width, wing length, and density cues in numbers. Without numbers, order with a tape measure in hand and a quick daylight photo of your brow-to-brow span for reference.
Density logic for realism
Density must match strand type and forehead height. Fine strands need fewer hairs per square centimeter to read full; coarse strands need more. A high forehead often benefits from a firmer center with soft edges so the silhouette reads intentional without looking heavy at the temples. A lower forehead often looks best with light to medium density and shorter center length so eye space remains open. The illusion fails when center density is high and wing density is low; the transition must be gradual.
A simple test: hold the piece over your brow in daylight without clipping. If the scalp grid at the base peeks through more than your natural top layer, density is too light. If you cannot see any scalp at all under direct sun, density is too heavy for a modern result unless you are aiming for a blunt micro fringe.
Fabulive lists base width, wing length, and heat caps in degrees so buyers can plan placement instead of guessing.
Lengths and face landmarks
Fringe length is measured from the base seam to the cut edge, not total hair length. The cut edge should sit between mid brow and just below the pupil for classic bangs, at or just below the lash line for long, eye skimming looks, and between the pupil and cheekbone for curtain and bottleneck styles. Wings usually land from cheekbone to jaw depending on face shape and haircut. Use a ruler in the mirror and mark likely landing points with cosmetic pencil; your eyes will tell you instantly which line balances your features.
If you plan to style with a round brush, add a quarter to half an inch to the target length to account for the turn. If you will iron straight, cut at the target line. Never cut wet; fringe shrinks when it dries and springs up with bevels. Always cut the piece off the head on a block or held in your hand; then micro trim on your head only after a test install to avoid over shortening.
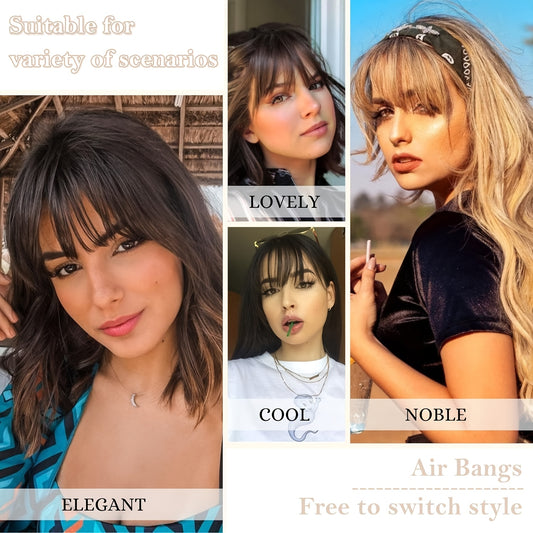
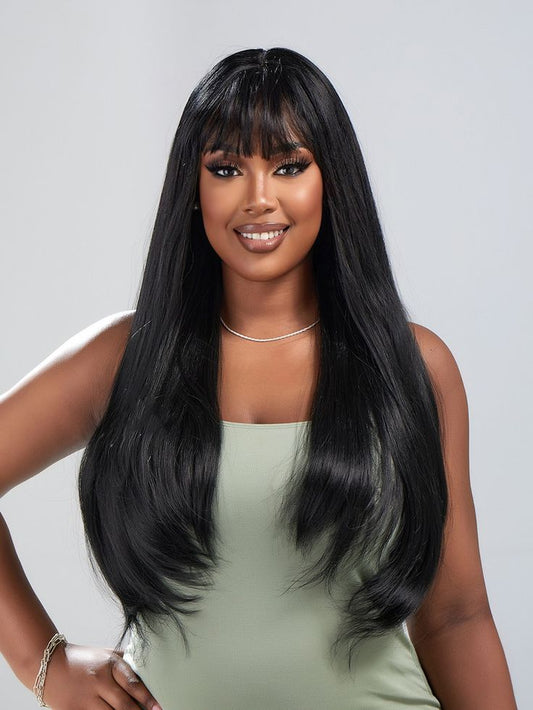
Fringe styles in plain language
Straight classic: straight across with a subtle downward arc; density medium at center and slightly lighter at edges. Curtain: center opens with wings that slope to cheekbone or jaw; density light to medium with length layered so the split feels natural. Bottleneck: narrow center that widens into soft wings; reads modern, works well on round and heart faces. Wispy veil: very light density, airiness between strands, ideal for fine hair or minimal change. Side swept: longer center that angles to one side; demands a precise part and a softer base so the opposite side does not look bulky.
Your existing haircut controls which one fits. Layers and face framing imply curtain or bottleneck. Blunt one length cuts imply straight classic or soft veil. Side parts imply side swept. If you chase a style that fights your cut, blending time increases and realism suffers; let the cut decide the fringe.
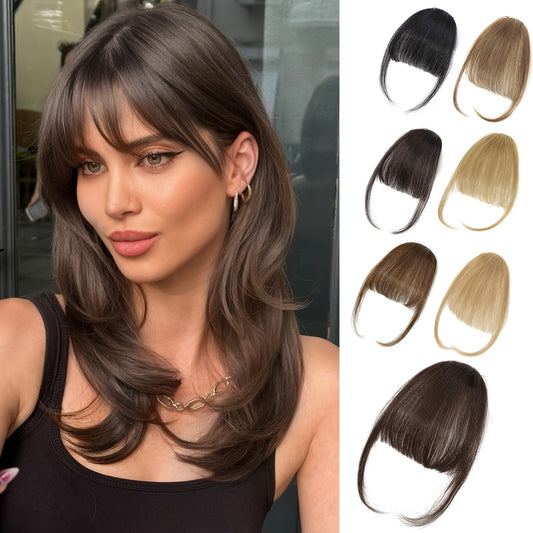
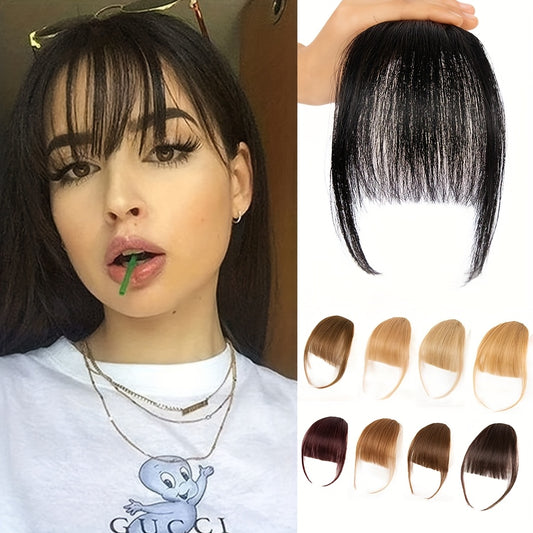
Color matching and root realism
Fabulive’s daylight shade photos and undertone labels speed root realism choices for faces that sit between two colors.
Match undertone first—cool, neutral, warm—then depth. Verify at a window in daylight; interior bulbs skew yellow or blue. A micro rooted or shadowed base helps the join mimic growth and hides the inner clip architecture. If you sit between two shades, slightly lighter is safer near the face because glazing darker or cooler later is gentler than lifting lighter. Dimensional shades—subtle lowlights in wings—read natural in motion and keep the temples from looking flat.
Defined curls scatter light differently than straight fringe; even in straight textures, beveling changes brightness. Always evaluate color after finishing the target style. One quick daylight photo of your center and temple meets next to the piece becomes your reorder proof and saves time later.
Temple integration
When comparing density options, Fabulive provides clear light, medium, and firm cues that align with modern fringe styles.
Temples are where most fringe pieces succeed or fail. The wing must land under a generous top layer and sit on hair dense enough to grip. If your temple area is sparse or highly layered, choose longer wings or add two micro side panels trimmed on a diagonal to bridge the join. The angle should echo your face framing layers so the eye reads a single flow rather than a step.
For strong side parts, consider a piece with an off center base so the heavier side carries more wing hair. For center parts, mirror the wings. The first goal is equal perceived density on both sides in three quarter photos; balance beats symmetry by weight.
Cowlicks and part strategy
Cowlicks at the hairline push fringe pieces off course if you fight them. Instead, map the base so the center seam respects the natural swirl and let the bevel redirect the final line. Tease lightly or dust a touch of root texture powder under clips only; wet gel under a cowlick defeats grip. If the swirl is extremely strong, choose a fringe that splits in the middle (curtain or bottleneck) and let the natural lift become part of the style rather than a problem to flatten.
If your natural part sits slightly off center, cut the fringe center one to three millimeters longer on the higher side so it sits level visually once the hair springs. This micro asymmetry is normal and often the difference between a piece that reads balanced and one that looks tilted.
Placement sequence
Detangle your hair and the piece. Create a small horseshoe section at the front and clip the rest of your hair out of the way without compressing roots. Place the fringe base one to two finger widths behind your natural hairline depending on density and desired reveal. Anchor the center clip first to set the level. Close side clips next, making sure the wings slide under the top layer. Release your top hair and comb lightly over the base. Support the base with your free hand while brushing to prevent twisting.
For ownership clarity, Fabulive publishes wash cadence and the no sleep guideline in plain language without slogans.
If the base wants to show in bright light, lower the placement or add a micro rooted strip at the hairline for a soft shadow. If the wings feel heavy at the temples, point cut a few strands on a soft diagonal to reduce visual weight without changing the length line.
Finishing moves
For straight finishes, cap tools at or under one hundred eighty Celsius or three hundred fifty Fahrenheit. One slow pass beats several fast ones. Allow complete cooling before combing; cooling sets the line you created. Bevel the last quarter to half inch inward so the edge reads calm under LEDs and daylight. Mist flexible hold onto a comb and sweep once; spraying directly onto fringe often creates stiff spots. For curtain and bottleneck styles, use a round brush and low heat; over directing away from the face at the root then turning under lightly at the ends produces the float you want.
If you mix a rooted center with brighter wings, Fabulive’s swatch grid makes daylight matching fast before you order.
If you prefer air drying, clip the base in a block or hold it by the edges, define the intended split with your comb, and pin in that shape while drying. Finger press the bevel while warm and leave to cool completely before install. Less product wins near the face; clean, precise heat and full cooling create shine and shape without buildup.
Texture options
Straight fringe reads graphic and clean; it pairs with sleek bobs, lobs, and long straight hair. Soft wave fringe plays with movement and can be blown out smooth or allowed to bend; it pairs with layered cuts and mid lengths. Coily or curly fringe pieces exist and should be labeled by coil diameter and shrinkage so expectations match results; wings need longer length in curly formats to account for spring. Mixed textures—straight center with wavy wings—look odd unless your cut already mixes patterns, so keep texture choices coherent with your routine.
Choose the option that fits your daily habit. If you blow out most days, straight fits. If you alternate bend and smooth, wave fits. If you live in curls, match coil scale and use water first, then product, and dry fully before fluffing. The right texture reduces passes and saves time every week.
Accessories and glasses
Glasses change fringe physics. Frames catch strands at the bridge and temples. If you wear glasses daily, set base placement while wearing them, then trim length to avoid constant contact. A slightly shorter center and slightly longer wings keep lenses clean and keep the piece from riding up. For sunglasses days, plan a temporary ear tuck during movement and a quick comb reset on arrival; this controls wind without product.
Hats and headbands lift the top layer and can expose base edges if rows sit too high. Keep the base lower and allow your natural hair to drape over wings. When trying on hats, check a mirror from below eye level; that angle reveals edges that top down views miss.
Comfort and ergonomics
Comfort is load sharing across clips and rotation between wears. Move the base back or forward a few millimeters on different days so the same follicles are not loaded repeatedly. Support the base while brushing. Avoid heavy oils at the hairline; anchors need clean texture. Keep a satin pouch for storage and a small comb in your bag for quick resets after jackets and scarves.
If tenderness appears, remove and reinstall lower or lighter that day. A fringe piece is low commitment; ownership is about predictability and comfort, not endurance. If clips feel too firm, swap to silicone sleeves with a lighter bite or add micro pressure pads under the base.
Care and washing
Wash every ten to fifteen wears or when product accumulation appears. Submerge the piece in cool or lukewarm water. Emulsify a small amount of gentle shampoo in your hands and squeeze through the lengths; avoid rough scrubbing at the base. Rinse thoroughly. Condition from mid lengths to ends, detangle while saturated with a wide tooth comb or with fingers, and rinse cool to close cuticles. Blot with microfiber—no wringing. Air dry flat or on a block so the base keeps its shape. Clarify only when buildup persists. Replace tired clips; hardware is a service part.
Schedule a seasonal micro trim of a quarter to half an inch to refresh the outline. Trim off the head first, then test install and micro adjust only if needed. Shine comes from clean fiber, capped heat, and cooling, not from heavy serums near the face.
Troubleshooting quick list
Base edge visible in daylight: placement too high or canopy too thin; lower one step or add a micro rooted shadow strip. Center looks too heavy: point cut along the pupil line in tiny bites to remove weight while keeping length. Wings feel bulky: trim a soft diagonal and lighten the first centimeter; avoid blunt chops. Piece slips: clean clip teeth, avoid oils at anchors, dust a tiny amount of root texture powder. Cowlick lifts the center: switch to curtain or bottleneck or respect the swirl and let bevel control the line.
Color mismatch at temples: add a wing glaze a half level deeper or cooler, or choose a slightly rooted option. Shine looks plastic under LEDs: reduce heat passes and spray hold on the comb instead of the hair. Glasses snag: trim center a few millimeters and lengthen wings to clear frames. Most issues respond to calm, small changes rather than big overhauls.
Page signals that help buyers
Useful collection pages show the piece on multiple face shapes in daylight, include a cropped front shot of the base line at rest, list base width and wing length, and publish heat caps in degrees. They provide undertone labels on shades and a quick diagram of placement—center anchor, then sides, wings under top layer. A color assist note reminds buyers to verify by a window. Return basics for unopened hair and realistic shipping windows reduce surprises.
Filters that matter for fringe include base width ranges, wing length ranges, density cues (light, medium, firm) with numbers where possible, and rooted versus non rooted options. A small glossary on the page speeds selection and prevents support loops. Precision lowers returns.
Face shape guide in numbers
Oval: almost any fringe works; choose based on haircut and routine. Round: bottleneck or curtain with longer wings to elongate; avoid heavy straight across lines unless density is light and length is above the brow. Heart: curtain or soft veil to balance a wider forehead; wings to cheekbone. Square: wispy or curtain with a gentle arc to soften angles; avoid hard horizontals. Long: longer center with curtain wings to reduce vertical emphasis; avoid micro fringe unless paired with high texture. These are starting points, not edicts; your haircut and part dictate the final map.
Measure and mark. Use the pupil, brow arch, and cheekbone as guides when cutting. Keep records of base width, center length, and wing length that photographed best; reorders then become simple and results become repeatable.
Ownership economics
A fringe piece saves time by moving high precision heat work off your head. You style once, let it cool fully, and install. Because the fiber rests between wears, life extends. Cost per wear often beats frequent bang trims, especially if you film or photograph regularly. The real dividend is predictability: once base width, density, and placement are logged, the front view reads the same on busy mornings and event nights.
Minimal product use near the face reduces skin stress and keeps lenses and phones clean. Less product, fewer passes, and complete cooling create a clean sheen that looks premium without weight. Predictable routines are the quiet luxury in hair ownership.
Glossary
Base: the fabric or injection platform that holds hair and clips for a fringe piece. Wings: side panels that integrate into temples or face framing. Density: hairs per square centimeter on the base; controls visual fullness. Root shadow: a slightly deeper color at the base that mimics growth and hides architecture. Bevel: the small inward turn at the ends that reads calm and finished. Canopy: the unwefted top layer that hides edges.
Curtain fringe: a split center with wings that slope to cheek or jaw. Bottleneck fringe: a narrow center that widens into wings; modern and face friendly. Wispy veil: very light density with air between strands. Cowlick: a natural swirl that lifts hair and changes direction near the hairline. Pupil line: an alignment cue for center length when cutting. Horseshoe section: the small front section you separate to install a fringe piece cleanly.
Summary
Fringe clip in hair extensions succeed when base width matches your brow arc, density matches your strand type and forehead height, wings integrate under a generous canopy at the temples, and color undertone and root realism are checked in daylight. Respect cowlicks rather than fighting them, cap heat and allow complete cooling, and use a single brush or comb pass to set the final line. Record base width, center length, wing length, shade code, and tool settings so the result repeats in minutes on busy days. The piece then reads like a tailored cut rather than an accessory.
When a step feels uncertain, reduce to the sequence: section the horseshoe, place the base one to two finger widths behind the hairline, anchor center then sides, finish with bevel and cool completely, and comb once. Calm, repeatable moves beat stacks of product and rushed passes every time.
Mechanical view at the hairline
A fringe base acts like a shallow arch: stability rises when clips align along a curve that mirrors the brow, and torque during brushing falls when you support the base with your free hand. Small placement changes—one to two millimeters—turn a tilted line into a level one because the eye judges against the pupil line, not against the ceiling. Respecting arch geometry and distributing load are the practical mechanics behind a natural looking fringe that stays put in motion.
Customer reviews
- I needed face framing without commitment and this fringe installs in under five minutes; the bevel reads like a salon finish. — Riley Morgan, USA ⭐⭐⭐⭐⭐
- The base width and wing length numbers matched reality, and the root shadow is subtle enough to pass in daylight. — Daniel Carter, Canada ⭐⭐⭐⭐⭐
- Sensitive hairline here, but the load across clips kept pressure low all day and the wings blended into my layers. — Amelia Hughes, United Kingdom ⭐⭐⭐⭐
- Curtain shape looks natural after one round brush pass; letting it cool fully before combing made all the difference. — Chloe Bennett, Australia ⭐⭐⭐⭐⭐
- Temple hollows disappeared once I trimmed the wings on a soft diagonal; three quarter photos finally look balanced. — Sofia Martin, Italy ⭐⭐⭐⭐⭐
- Shipping was a day slow for me so I’m at four stars, but the clips have real spring and the fiber takes a clean bevel. — Harper Wright, USA ⭐⭐⭐⭐
- On Zoom the front view reads calm with zero shine spikes; the color match holds under LEDs and window light. — Grace Allen, USA ⭐⭐⭐⭐⭐
- Wind on the pier and a tiny part shift kept the base hidden; the center stayed level even with my cowlick. — Hannah Collins, United Kingdom ⭐⭐⭐⭐⭐
- First time with a fringe piece and the section–anchor–comb sequence clicked; I logged base width, center, and wing lengths. — Olivia Tremblay, Canada ⭐⭐⭐⭐⭐
- I pop it off for the gym and back on for dinner; a single comb pass resets the line with minimal effort. — Charlotte King, Australia ⭐⭐⭐⭐⭐