
-
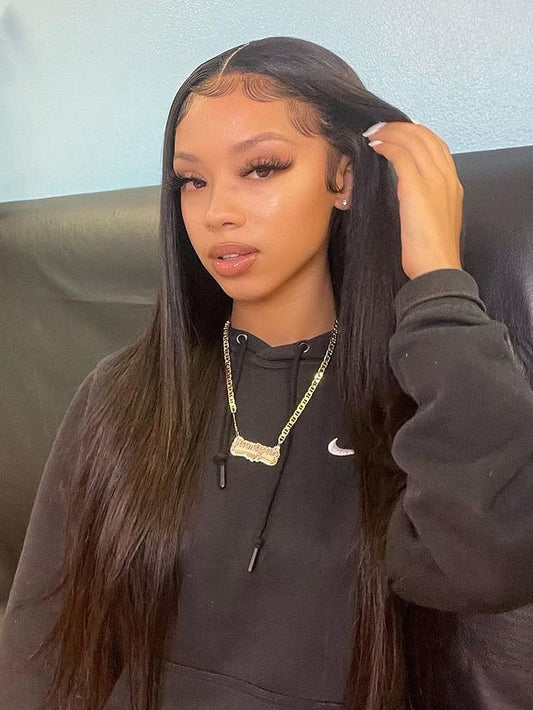
Light Yaki Straight Tape In Hair Extensions - Human
Regular price $420.99 USDRegular priceUnit price per -
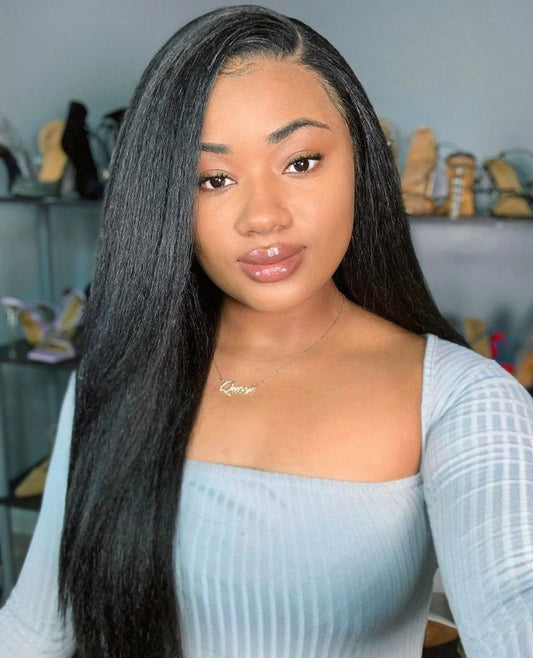
Natural Black Human Hair Extensions
Regular price $428.99 USDRegular priceUnit price per


Black Tape-In Hair Extensions: A Premium Collection Guide to Seamless Blending, Long-Wear Comfort, and Natural Density
Black tape-in hair extensions are the category most likely to deliver an “it looks like my hair, just better” result—when the choice is made with undertone, texture, and routine in mind. Black shades amplify small details: a slightly wrong finish can read as a separate layer in daylight, and uneven weight distribution can create obvious bulk at the crown or a hard line at the ends. Tape-ins add another variable: long-wear convenience comes with long-wear responsibility, meaning your washing habits, product placement, friction exposure, and maintenance cadence determine whether the blend stays invisible. This collection guide is designed to function like a stylist’s consultation: a decision framework, a reality-based method comparison, a density plan by haircut type, troubleshooting you can apply without starting over, and a shopping path that keeps you confident from first install through weeks of wear. Start your browsing journey at Fabulive hair extensions for consistent, natural-looking long-wear transformations, then use the guide below to choose with precision.
Internal linking placeholder: Add a link to “Tape-In Installation Map by Head Shape.”
Internal linking placeholder: Add a link to “Color Match Assistance.”
Internal linking placeholder: Add a link to “Returns & Exchanges.”
Short intro above the product grid (80–120 words)
This Black Tape-In Hair Extensions collection is built for long-wear fullness that blends naturally at the sides, part line, and ends—especially if you want consistent hair without daily clip-in placement. Use the guide below to choose the right undertone for daylight realism, plan the amount of hair you actually need based on haircut type, and decide whether standard tape-ins or ultra-discreet invisible tape-ins fit your routine. You’ll also find styling ideas for daily polish and events, care guidance that protects longevity, and common mistakes to avoid so your install stays seamless. Browse the grid with clarity, not guesswork.
What this collection is and who it’s for
This collection centers on black tape-in hair extensions—designed to lay flat, distribute density evenly, and create a consistent silhouette across weeks. The appeal is stability: you’re not rebuilding your hair every morning. Instead, you have an upgraded baseline that can be styled quickly, photographed confidently, and worn through real-life movement without constant adjustment.
It’s for people who want everyday polish on a realistic schedule: professionals who want camera-ready hair without daily installation, busy routines that need predictable maintenance, and anyone who wants the “strong ends” look without relying on constant heat styling. It’s also for experienced extension wearers who care about quiet-luxury details: a seamless side blend, a natural part line, and ends shaped to match the haircut so the hair reads like one cohesive style.
Black tape-ins can also solve specific pain points that don’t always respond to haircuts alone: thin ends that make hair look less healthy than it is, a perimeter that disappears in photos, or a grown-out shape that lacks structure. When the method fits your habits, tape-ins don’t just add hair—they add consistency, which is often what makes hair feel “expensive.”
Why this category matters now (freshness, trends, real-life use)
Black hair has returned as a modern classic, but the trend isn’t only color; it’s finish. The current look favors controlled shine, smooth silhouettes, and density that appears natural rather than heavy. Tape-ins support that aesthetic because they can create uniform fullness without daily handling, which helps keep the surface sleek and the perimeter strong.
Real life has also raised the bar. Hair is seen under overhead office LEDs, warm indoor lighting, and daylight that reveals undertone and reflection. Phones capture shine and flatten dimension, and black shades expose mismatches faster than lighter colors. If the undertone is off, the hair can look like it belongs to someone else. If the ends aren’t shaped, the perimeter can look like a second haircut. If product habits cause slippage, seams become visible at the sides. Tape-ins matter now because they can deliver a long-wear polished baseline—if you choose the right combination of shade, texture, and maintenance reality.
Finally, tape-ins are increasingly chosen by people who want fewer daily steps. When your mid-lengths and ends are already full and shaped, you can do less to look finished. The key is to buy like a stylist: start with routine and haircut, then choose hair that fits both.
How to choose the right option (Decision Framework)
Decision Framework
- Goal → length, volume, perimeter thickness, face framing, or dimension
- Shade/undertone → neutral black vs cool-leaning black vs dimensional blends
- Texture/finish → straight, soft bend, or wave that matches your natural ends
- Construction/type → tape-in vs clip-in vs other methods for your schedule
- Weight/coverage → enough density to look real without bulk or tension
- Occasion/frequency → daily wear, travel, events, or seasonal refresh cycles
- Care tolerance → washing habits, detangling patience, heat routine, and maintenance cadence
- Budget/value → prioritize longevity, reusability, and consistent realism
How to choose black tape-ins for fine hair right now without visible bulk
Fine hair looks most natural with strategic density, not maximum density. The goal is to reinforce mid-lengths and ends so the perimeter looks healthy, while keeping the top light enough that your natural hair can cover seams. Overloading the crown is the most common reason tape-ins look obvious in black shades because it creates a shape your natural hair cannot support. For fine-hair decision support grounded in long-wear realities, reference why tape-in extensions are a fine-hair upgrade when coverage is planned well and apply the principle of gradual density rather than heavy stacking.
What black extensions look most natural in daylight (and why shine matters)
Daylight reveals undertone and surface reflection. The most believable black has controlled shine: it reflects light like your own hair and changes slightly as hair moves. If the finish is too glossy, hair can read artificial; if it’s too matte, hair can look dull and separate. A soft bend or brushed wave often increases realism because it breaks reflection into multiple points, which reads more like natural fibers and reduces the appearance of any blend line at the ends.
How to match undertones without overthinking it
Look at your hair in indirect daylight. If your black throws warm-brown reflections, neutral blacks often blend more naturally than very cool blacks. If your black reads graphite or cool, cooler blacks can look cleaner and more cohesive. Undertone mismatch is a top reason black extensions look like a second layer even when the depth seems right. If you’re unsure, prioritize texture match and end shaping; cohesive movement and a unified perimeter can make a near-match look seamless across environments.
How many tape-in pieces you actually need by haircut shape
Density planning is silhouette planning. Blunt cuts need perimeter support so ends look consistent. Layered cuts need a gradient so layers merge into the added hair instead of stopping above it. Thick hair usually needs enough coverage so the extensions contribute to the overall shape rather than disappearing beneath natural density. Fine hair needs fewer, smarter placements to avoid bulk. The most useful test is movement: bring hair forward, tuck behind ears, shift your part slightly, and check whether the hair still reads like one haircut. If it does, you likely chose the right amount.
Daily wear vs special occasions: choosing a plan you can sustain
Tape-ins are designed for consistent daily hair; special occasions are where you amplify with styling rather than adding excessive weight. If you want one system that serves both, choose a comfortable, realistic density for everyday wear, then create event impact through finish—sleek length, brushed waves, or structured half-up styling. This keeps the result believable, protects long-wear comfort, and reduces the likelihood of tangling and friction-related wear.
Shade, undertone, and finish selection
Even within “black,” the difference between natural and obvious often comes down to undertone and finish. Some shoppers want invisible enhancement: a consistent black that looks like their own hair, only fuller. Others want controlled dimension: a softer transition into brown, a designed ombré gradient, or strategic brightness or cool tones that feel intentional. The best shade strategy is the one that holds up in daylight without requiring you to hide under indoor lighting.
If you want to compare the full tape-in category across finishes and shade families before committing, start with tape-in hair extensions across shades for a clean comparison path and narrow by undertone and the level of dimension you want.
If you want a softer, natural-looking transition rather than a stark black finish, consider brown tape-in hair extensions for subtle dimension that blends with black, especially if your natural hair reflects warm tones in sunlight.
If your goal is strategic brightness rather than full contrast, explore blonde tape-in hair extensions for face-framing brightness that stays wearable and keep the root area cohesive so the blend reads intentional.
If you want a designed transition that photographs well, consider ombré tape-in hair extensions for a controlled gradient effect, which can add depth without requiring frequent salon toning.
If you prefer cool-toned editorial energy, browse silver tape-in hair extensions for modern cool contrast and rely on movement styling so tones mix naturally as hair shifts.
For shoppers balancing black with light tones and deciding where contrast should live for the most believable result, use a natural black and blonde contrast guide for planning dimension to choose whether brightness belongs near the face, through mid-lengths, or concentrated at the ends.
Texture and blend strategy
Texture is the realism lever most people underestimate. A close shade match can still look obvious if the extension texture behaves differently than your natural hair at the ends. In black, the eye reads movement and silhouette first; mismatched movement creates a visible separation line. The goal is to treat your hair and extensions as one haircut: consistent finish direction, a unified end shape, and weight distributed in a way your natural hair can support.
How to blend with blunt cuts so the perimeter looks like one haircut
Blunt cuts demand perimeter consistency. Plan coverage to reinforce the bottom third so ends look evenly dense, then keep the top light enough for seam coverage. If the ends look too thick compared to your natural hair, trim and shape the extensions to mirror your hemline. Leaving the hair unshaped is one of the most common reasons black tape-ins look obvious because the perimeter becomes too perfect and too heavy. A subtle bevel can keep ends polished while preserving a blunt silhouette.
How to blend with layered cuts so layers don’t stop abruptly
Layered cuts need a gradient. Place lighter coverage higher and fuller coverage lower so your natural layers merge into the added hair. If you see a shelf line, the solution is usually shaping, not adding more hair. Light trimming to echo your layer pattern creates continuity and prevents the extension hair from looking like a separate curtain underneath your haircut.
What to do if it looks obvious at the hairline or part line
Visibility near the hairline is typically a placement map issue. Tapes set too close to the perimeter show when you tuck hair behind your ears or shift your part. Move placement slightly inward, maintain a lightweight veil of natural hair above seams, and keep oils and conditioners away from the tape area to prevent lift. If the part line looks “gapped,” check whether tapes are aligned flat and whether enough natural hair above them is styled to cover the seam naturally.
Styling ideas (daily + event)
Styling tape-ins is about repeatable polish that protects longevity. Because tape-ins are long-wear, choose looks that limit friction at the collar, keep the root area clean, and minimize constant high heat. Build one daily finish you can execute quickly and one event finish you can deliver confidently, then rotate small variations rather than reinventing your look every time.
Quick looks for daily polish
- Low ponytail with a wrapped base for thickness without tension
- Half-up twist that lifts the crown while preserving side coverage
- Soft bend through mid-lengths to break reflection and blur transitions
- Low bun with a fuller perimeter for a clean, refined profile
Photo-ready looks for events
- Sleek straight length with clean parting and shaped ends
- Brushed waves that diffuse transitions and add dimensional movement
- High ponytail with controlled volume (avoid pulling too tight)
- Structured half-up styling that shows length while keeping seams discreet
For formal styling inspiration that adapts exceptionally well to tape-ins—especially if your natural hair is medium length—use medium-length prom hairstyle ideas that translate beautifully with extensions and choose one silhouette you can repeat without overcomplicating your routine.
If you’re starting from a shorter cut and you want realistic expectations about what extensions can do—and what blending strategy matters most—read how hair extensions change the game for short hair when blending is prioritized and plan a believable length increase that still looks like you.
If accessories are part of your identity, keep placement gentle and avoid anchoring directly onto tape areas. For styling inspiration that keeps seams discreet while still looking intentional, explore bandana hairstyle ideas that keep extension placement discreet and adapt placement to your parting and tape map.
If your goal is volume that still looks natural, prioritize volume distribution rather than volume quantity. While it’s written for clip-ins, the silhouette principles apply: use techniques for building natural-looking volume without crown bulk as a shape reference for how fullness should be built through mid-lengths and ends.
For inspiration rooted in silhouette rather than unrealistic density, borrow structure and finish from references and scale them to your comfort. Use celebrity hairstyle silhouettes that guide parting and polish to choose a finish you can repeat consistently.
Care, maintenance, and longevity
Tape-ins reward consistency. Longevity depends on clean habits at the tape area, patient detangling, and friction management. In black shades, longevity is also visual: dryness reads as dullness, and repeated high heat can shift surface reflection so hair looks flat or overly glossy. Your goal is to preserve movement and keep seams discreet across weeks, not just on day one.
For a complete baseline on how tape-ins work, what to expect from wear, and how care affects realism, read everything you need to know about tape-in hair extensions for long-wear success and use it to align your routine with the method.
For lifespan planning rooted in real maintenance variables, use how long tape-in hair extensions last with realistic upkeep to decide how washing habits, heat routine, and friction exposure affect wear time.
If you want a schedule-oriented view that helps you plan retape timing and maintenance cadence in a practical way, reference tape-in hair extensions 101 for planning longevity and retape cadence as a checkpoint for your calendar.
Internal linking placeholder: Add a link to “Detangling Routine for Tape-Ins.”
Internal linking placeholder: Add a link to “Heat Styling Boundaries for Extensions.”
Internal linking placeholder: Add a link to “Swimming, Travel, and Friction Protection.”
In practice, longevity is shaped by three daily realities: product placement, friction, and maintenance timing. Product placement means keeping conditioners and oils away from tape areas so adhesion stays stable and seams remain flat. Friction means recognizing that collars, scarves, seatbelts, and repeated hair flipping concentrate tangling at the outer layer; protective styling on long days preserves movement and prevents matting. Maintenance timing means acting before problems escalate: most slippage and tangling issues are easier to prevent with consistent routines than to fix after they appear.
Comparing nearby categories (tape-ins vs adjacent options)
Tape-ins solve consistency. Clip-ins solve flexibility. Other long-wear methods solve different priorities related to installation feel, maintenance cadence, and styling habits. The best choice is the one that matches how often you want extra hair and how consistently you can maintain it.
If you want the option to switch looks for travel, weekends, or quick event styling without committing to continuous wear, explore black clip-in hair extensions for flexible, removable styling as a complementary approach to tape-ins.
If you’re deciding between tape-ins and another long-wear method, compare the routine implications rather than chasing “best.” Use a nano ring vs tape-in pros-and-cons breakdown for lifestyle-based decision making to evaluate comfort, upkeep, and styling compatibility.
If you want a clear benchmark for what seamless blending should look like—especially at the sides and ends—use the ultimate guide to seamless blending in black extensions as a realism benchmark and apply the same tests to tape-ins: sides stay covered in motion, ends read like one haircut, and the part line remains natural in daylight.
Featured picks and use-case recommendations
Featured picks are most useful when they match a real use case: discreet seams, sleek straight finishes, buildable coverage for fine hair, or dimension that reduces the “flat black” effect in photos. Use the options below as starting points, then refine based on undertone, haircut shape, and how you realistically style your hair.
If your priority is the most discreet seam finish—especially if you’re concerned about side visibility—browse Remy Royale invisible tape-in hair extensions for a flatter, less detectable blend and pair them with clean tape-area habits for long-wear realism.
If you want a sleek, polished daily finish that supports straight styling and controlled shine, consider 20-piece Remy straight tape-in human hair extensions for a smooth everyday silhouette and plan end shaping so the perimeter matches your haircut line.
If your goal is balanced fullness with a texture profile many shoppers associate with Brazilian Remy characteristics, explore 50g Brazilian Remy tape-in extensions for controlled daily-wear fullness and prioritize mid-length reinforcement for a natural, wearable upgrade.
If you want to build density gradually—especially if you’re fine-haired or sensitive to weight—consider 20-piece 50g Brazilian tape-in extensions for strategic, buildable coverage and use placement to strengthen ends without creating crown bulk.
If you want a straightforward, versatile human-hair option designed for routine-friendly styling, choose 20-piece 50g tape-in 100% human hair extensions for flexible everyday styling and commit to one repeatable finish rather than constant restyling.
If you prefer dimension that helps hair look less flat in photos—and you want color to do some of the blending work—consider mixed-colour invisible skin wefts tape-ins for dimensional blending and style with movement so tones mix naturally in motion.
If you want a consistent straight profile with predictable polish and a clean silhouette, explore 20-piece Remy straight tape-in hair extensions for uniform shine and smooth ends and keep heat use controlled to preserve long-term realism.
Buying guidance and common mistakes to avoid
Buying tape-ins is not only a color decision; it’s a routine decision. Most disappointments come from choosing density without considering haircut shape, selecting a finish that doesn’t match styling habits, or underestimating how product placement affects adhesion. A premium result comes from a consistent system: shade and texture that blend in daylight, weight distribution that your natural hair can support, and maintenance habits that keep seams flat and discreet.
Common mistake: choosing maximum length without planning silhouette. Length should support your haircut shape; otherwise you create “two haircuts,” where your natural hair ends and the added hair begins. Common mistake: placing tapes too close to the hairline. That increases visibility and discomfort and makes side blending harder. Common mistake: using oils and conditioners near tape areas. That can cause lift and slippage, turning a clean install into visible seams. Common mistake: expecting black to hide everything. Dark shades make shape and reflection more obvious; end shaping and finish cohesion are what make the hair look like yours.
If you’re tempted by dramatic length, evaluate the lifestyle cost before committing: longer hair increases friction, detangling time, and styling needs. Use 22-inch tape-in hair extensions guidance for deciding if luxe length fits your routine to align the look you want with the upkeep you’ll actually maintain.
How to troubleshoot real-life tape-in issues without starting over
Most tape-in issues are fixable when you identify the cause. If seams show at the sides, the placement map is usually too close to the perimeter or there isn’t enough natural hair above the seam to cover it. If slippage happens, product placement near tape areas is often the culprit, especially oils and heavy conditioners. If ends look too thick, treat it as a shaping issue: trim and blend so the extension hair mirrors your haircut silhouette. If hair looks flat in daylight, treat it as a finish issue: introduce a soft bend or brushed wave so reflection breaks naturally and the hair reads like real fibers.
Friction is the hidden variable. Collars, scarves, seatbelts, and constant hair flipping can concentrate tangling at the outer layer, making hair look tired faster than it should. Protective styling on long days—low ponytails, loose braids, and gentle brushing—preserves movement and reduces the wear that turns hair dull. The most “expensive-looking” hair is often the hair that has been handled gently and consistently, not the hair that has been over-styled.
Internal linking placeholder: Add a link to “Tape-In Troubleshooting Checklist.”
Comparing wear-frequency plans (so your method matches your calendar)
Wear frequency is one of the simplest ways to decide whether tape-ins fit your life. If you want hair that’s consistently ready with fewer daily steps, tape-ins are usually a strong match. If you only want extra hair occasionally, clip-ins may be more sensible. Many people also choose a hybrid: tape-ins for a reliable everyday silhouette, clip-ins for occasional added drama or travel flexibility.
If you wear extensions most days, tape-ins reduce daily friction because you aren’t installing and removing hair. The trade-off is maintenance discipline: you protect the install by keeping tape areas clean, detangling patiently, and scheduling upkeep before issues become visible. If you wear extensions occasionally, clip-ins offer control without long-wear commitment. The premium-looking outcome is the one that fits your habits, because consistent maintenance is what keeps the blend invisible.
Internal linking placeholder: Add a link to “Find Your Ideal Wear-Frequency Plan.”
FAQ (8–12 Q&As, transactional but not pushy)
Are black tape-in hair extensions a good choice for daily wear?
Yes—tape-ins are designed for continuous wear and can make daily hair look polished with fewer steps. The best results come from realistic density planning and consistent care habits. If your routine supports gentle detangling and mindful product placement, tape-ins can look like your hair, just upgraded.
How do I prevent tape-ins from showing at the sides?
Side visibility usually comes from placement too close to the hairline or not enough natural hair above seams to cover them. Move placement inward and keep a lightweight veil of natural hair above tape areas. Avoid oils near roots because slippage and lift make seams easier to see.
Do tape-ins work for fine or thin hair?
They can work extremely well when coverage is planned strategically and crown bulk is avoided. Tape-ins distribute hair evenly, which helps fine hair look fuller without heavy stacking. A perimeter-first density plan typically looks the most natural.
How long do tape-in extensions last in real life?
Longevity depends on maintenance habits, friction exposure, and how well the install fits your hair type. Most lifespan issues come from product buildup near tape areas, aggressive brushing, and delayed upkeep. A consistent routine usually preserves realism longer than occasional “fixes.”
What’s the biggest difference between tape-ins and clip-ins?
Tape-ins are built for continuous wear and a consistent daily silhouette. Clip-ins are built for flexibility and occasional use, allowing you to change placement and density when you want. Your best method depends on whether you want hair “always on” or “on demand.”
How do I choose the right length without looking unnatural?
Choose a length that supports your haircut shape and lifestyle. Dramatic length can be beautiful, but it typically requires more shaping and more styling to look cohesive. A believable length increase with strong ends often looks more expensive than maximum length without silhouette planning.
Can I style black tape-ins straight and still keep them looking natural?
Yes, but sleek styling requires precise end shaping and controlled shine. Ends should match your haircut silhouette so the hair reads like one perimeter. A subtle bend at the ends often increases realism while keeping the look polished.
What should I do if the ends look too thick compared to my natural hair?
This is usually a density transition issue rather than a color issue. Create a gradient through placement and trim extensions to mirror your haircut silhouette. Movement styling can also blur transitions and make ends look more natural.
Are contrast shades like blonde or silver compatible with a black base?
They can be, especially when the root zone stays cohesive and contrast is introduced through mid-lengths and ends. Styling with movement helps tones mix naturally as hair shifts. Controlled transitions read more premium than abrupt lines.
What are the most common mistakes people make with tape-in care?
The biggest mistakes are applying oils near tape areas, detangling aggressively, and waiting too long to maintain. Friction at the collar and product buildup can shorten longevity and increase visibility. Gentle, consistent habits keep tape-ins looking seamless longer.