
-

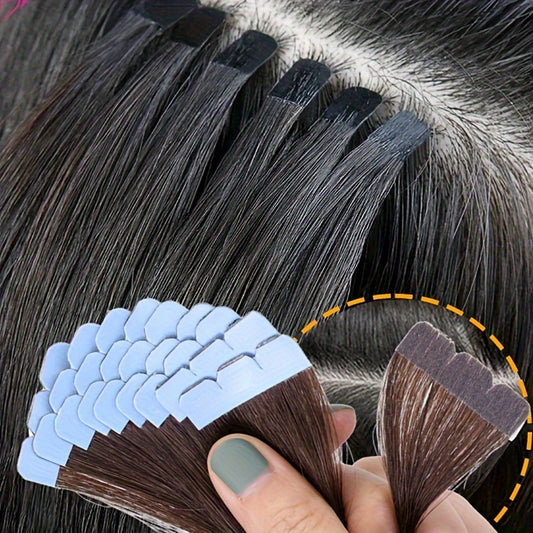
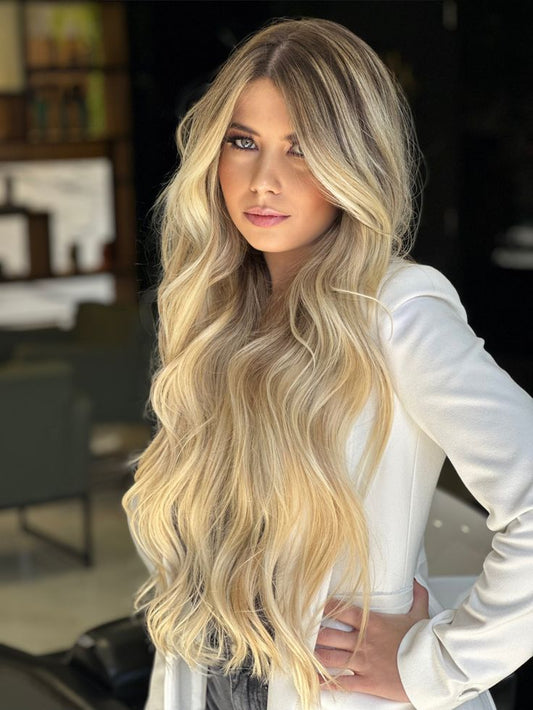
10pcs Soft Human Hair Mini Tape In Hair Extensions
Regular price From $111.70 USDRegular priceUnit price per$11.70 USDSale price From $111.70 USD -

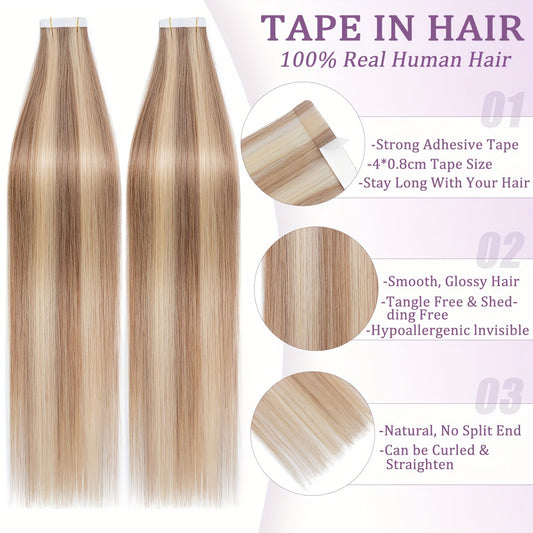
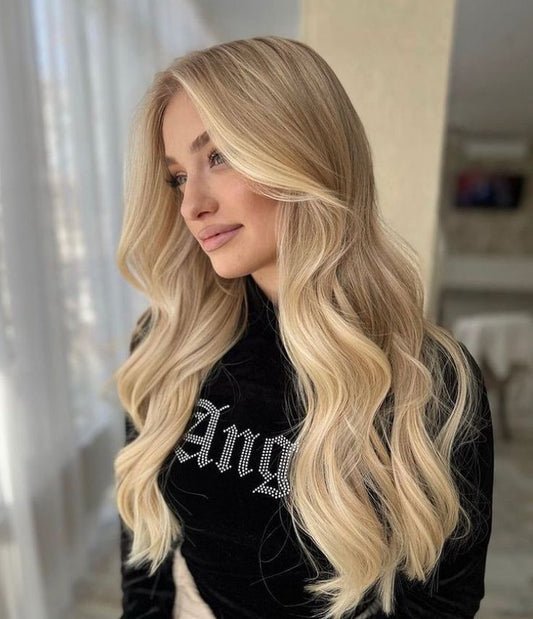
16-22 In Invisible Tape In on Light Beige Weft Human Hair Extensions
Regular price From $128.11 USDRegular priceUnit price per$28.11 USDSale price From $128.11 USD -
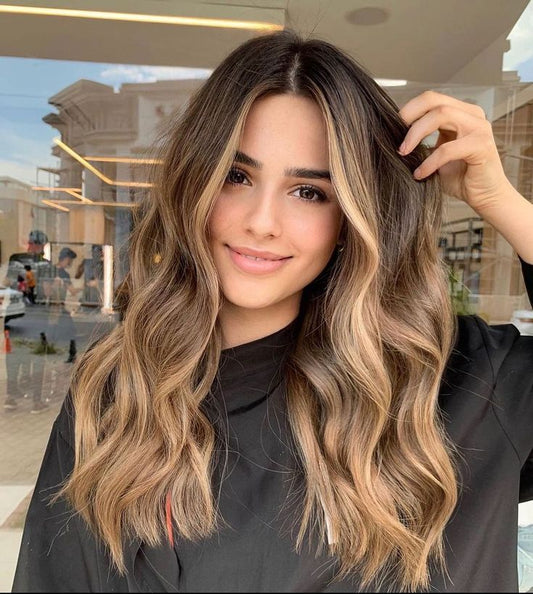
Camel Brown x Bleach Blonde Weft Hair Extensions
Regular price $398.99 USDRegular priceUnit price per -
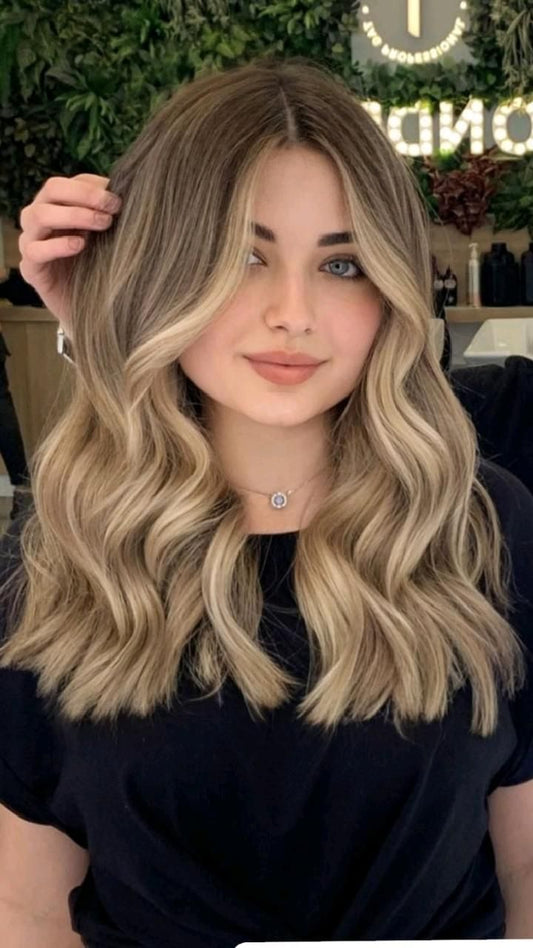
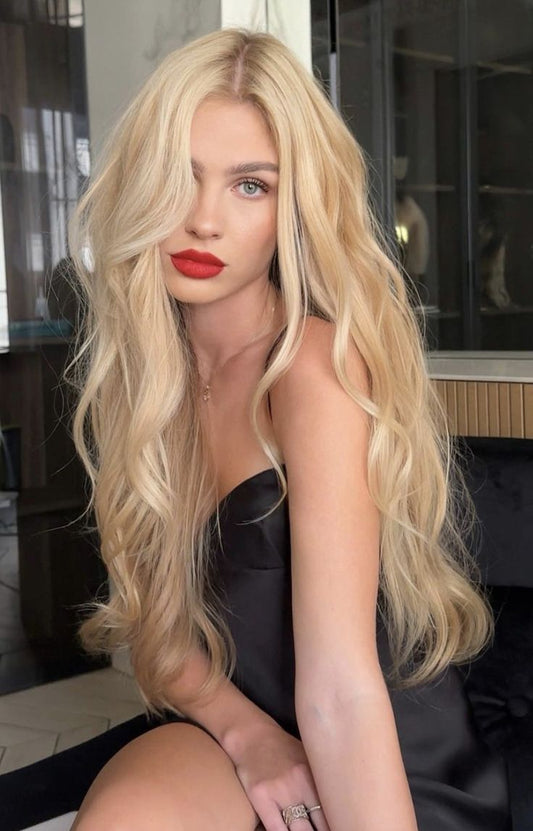
Bleach Blonde Tape In Hair Extensions
Regular price $379.99 USDRegular priceUnit price per -
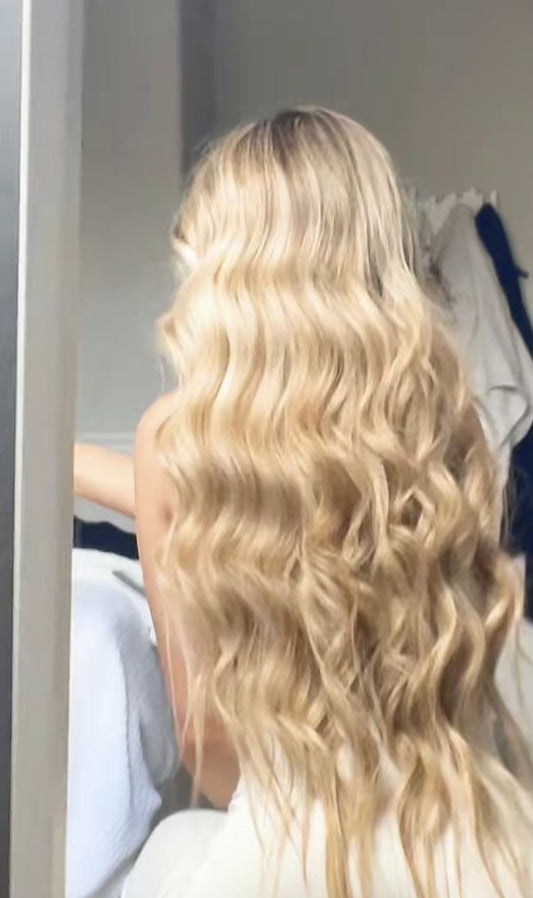
Bleach Blonde Human Weft
Regular price $334.99 USDRegular priceUnit price per


Blonde Tape-In Hair Extensions: A Complete Guide to Seamless Length, Density, and Modern Blonde Dimension
Blonde tape-in hair extensions are designed for one thing: believable transformation that stays comfortable and discreet day after day. If you want longer lengths, fuller ends, or a more dimensional blonde look without constant styling or frequent chemical services, tape-ins can deliver an elevated result with the right match and installation plan. This page is your short pre-grid orientation plus a deep, practical guide—covering how to choose the right tape-in type, shade strategy, blending approach, and maintenance routine so your extensions look natural in every light and every style.
Shop blonde tape-in hair extensions for a sleek, discreet everyday blend
What It Is and Who It’s For
Tape-in hair extensions are wefts pre-attached to lightweight adhesive tabs. Hair is sandwiched between two tape panels placed close to the scalp, creating a flat, low-profile attachment designed to blend discreetly under natural hair. The key appeal is the combination of invisibility, comfort, and movement: tape-ins sit flatter than many methods, distribute weight evenly, and can look exceptionally natural when shade and placement are correct.
Blonde tape-ins are especially useful because blonde hair often appears more translucent at the ends. Even healthy blonde can look visually lighter in density, which makes blunt cuts, long layers, and styles like ponytails or waves look less full than intended. Tape-ins restore that perimeter and add dimension without demanding daily removal.
They also help solve what many blondes experience as “styling fatigue.” When hair is fine or porous from lightening, you can spend time styling only to watch volume fall out by midday. Tape-ins provide a baseline of structure, so your blowout lasts longer, your waves hold their pattern, and your overall silhouette stays consistent.
Blonde tape-ins are a strong fit for:
- Fine or medium-density hair that needs subtle fullness through mid-lengths and ends
- Blonde, highlighted, or balayaged hair that requires multi-tonal blending
- People who want an everyday method that doesn’t require frequent reapplication
- Busy routines where “wake up and look polished” matters more than constant restyling
- Event seasons where consistent hair density improves photos, styling, and longevity
If you want to explore the broader tape-in category beyond blonde, start here:
Browse tape-in hair extensions across shades, textures, and wear goals
Why It Matters Now
Modern hair trends reward two things at once: effortless realism and high-end finish. In blonde, that often means a lived-in color story—root depth, creamy highlight ribbons, and a soft sheen that reads expensive rather than overly processed. At the same time, hair health has become non-negotiable. Many blondes are spacing out lightening appointments to reduce breakage and dryness, which makes extensions an attractive solution: you can achieve fuller, brighter-looking hair visually without pushing your natural strands through repeated chemical lift.
From a practical standpoint, tape-ins match today’s styling habits. Airy blowouts, loose waves, and soft bends look better when hair maintains density through the bottom. Tape-ins support that silhouette. They also help on real-life days: humidity, travel, long work hours, and second-day hair can flatten volume. Tape-ins give you a baseline of fullness that keeps your style looking intentional.
There’s also a shift in how people shop for beauty: decisions are more research-driven. Shoppers want to know what will work for their hair type, their lifestyle, and their maintenance tolerance. Tape-ins reward that approach. When you choose a shade strategy that matches your ends, select the right weft profile, and commit to a lightweight routine, the result can look remarkably natural.
Finally, tape-ins have become a go-to for fine hair because the attachment is flat and comfortable, reducing bulk and making the blend more discreet under thinner top layers when installed strategically.
How to Choose
Decision Framework
Goal → Shade → Texture → Type → Coverage → Occasion → Care → Budget
Micro-intent: Start with your goal (length, volume, or dimension)
Length changes your silhouette, but it needs believable ends to look natural. Volume restores density through mid-lengths and bottom perimeter so your hair looks fuller from every angle. Dimension focuses on shade strategy—blends that mimic highlights and lowlights so blonde looks real in multiple lighting conditions. Choose one primary goal and one secondary goal to prevent overbuying or selecting the wrong density.
A practical way to define your goal is to name the “problem moment” you’re solving. If you hate photos because your ends look wispy, you likely need perimeter density more than dramatic inches. If you love your length but your hair collapses by afternoon, you likely need mid-length support and weight distribution. If your blonde looks flat, you likely need dimension—multi-tonal hair that adds depth and brightness where light naturally hits.
Micro-intent: Decide how everyday your tape-ins should be
Some tape-in looks are subtle and seamless for daily wear; others are designed for dramatic length and high-impact color. The more dramatic the transformation, the more important blending becomes—especially around face framing and the ends. Decide whether you want undetectable everyday hair or event-ready hair every day, then choose coverage and length accordingly.
Everyday tape-ins typically prioritize comfort and invisibility: conservative placement, natural movement, and a shade strategy that looks believable without constant styling. High-impact tape-ins prioritize transformation: longer length, bolder brightness, and more deliberate styling to keep the finish cohesive. Neither is “better,” but one will match your life more naturally.
Micro-intent: Choose coverage based on hair density and parting habits
If your hair is fine, you’ll typically want fewer, strategically placed wefts so your top layer can cover the tapes. If your hair is thicker, you may need more wefts to avoid a thin-ends effect. Also consider your part: a center part and side part can expose different areas, so placement should match how you wear your hair most often.
Coverage is also about where your hair is naturally sparse. Some people have density through the back but thinness near the sides; others have fullness at the crown but taper dramatically at the ends. Tape-ins can be targeted to the areas that change your silhouette most—this often creates a more natural result than evenly distributing wefts without regard to your haircut and growth pattern.
Micro-intent: Match your ends first, then solve for root depth
For down styles, the blend is judged at the mid-lengths and ends. Matching your ends creates cohesion even if you have darker roots or grow-out. Root depth can then be handled by selecting dimensional blondes or mixed tones that mimic your existing color story rather than forcing a uniform shade.
If your roots are notably deeper, the most believable blonde tape-in results usually incorporate some depth, even if the overall look is bright. That can be achieved through multi-tonal blondes, carefully chosen placement, and styling that keeps the blend soft rather than overly contrasted.
Micro-intent: Pick the right tape profile for comfort and invisibility
Comfort comes from flat placement and proper spacing. Invisiblity comes from appropriate weft width and careful alignment so tapes sit flush and are hidden by your natural hair. If you prefer an ultra-discreet look, prioritize lower-profile wefts and conservative placement near the hairline.
Think of the tape profile as architecture. When the structure is flat and evenly distributed, hair moves naturally. When the structure is stacked or uneven, hair can look “supported” in a way that reveals the method. The best installs feel lightweight, lie flat, and disappear under your natural top layers.
Micro-intent: Choose length by proportion, not trend
Longer is not always more natural. Consider your height, torso length, haircut, and styling preferences. Moderate lengths often blend most easily and feel effortless day to day, while very long lengths deliver drama but require more styling discipline and detangling.
Also consider your wardrobe and lifestyle. If you wear hair up frequently for work, gym, or parenting, extremely long hair may become inconvenient. If you mostly wear hair down and love styling, longer lengths can feel luxurious. The most flattering length is the one you’ll wear confidently without constantly adjusting or feeling weighed down.
Shade, Undertone, and Finish
Blonde matching is a system. The most natural tape-ins align three variables: depth, undertone, and finish. Depth is how light or dark the hair reads overall. Undertone is the temperature—warm, cool, or neutral. Finish is how the hair reflects light, from natural sheen to glossy. When these align, tape-ins look like your hair, not an add-on.
Blonde can be especially tricky because the same shade name can look different depending on lighting and hair condition. Porosity, dryness, and surface residue can change reflect and make hair appear warmer or cooler than it “is.” That’s why a system matters: it reduces the temptation to chase a label and instead focuses on how the hair will read in your real environment.
Micro-intent: Use multi-tonal logic for highlighted and balayage blondes
Most real blondes are not single-tone. Highlights create brightness near the surface, while interior hair carries deeper tones for depth. Multi-tonal blends are often the best match because they mimic that natural distribution. If your hair has variation—balayage, babylights, or a root shadow—choose a shade strategy with dimension instead of chasing a single perfect blonde label.
Multi-tonal logic also improves grow-out. As your natural hair shifts between appointments, dimensional tape-ins continue to look believable because they contain a range of tones rather than one rigid shade. This is especially useful if you’re committed to hair health and want to extend time between toning sessions.
Micro-intent: Identify undertone in daylight, then confirm in warm indoor light
Daylight reveals undertone honestly. Warm indoor lighting can exaggerate gold and make cool blondes look brighter, sometimes even slightly gray. Check your ends near a window and then in a warm room to see how your blonde behaves. If your blonde looks creamy outdoors but golden indoors, you likely sit neutral-to-warm. If it stays beige or pearl outdoors and looks very pale indoors, you may sit cool-neutral.
When you’re uncertain, neutral undertones are often the safest bridge—especially for blondes who shift between warm and cool toners. Neutral doesn’t mean “flat.” It means balanced: enough warmth to look healthy in indoor light, enough coolness to avoid brass in daylight. The best neutral blondes look expensive because they read natural rather than aggressively toned.
If your blonde has deeper root depth or you want a low-maintenance blend that stays believable through grow-out, consider exploring deeper blonde families and tonal variation within blonde collections:
Explore blonde hair extensions for broader shade families and dimensional blends
For shoppers balancing blonde with darker bases, neutral-to-warm blended color stories can look especially natural as your hair grows. This bronde guide can help you visualize a chic blonde-brunette blend that still reads bright:
Learn how bronde extensions create a chic blend of blonde and brunette tones
If you want a clearer framework for selecting a blonde tone that complements your undertone, this shade guide maps blonde families in a practical way:
Use this guide to find the best blonde shade match for your undertone and style goals
Micro-intent: Match finish to your real hair, not your ideal hair day
Finish affects both realism and perceived color. If your natural hair is slightly matte from dryness, overly glossy extensions can look separate. If your hair is typically smooth and reflective, overly matte extensions can read dull. Aim for a compatible baseline, then use styling products to unify finish rather than forcing a mismatch to behave.
Finish also influences how thick hair appears. A smooth, satin finish can make hair look denser because strands reflect light more uniformly. A very textured finish can make hair look airy but sometimes less dense in photos. Choose the finish that matches your style identity: sleek and polished, soft and romantic, or lived-in and effortless.
Micro-intent: Choose camera-safe blonde for event seasons
Flash photography and direct sun can exaggerate contrast. If you’re planning weddings, events, or a heavy content season, choose blonde blends that won’t look overly stark under bright light. Dimensional blondes tend to be more forgiving, because their tonal variation reads natural in photos and reduces the risk of a single shade looking flat or overly bright.
Camera-safe also means avoiding extremes when you’re uncertain. If you’re between two shades, the slightly more dimensional option usually reads more natural under flash. You can always brighten the look with styling and makeup; it’s harder to “warm up” a very cool blonde that reads gray in a reception hall.
Practical shade-matching checks that reduce mistakes:
- Compare to your ends, not your roots, for most down styles
- Confirm undertone in daylight and warm indoor lighting before deciding
- Choose dimension if you have highlights, balayage, or visible tonal variation
- Think about your toner cycle; select blends that stay believable as it fades
- Match finish to your everyday hair condition so the hair reads cohesive
Texture and Blending
Texture is the secret to tape-in invisibility. Even a perfect shade can look separate if your natural hair moves differently than the extensions. Blending happens when texture, movement, and haircut shape align—especially through the ends and around the face.
Texture also changes how you perceive color. Wavy hair breaks up reflection and can make blonde look softer and more dimensional. Very straight hair reflects more evenly and can make mismatches more visible. If you prefer straight styling, that’s completely workable—just recognize that precision in shade and finish matters more.
Micro-intent: Make texture consistent by styling your hair and tape-ins together
Install or apply first, then style your natural hair and extensions as one unit. This merges curl pattern, shine, and movement. If you like sleek looks, finish with a gentle curve at the ends rather than pin-straight hair, which can emphasize any difference in density. If you prefer waves, keep direction consistent and avoid curling only the extensions—your natural hair must share the same pattern to blend.
Consistency also means how you brush. Aggressive brushing can separate the hair into layers that show structure. A gentler approach that smooths and merges strands helps hair read like one continuous fall.
Micro-intent: Blend your haircut shape (layers, blunt ends, face framing)
Blunt cuts can look modern, but they often need soft bends or waves to disguise the transition line where your natural ends meet the added length. Layered cuts blend more easily, but the extension length should support your longest layer so the silhouette doesn’t look tapered or uneven. Face framing matters in blonde because it catches light; styling the front sections together helps the whole look read cohesive.
If you have a very short top layer or significant face-framing, your blend strategy should prioritize seamless transitions. That may mean choosing a slightly shorter extension length than your dream length so the gradient looks believable, then relying on volume and finish to create the luxe effect.
If you want maximum discretion, consider invisible-style tape-ins designed for ultra-flat blending:
Explore Remy Royale invisible tape-ins for an ultra-discreet, flat-lay blend
Placement matters as much as texture. A natural result typically uses more coverage in the lower back of the head for down styles, while leaving enough natural hair at the top and sides to conceal the tapes. For upstyles, you may need a different placement plan so the sides look full under tension.
Placement and blend tips that improve realism:
- Keep tapes lower for down styles so top layers conceal seams naturally
- Maintain even spacing to prevent bulk points that show through fine hair
- Use gentle brushing and light finishing spray to merge strands and reduce separation
- For blunt perimeters, add a soft bend to break up the transition line
- Avoid stacking too high at the crown, which can create a visible shelf
- For side parts, ensure the heavier side has sufficient coverage without sitting too close to the hairline
Finally, think about “movement identity.” Some people love bouncy blowouts, others love loose beach waves, others prefer sleek and straight. Choose a blend strategy that supports your identity. When your extensions match how you naturally wear your hair, they look more believable with less effort.
Styling Ideas
Tape-ins shine in styles that rely on a smooth fall, consistent density, and natural movement. With the right blend, many daily styles become easier: ponytails look fuller, waves look more luxurious, and blowouts hold their shape longer because the hair has more structure.
Daily styles that look polished without feeling overdone:
- Soft blowout bend: smooth mid-lengths, then curve the ends for a natural, expensive finish
- Loose waves: brush out curls for softness that shows dimension
- Half-up lift: uses top layers to conceal tapes and keeps the silhouette airy
- Low pony with wrapped base: minimal effort, maximum polish, especially in dimensional blonde
- Loose braid texture: added density makes braids look intentional rather than thin
If you’re planning event hair—prom, weddings, parties—tape-ins can reduce the need for heavy teasing and product buildup, which often dulls blonde. This prom styling guide can help you visualize fuller, photo-ready shapes:
Find prom hairstyles that work beautifully with added length and density
For glam inspiration that shows how proportion and finish create a premium effect, celebrity references are useful because they highlight what reads best on camera:
Explore celebrity hairstyles that translate well with tape-in density and length
On casual and travel days, accessories can make hair look styled with minimal effort, and tape-ins support a fuller silhouette that still looks intentional:
Try bandana hairstyles that look elevated with fuller, blended lengths
If you’re working with shorter hair, tape-ins can be transformative, but blending strategy matters. This guide explains why extensions can be especially impactful for short cuts and grow-out phases:
See why extensions are a game-changer for short hair transformations
For shoppers who want more volume without a dramatic length shift, technique matters more than more hair. Clip-in techniques can still teach placement logic that translates to tape-ins and helps you understand where volume makes the biggest difference:
Learn volume techniques that improve fullness and blending across styles
To keep styles looking premium, prioritize controlled softness. Overly stiff curls or heavy sprays can make blonde look dull and “set.” A lighter finish with touchable movement typically reads more expensive and more modern.
Care and Maintenance
Great blonde tape-ins are maintained, not managed. The goal is simple: keep the hair soft, keep the cuticle smooth, and prevent buildup near attachment points. Tape-ins can look remarkably natural for weeks, but they perform best when your routine is consistent and lightweight.
Daily and weekly habits that protect tape-ins:
- Brush gently from ends upward, supporting hair near the tape area to avoid tugging
- Wash only when needed; over-washing can dry the hair and shorten longevity
- Condition mid-lengths and ends; avoid heavy products directly at the tape area
- Use heat protectant consistently and keep tools at the lowest effective temperature
- Sleep with hair secured loosely to reduce friction and tangling
The most common reason tape-ins look less natural over time isn’t the method—it’s friction and buildup. When hair tangles, it loses movement and looks “separated.” When hair is coated, it loses brightness and looks dull. Your routine should prioritize smoothness and lightness: enough hydration to stay soft, enough cleansing to stay clear, and enough discipline to protect the tape area.
Micro-intent: Protect tape adhesion with product placement discipline
Tape-ins perform best when oils and heavy conditioners are kept away from the tape area. Product buildup can weaken adhesion and create slippage. This doesn’t mean your hair should be dry; it means moisture should live in the mid-lengths and ends, while the root area stays clean and lightweight. If you prefer rich leave-ins, apply them after drying and focus strictly on the lower half of the hair.
Adhesion discipline also includes how you handle heat at the root. Direct heat near tapes can compromise the bond or attract product residue to the area. If you use hot tools, keep the hottest passes on mid-lengths and ends, then finish the top lightly for polish without overheating the attachment zone.
Micro-intent: Keep blonde bright by controlling buildup, minerals, and heat
Blonde dullness often comes from surface issues: mineral deposits from hard water, styling residue, and heat roughness that changes how hair reflects light. A gentle, appropriate reset routine combined with lightweight hydration can restore movement and shine. The most effective strategy is prevention: heat protection, careful product choice, and consistent detangling so the cuticle stays smooth.
Brightness is also influenced by how cleanly hair dries. If you air-dry frequently, ensure hair is detangled and smoothed while drying so it doesn’t set in a rough pattern. If you blow-dry, use controlled airflow and avoid over-brushing near the tape area. Smoothness equals shine; shine equals a brighter-looking blonde.
If you want a deep education path on tape-in care, wear time, and what impacts longevity, these guides offer detailed answers:
Read a complete guide to tape-in hair extensions from application to maintenance
Learn what affects how long tape-in hair extensions last in real life
Understand tape-in longevity and what to expect across wear cycles
Fine hair has specific needs: low-profile placement, minimal tension, and careful product selection near the roots. If fine hair is your baseline, this guide focuses on why tape-ins can be a particularly strong choice:
Explore why tape-in extensions can be a game-changer for fine hair
Practical maintenance habits that preserve softness and reduce tangling:
- Detangle before washing so water doesn’t tighten knots
- Pat dry instead of rough towel-drying to reduce friction
- Keep conditioning on mid-lengths and ends to preserve movement
- Secure hair loosely at night to reduce rubbing and twisting
- Refresh with light finishing products rather than layering heavy oils
- Plan maintenance appointments based on growth so tapes remain discreet and comfortable
Category Comparisons
Choosing tape-ins is easier when you compare them to other methods and to other tape-in variants. The best method is the one you’ll maintain consistently and wear comfortably—because comfort determines whether you style your hair confidently or spend your days trying to hide it.
Tape-ins are known for a flat, low-profile feel and a sleek fall that supports polished styling. They often suit people who want consistent daily wear and prefer not to apply and remove hair regularly. The trade-off is that you must protect the tape area from heavy products and be mindful of maintenance cycles.
Micro-intent: Compare tape-ins to nano rings for your lifestyle
If you’re choosing between tape-ins and ring-based options, consider your preferences around adhesives, maintenance cadence, and feel. Tape-ins are flat and discreet, often favored for sleek looks. Ring-based methods can appeal to those who prefer no adhesive, but they may feel different at the scalp and require different maintenance. For a detailed pros-and-cons breakdown, this comparison is a useful reference:
Compare nano rings vs tape-ins with practical pros and cons for everyday wear
Color-category comparisons can also guide your decision. If you prefer a high-contrast look, you may prioritize shades that read intentional rather than almost matching. If you prefer natural realism, you may prioritize dimensional blends that mimic highlights and lowlights.
Explore tape-ins by color story and styling goals:
- Shop black tape-in extensions for rich depth and sleek contrast looks
- Browse brown tape-in extensions for natural blending and warm dimension
- Explore ombre tape-ins for gradient color and salon-inspired dimension
- Discover silver tape-ins for cool-toned statements and modern edge
And if you like to switch between methods depending on the occasion—tape-ins for daily wear and removable volume for events—clip-ins can complement your routine:
Add blonde clip-ins for flexible volume on event days and quick styling changes
Comparison questions that lead to better outcomes:
- Do you want to sleep in the hair daily, or remove hair at night?
- Do you prefer a sleek finish, or is your natural texture wavy?
- How comfortable are you with maintenance cycles and careful product placement?
- Will you wear hair up often, where concealment under tension matters?
- Do you want maximum discretion, or are you comfortable with a slightly more structured feel?
Featured Picks
Featured picks below are chosen to represent different priorities: bright blonde impact, invisible blending, and versatile everyday wear. Use them as reference points, then choose the shade depth and tone strategy that matches your hair and your lifestyle.
If you want a bright blonde tone in a tape-in format, this option is designed for a crisp, high-impact blonde look that can still blend naturally when undertone is aligned:
Choose bleach blonde tape-ins for a bright, clean blonde finish
If your goal is straight, sleek length with Remy hair characteristics in tape-in format, consider this option as a baseline for polished everyday styling:
Explore straight Remy tape-ins for sleek length and a smooth finish
If you prefer Brazilian Remy hair in a balanced weight, this option can be a strong choice for natural movement and everyday wearability:
Consider Brazilian Remy tape-ins for natural movement and an easy daily blend
If you want Brazilian human hair tape-ins with a practical, wearable density, this option supports a fuller silhouette without an overly heavy feel when placed correctly:
Choose Brazilian human hair tape-ins for a fuller look with everyday comfort
If you’re looking for tape-ins in a classic configuration that supports consistent blending through mid-lengths and ends, this option can be used to build a seamless everyday result:
Select a classic tape-in set for consistent blending and reliable fullness
If you want a mixed-color option with invisible skin wefts for discreet blending and tonal dimension, this pick supports a nuanced color story that reads natural in multiple lights:
Try mixed-colour invisible skin wefts for discreet blending and dimensional tone
If you’re considering a specific length as your signature, 22 inches is often a sweet spot: long enough to feel luxurious, but still manageable for daily wear when your care routine is consistent:
See why 22-inch tape-ins are a popular length for luxe, wearable hair
How to pick among featured options without overthinking:
- If your priority is maximum brightness, start with a clean blonde tone and commit to consistent softness-focused care
- If your priority is daily polish, choose a baseline that supports sleek styling and easy blending
- If your priority is realism, lean toward mixed-color or dimensional options that mimic highlights and lowlights
- If your priority is comfort, focus on lightweight feel and a maintenance plan you’ll follow
Buying Mistakes
Most tape-in regrets come from preventable mismatches—usually shade strategy, coverage, or maintenance habits. Blonde shows errors quickly, so a careful decision upfront saves time and frustration later.
Micro-intent: Avoid buying too light, too cool, or too much hair at once
Three overcorrections create the most obvious results. Buying too light can create a disconnected panel effect at the ends. Choosing a tone much cooler than your natural hair can look gray under warm indoor lighting. Adding too much density can overwhelm fine hair and make tapes harder to conceal. A safer approach is matching your ends, choosing dimension when unsure, and building coverage gradually until the silhouette looks balanced.
Other common buying mistakes to avoid:
- Ignoring your parting habits, leading to placement that shows when you switch styles
- Choosing a length that requires more styling than you realistically want to do
- Applying heavy oils at the root area, which can weaken adhesion and cause slippage
- Expecting straight styling to hide mismatched density; straight hair reveals more than waves
- Forgetting finish: very glossy hair can look separate if your natural hair is matte
- Skipping a plan for maintenance appointments and re-taping cycles
Buying mistakes often come from a mismatch between your desired aesthetic and your maintenance tolerance. If you love a bright, ultra-light blonde but dislike frequent styling and careful product routines, you may be happier with a dimensional blonde that stays believable without perfection. If you love dramatic length but prefer low-effort mornings, consider choosing a length that still feels luxe but doesn’t require daily detangling and styling.
Another subtle mistake is neglecting “hairline reality.” Tape-ins can look invisible in down styles, but if you frequently wear hair pulled back tightly, you need a placement plan that supports upstyles. If you want ponytails and buns to look flawless, build that into your install strategy rather than hoping it will work automatically.
Buying smart is about alignment: your method must fit your routine, your shade must fit your real lighting, and your coverage must fit your hair density. When those variables align, tape-ins look natural not only on day one, but throughout the wear cycle.
FAQ
-
How long do tape-in hair extensions typically last?
Wear time depends on hair growth, care routine, and product habits near the tape area. Many people wear tape-ins for weeks at a time before maintenance is needed, then reuse hair through multiple re-taping cycles when cared for properly. Consistent, lightweight routines tend to improve longevity.
-
Are tape-ins a good option for fine hair?
They can be, because the attachment is flat and distributes weight evenly when placed correctly. The key is conservative coverage, strategic placement, and avoiding heavy products near the roots that could cause slippage. When installed thoughtfully, tape-ins can add fullness without bulk.
-
Should I match tape-ins to my roots or my ends?
For down styles, match your ends first, because that’s where the blend is most visible. Root depth can be handled through dimensional blends that mimic your existing color story. If you wear your hair up frequently, discuss placement and tone strategy to keep the blend believable around the sides and crown.
-
What’s the biggest mistake people make with blonde tape-ins?
Choosing a shade that’s too light or too cool in hopes of looking brighter. That can create a disconnected look in daylight or a gray cast indoors. A more reliable approach is matching ends and choosing dimensional tones that look natural across lighting.
-
Can I style tape-ins with heat tools?
Yes, but use heat protection consistently and keep tools at the lowest effective temperature. Heat affects softness and shine, and blonde can show dryness quickly. Styling your natural hair and extensions together also improves blending.
-
Do tape-ins show if I wear my hair in a ponytail?
They can if placement isn’t planned for upstyles. If you wear ponytails often, you’ll want strategic placement that supports the sides and keeps tapes concealed under tension. Soft, lower ponytails are typically easier than high, tight styles.
-
How do I keep tape-in hair from tangling?
Detangle gently from ends upward, reduce friction at night, and keep the cuticle smooth with lightweight conditioning on mid-lengths and ends. Avoid heavy oils that can cause separation and attract buildup. Consistent brushing and careful sleep habits make the biggest difference.
-
Can tape-ins help me avoid frequent bleaching appointments?
Extensions can enhance the overall blonde effect by adding brightness, density, and dimension without requiring more lift on your natural hair. Many people use extensions to maintain a polished blonde look while spacing out chemical services. The key is choosing tones that integrate with your existing color story.
-
What tape-in length is the most wearable for everyday life?
Wearability depends on your lifestyle and styling preferences, but many people find mid-to-long lengths balance impact and manageability. If you want a luxe look without constant upkeep, choose a length you can maintain comfortably with your daily routine and sleep habits.
-
How do I choose between tape-ins and another method?
Choose tape-ins if you want a flat, discreet feel with consistent everyday wear. If you prefer no adhesive, ring-based methods may appeal, but they feel different and have different maintenance needs. Consider your comfort preferences, styling habits, and how often you want to remove or restyle hair.
Conclusion
Blonde tape-in hair extensions are one of the most polished ways to add length, density, and modern blonde dimension with an everyday-wear feel. The best results come from a clear decision sequence: define your goal, match your ends, choose undertone honestly in daylight, align texture and finish, and commit to a lightweight care routine that protects adhesion and softness. When those pieces come together, tape-ins don’t look like extensions—they look like the best version of your hair, consistently.
If you want a quick next step, shop by the blend you actually live in: dimensional blonde for realism, brighter blonde for statement impact, and invisible tape-ins for the flattest, most discreet wear. Then plan coverage based on your density and how you style most often.