
-

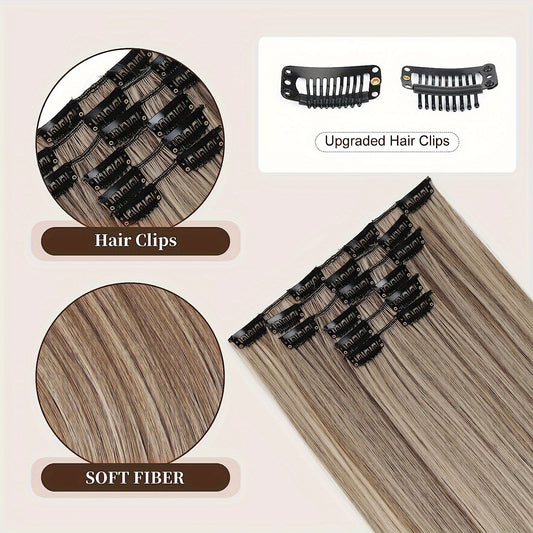
24 Inch Clip In Long Straight Synthetic Hair Extension | 6PCS Balayage Pale Golden Honey Thick Hairpieces
Regular price $109.99 USDSale price $109.99 USDUnit price per -

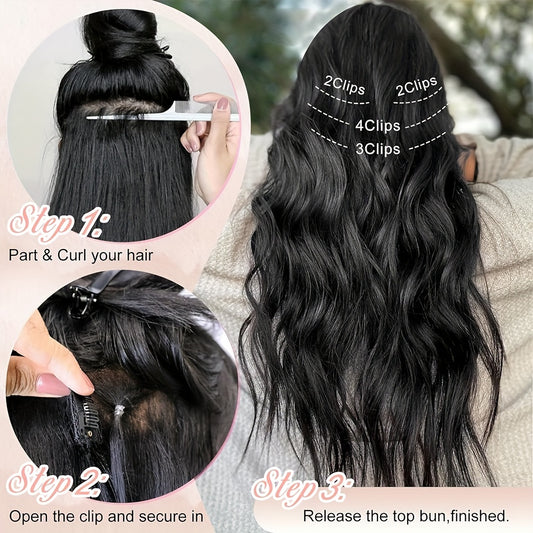
4pcs Thick Clip In Long Wavy Synthetic Hair Extensions
Regular price From $114.84 USDRegular priceUnit price per$14.84 USDSale price From $114.84 USD -

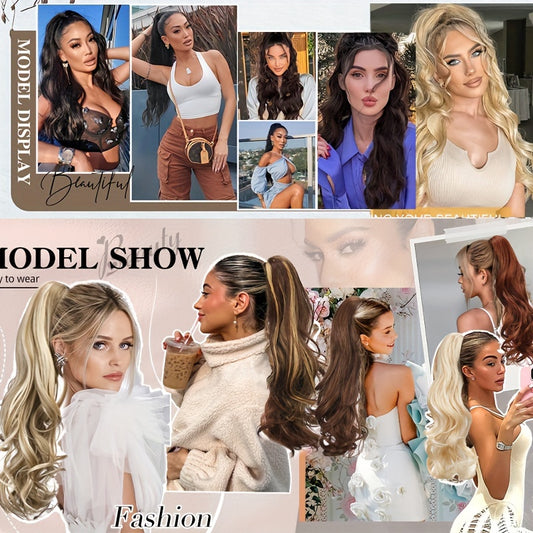
18 INCH Long Natural Curly Wavy Claw Clip Ponytail Extensions
Regular price $110.05 USDSale price $110.05 USDUnit price per -
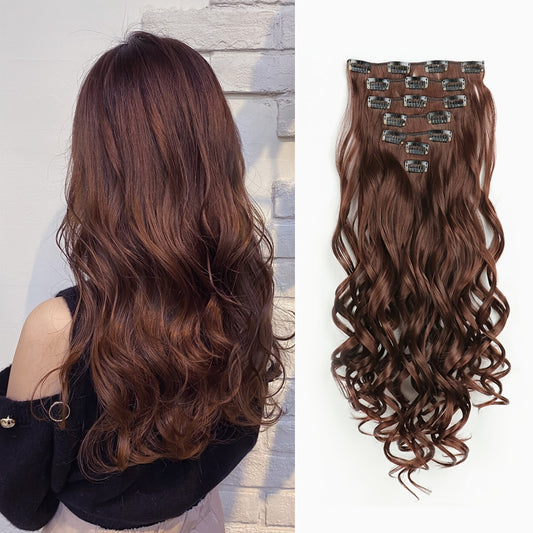
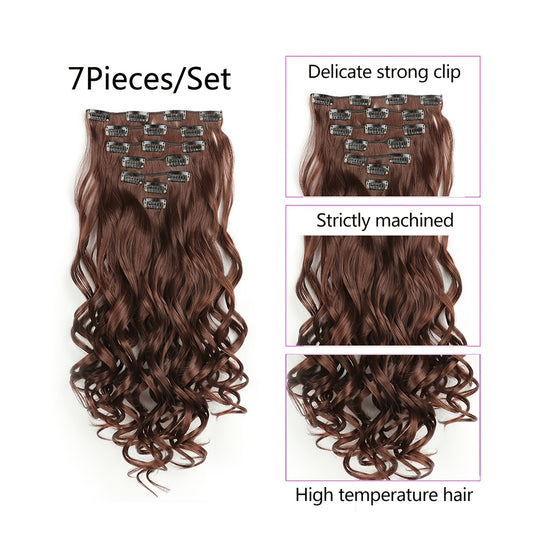
22 Inch Full Head Clip In Hair Extensions
Regular price From $105.19 USDRegular priceUnit price per$3.99 USDSale price From $105.19 USD


Balayage Clip In Hair Extensions: The Seamless Dimension Playbook for Natural Highlights, Instant Volume, and Everyday Realism
Balayage clip in hair extensions are the closest thing to “effortless color” you can choose on your own terms: a softly blended lift through the lengths, a believable root story, and the kind of dimension that makes even simple styling look finished. The goal isn’t to look like you changed your hair overnight—it’s to look like you’ve always had naturally brightened, healthier-looking hair with better shape and fuller ends. If you want the most natural result, focus on three decisions: undertone harmony, texture matching, and coverage that supports your silhouette from the sides as well as the back. Start with the balayage clip in hair extensions collection, then use the guide below to choose like a pro.
What This Collection Is and Who It’s For
Balayage clip-ins are designed to mimic how real hair lightens: not evenly, not harshly, and not from the roots down like a uniform dye job. A well-designed balayage blend keeps depth near the top and introduces lighter tones through the mid-lengths and ends—often with multiple transitional tones in between. That multi-tone structure is what makes the look feel “grown-in” rather than applied.
This collection is for anyone who wants the benefits of dimension—optical thickness, movement, and a more expensive finish—without locking themselves into a salon schedule. It’s especially useful if:
-
You want highlights without frequent toning, touch-ups, or the commitment of permanent color.
-
You love the look of thicker ends and a stronger perimeter, but still want hair to read natural up close.
-
You need hair that performs across real life: daylight, indoor lighting, photos, and quick styling days.
-
You like the idea of changing your look by occasion—subtle on weekdays, more dramatic on weekends.
Balayage clip-ins can also be a smart confidence move if you’re in a grow-out phase. When your haircut is in-between lengths, dimension and fullness make the shape look intentional. Instead of feeling like you’re waiting for your hair to “get there,” you can live in a polished version of it now.
Why This Category Matters Now
Modern hair trends are less about extreme change and more about believable luxury: softness, movement, and depth that looks like it belongs. Balayage fits that moment because it’s inherently nuanced—light where it should be, shadow where it needs to be, and transitions that look natural even when you move.
There’s also a practical reason balayage clip-ins are having a moment: cameras are sharper than ever. Mixed lighting can expose harsh lines, mismatched undertones, and unnatural shine. Balayage’s multi-tone construction is forgiving in that environment because it gives the eye more “truth cues”—variation, light reflection, and a color story that looks organic rather than flat.
If you’re comparing options and wondering why clip-ins remain the fastest route to visible change, this guide to quick transformations with clip hair extensions frames the value clearly: clip-ins let you upgrade length, volume, and overall finish without committing to a method you can’t easily undo.
How to Choose the Right Option
Decision Framework
Use this method to keep your choice grounded in your real routine—not just a perfect product photo.
-
Goal → Shade/undertone → Texture/finish → Construction/type → Weight/coverage → Occasion/frequency → Care tolerance → Budget/value
This framework matters because balayage is a combination decision. You’re not just choosing “a color.” You’re choosing how the color sits next to your roots, how it moves through the mid-lengths, how it reflects light at the ends, and how it behaves when styled. When those factors align, the hair looks like it belongs to you—even in daylight and close-up photos.
How to choose balayage clip ins for thin hair right now
If your hair is fine, choose coverage that supports the mid-lengths and sides before you chase dramatic length. Thin hair can look most “obvious” when the ends are too long without enough density to back them up. Softer balayage contrast often flatters fine hair because it creates depth without emphasizing see-through areas. A gentle wave or bend can make the transition look seamless by creating overlap where the eye might otherwise see a line.
What balayage clip ins look most natural in daylight
Daylight is the ultimate honesty test. The most natural balayage looks like a subtle lift from your base, not a separate bright piece attached at the ends. Match your root depth first, then select highlights that live within your warmth range. Finally, ensure the finish isn’t overly glossy compared to your natural hair. Soft movement—waves or brushed bends—helps light reflect naturally, which makes the blend look real.
How to match undertones without overthinking it
In indirect daylight, ask whether your hair reads smoky (cool), honeyed (warm), or balanced (neutral). Choose a balayage blend that shares that temperature. Warm hair paired with icy highlights can look gray; cool hair paired with very golden highlights can look brassy. Undertone harmony is the quiet detail that makes balayage read “grown-in.”
How many wefts do you actually need for believable dimension
Piece count is less important than distribution. A believable balayage effect should wrap around the head, not live only at the back. Side support is crucial so the front lengths connect naturally into the back and the color story looks continuous. If you’re unsure, choose a setup that allows you to build gradually: start balanced, then add for events.
Best option for daily wear vs special occasions
Daily wear favors comfort and repeatability: softer contrast, lighter coverage, and a texture that blends without effort. Special occasions can handle fuller coverage and stronger contrast because you’ll style more deliberately and set the shape longer. If you want one set that does both, choose a blend that looks subtle when brushed out but becomes more dimensional when waved.
How to choose a length that blends easily if you’re new to clip-ins
Beginners often get the most natural results by starting with a more blendable length and refining placement before going ultra-long. Shorter-to-mid lengths are forgiving because the transition point is easier to hide with styling. If you want realistic styling expectations and shape ideas that work especially well for newer wearers, this short chic 12-inch clip-in style guide offers practical inspiration you can scale up later.
What to do if the blend line shows
A visible blend line usually comes from one of three issues: the top weft is placed too high, the sides are under-supported, or your natural hair and extensions have different finishes. Lower the top placement slightly, add side coverage, and style everything together with a soft bend at the transition point. Overlap hides edges; perfectly straight separation reveals them.
How to avoid a stripey balayage effect
Stripey balayage happens when contrast is too harsh or when hair is styled too straight and segmented. Choose blends with a gradual melt and use waves or brushed curls to diffuse the color. If you prefer straighter looks, keep a subtle bend through the mid-lengths so highlights catch light softly rather than appearing as bands.
How to get volume without bulky stacking
Volume should look airy, not heavy. The best approach is strategic placement: build fullness where your hair is naturally thin (often the sides and lower mid-lengths) rather than stacking dense pieces in one spot. For a placement blueprint that supports natural-looking volume, use these clip-in volume techniques to guide how you distribute weight and shape the silhouette.
How to choose between halo and clip-ins for a dimensional look
Halos can be quick, but clip-ins allow precision placement—especially important for balayage, where dimension needs to look continuous around the head. If you’re comparing the two, this halo vs clip-ins breakdown helps you decide based on your routine, comfort preference, and blending goals.
Double weft vs single weft: what changes in the final look
Weft structure affects density, feel, and how quickly you can build fullness. Some wearers love denser wefts for fast transformation; others prefer lighter options for daily comfort. If you want a deeper explanation of the tradeoffs—especially for balancing comfort with fullness—this double-weft versus single-weft guide will help you choose the construction that fits your hair density and wear frequency.
How to choose clip-ins that feel comfortable across long days
Comfort is part of realism. If hair feels heavy, you’ll touch it and adjust it more, and that can disrupt the blend. Distribute clips evenly, avoid concentrating the heaviest pieces too low, and keep the crown smooth so the hair falls naturally. The most believable results are usually the ones that feel effortless to wear.
Shade, Undertone, and Finish Selection
Balayage is a transition design: base tone, highlight tone, and the softness of the melt between them. The most natural sets typically match the base close to your root depth and keep highlights within a believable “lift range” for your undertone. When highlights are too far from your natural warmth level, the look can feel detached unless styling is very controlled.
To shop efficiently, choose your base family first, then decide how much contrast you want, then choose texture. This order keeps your decisions cohesive and reduces mismatch risk.
Choosing balayage for dark roots without harsh contrast
Dark roots look best with highlights that glow rather than jump. Keep the base close to your root depth and choose highlights that mimic sun-lift. If you want to anchor your root match before deciding on a balayage blend, browse black clip-in hair extensions for deep, seamless base matching and then select a balayage transition that stays believable next to that depth.
Balayage for brunettes: the most wearable “natural luxury”
Brunette balayage often looks expensive because brown naturally carries shadow and dimension. Caramel, chestnut, and soft neutral lifts can brighten without feeling dramatic. If brunette is your everyday identity, compare with brown clip-in hair extensions for easy daily blending and choose balayage highlights that complement your undertone rather than overpower it.
Balayage for blondes: avoiding brassiness and dullness
Blonde blends can look stunning, but tone mistakes show quickly. Cool blondes can look brassy with overly warm ends, while warm blondes can look gray with overly cool highlights. If you’re confirming your blonde direction, blonde clip-in hair extensions for tonal alignment can help you calibrate warmth before choosing a balayage transition.
Ombre vs balayage: which transition suits your style
Balayage is softer and scattered; ombre is more defined from mid-length to ends. If you want brighter ends and a clearer gradient, compare with ombre clip-in hair extensions for a bold gradient effect. If you want a sun-kissed, grown-in feel, balayage is usually the more natural choice.
Finish selection: the “expensive hair” rule
Premium hair usually looks soft and healthy rather than overly reflective. Choose a sheen level that matches your natural hair after styling, not on an unstyled day. If your hair is naturally matte, avoid a glossy finish that can look artificial under flash. If your hair shines, keep it natural and rely on styling for polish. Movement helps: a brushed wave often looks more realistic than rigid curls.
Texture and Blend Strategy
Texture is the realism engine. Even perfect color can look wrong if your natural hair behaves differently than the extensions. The easiest strategy is to match how your hair moves and changes through the day, then style everything together so the finish reads as one unified texture story.
Blend strategy also includes placement. Balayage should look continuous around the head, which means side pieces matter. The brightest pieces should be placed thoughtfully so the highlight doesn’t look concentrated only at the back.
How to blend with blunt haircuts
Blunt cuts demand a consistent perimeter. Choose enough density so the ends don’t look wispy compared to your natural hair. Then style with a soft bend through the last few inches so the perimeter reads as one continuous shape. Ultra-straight styling can expose transitions; gentle curvature hides them.
How to blend with layered haircuts
Layers are forgiving because they create natural movement. Keep the highest placement low enough that your shortest layers veil it. Style for overlap: a blowout curve or brushed wave helps your layers and the extensions move as one silhouette, which is the fastest way to make balayage look grown-in.
How to blend with short hair without it looking obvious
Short-to-long blending is an illusion that relies on movement and smart distribution. Softer contrast helps the eye stop searching for the transition point. For a practical perspective on why extensions can be especially effective for shorter cuts—and how to style them so the result looks natural—see these reasons extensions are a game-changer for short hair.
What to do if it looks obvious at the sides
If the sides look obvious near the ears, you likely need more side support or a style that sweeps forward slightly. Avoid sharply tucking behind the ears unless your blend is flawless. Use face-framing bends to create overlap and keep the dimension dispersed rather than concentrated in one “front stripe.”
Choosing a sleek finish that stays believable
Sleek styles look premium, but they’re less forgiving. If you love straight looks, choose hair that matches your smoothness level and keep sheen natural. You can compare the finish expectations in clip-on straight hair extensions to decide whether your routine supports consistently sleek blending.
Why waves make balayage look more natural
Waves diffuse contrast and hide minor mismatches. They also create highlight and shadow naturally, which makes balayage look richer. If you want the most forgiving texture path, explore clip-on wavy hair extensions and choose a highlight tone that matches your undertone so the movement reads organic.
Curly blends: texture first, color second
Curly blending depends on curl pattern consistency. When texture matches, color has more flexibility because curls naturally break up light reflection. If you’re curl-forward, start with curly clip-in hair extensions and choose dimension that complements your curl definition rather than fighting it.
What to do if highlights look too bright once installed
If the highlights feel brighter than expected, styling can soften them. Waves and brushed curls diffuse contrast. You can also position the brightest pieces lower so the crown stays closer to your natural base, creating a more grown-in root story. The goal is distribution—making the brightness look intentional, not accidental.
What to do if the blend looks good indoors but off outdoors
This is usually an undertone issue. Indoor lighting can hide warmth or coolness differences that daylight exposes. If outdoor light makes the blend feel “separate,” prioritize root-adjacent matching and keep your highlight warmth level closer to your natural tones. A soft wave often helps because it breaks up the light pattern and reduces the appearance of a hard boundary.
Styling Ideas: Daily + Event
Balayage styling is most effective when it’s simple. Dimension does the heavy lifting, so your job is to choose shapes that showcase it: movement through the mid-lengths, a controlled crown, and ends that look soft. Think in two categories: daily hair you can repeat quickly, and event hair that photographs beautifully.
Quick looks for everyday mornings
-
Low ponytail with a wrapped section for polish and a clean silhouette.
-
Half-up twist that keeps the face open while showing dimension through the lengths.
-
Soft bends through the mid-lengths with slightly straighter ends for modern movement.
-
Claw-clip French twist with lengths left out for effortless elevation.
Photo-ready looks for parties, weddings, and content days
For camera-friendly styling, aim for controlled volume and soft movement. A blowout curve makes balayage look expensive because highlights catch light smoothly. Brushed waves add depth and reduce harsh contrast. If you’re planning a formal style, these prom hairstyles for medium-length hair translate well to clip-ins—keep the structure and let dimension add impact.
How to keep daily styling from damaging the ends
Balayage often places the lightest tones at the ends, and ends are the first area to look dry if heat is overused. Use moderate heat, fewer passes, and styles that don’t require constant re-curling. A brushed wave that relaxes gracefully usually looks more natural than a tight curl you feel pressured to “maintain.”
Accessories that make balayage feel intentional
Accessories can elevate the look and help with side blending while you refine placement. A scarf or bandana also makes the style feel designed rather than accidental. If you like accessory styling, these bandana hairstyle ideas pair especially well with dimensional color.
Care, Maintenance, and Longevity
Clip-ins last longest when you treat them like delicate fabric, not scalp-attached hair. They don’t receive scalp oils, so overwashing can dry them out. Friction from clothing, bags, and seating is what ages the ends fastest. Your goal is to preserve softness and movement, because softness is what makes balayage look premium rather than worn.
Detangling routine that protects highlighted ends
Detangle from ends upward, supporting hair above knots so you don’t pull tension through the weft. A short detangle after each wear prevents small tangles from tightening into stubborn knots. When hair moves freely, highlights look brighter and more natural because they reflect light smoothly.
Washing cadence that keeps texture believable
Wash only when buildup makes styling harder or the hair loses softness. Condition mid-lengths to ends and avoid heavy buildup near the top. Let hair air-dry mostly before using heat to preserve movement and keep the blend looking natural.
Storage habits that preserve the blend
Store clip-ins flat or hung so ends don’t kink. If traveling, wrap them to reduce friction. In balayage sets, the light tones often live at the ends, so protecting ends protects the most visible part of the color story.
Comparing Nearby Categories
Balayage is dimension-first, but your best match depends on base family, texture family, and weft structure. Comparing nearby categories keeps shopping efficient because it clarifies what you’re choosing: depth, movement, and coverage type.
How black, brown, and blonde bases change the final effect
Deep bases make highlights pop, but they require a believable root story. Brown bases often look the most naturally dimensional because depth is already built in. Blonde bases demand the most undertone precision, because small tone differences show quickly. Choosing your base family first makes every other decision easier.
Choosing double-wefted clip-ins for fast fullness
If you want more density with fewer pieces, denser weft construction can create a fuller silhouette faster. This is particularly helpful for event hair, for thicker natural hair, or for anyone who wants a strong perimeter without layering many wefts. You can explore that structure in double-wefted clip-in hair extensions and then decide whether your comfort tolerance and styling habits support that added density.
Featured Picks and Use-Case Recommendations
Featured picks are most useful when they match real-life scenarios: daily movement, full-head transformation, deep-root blending, and synthetic choices for occasional wear. The “best” option is the one that matches your lifestyle—how often you wear it, how much you style, and how much maintenance you’re willing to do to keep ends looking soft.
For everyday movement with a soft, wearable wave
If you want dimension that looks natural in motion and blends easily, consider 20-inch wavy clip-ins for daily softness and volume. Wavy texture reduces visible transition risk and makes highlights look diffused rather than stripey.
For full-head impact when you want a complete transformation
If your goal is an all-over change—length and density that looks finished even with simple styling—explore 22-inch full-head clip-ins for balanced coverage. Full-head coverage is especially useful when you want the sides and back to look equally supported.
For deep-root blending with a polished, dark base finish
If you have a darker root area and want a refined silhouette, evaluate 24-inch Remy clip-ins in deep 1B with double-weft support. Deep bases look most premium when the crown is smooth and the ends remain soft.
For an easy balayage look in a straight synthetic format
If you want to experiment with balayage dimension without commitment or you’re shopping for occasional wear, consider 24-inch synthetic balayage clip-ins in pale golden honey. The most natural result comes from matching your natural hair’s finish so the blend looks intentional.
For lightweight long-wave synthetic volume on quick days
If you want a smaller set for quick boosts—especially half-up looks and casual waves—try a 4-piece long wave synthetic set for easy fullness. This format can be ideal when you want movement and visible dimension without a full install.
For thicker wavy synthetic volume with a denser feel
If you want bolder volume in a wavy synthetic format for occasional glam, consider a 4-piece double-weft wavy synthetic set for higher-impact volume. Pair with soft waves in your natural hair so everything reads cohesive.
Buying Guidance and Common Mistakes to Avoid
Balayage clip-ins look effortless when chosen well—and frustrating when chosen impulsively. The most common problems are consistent: mismatched undertone, incomplete side coverage, and styling that separates your natural hair from the extensions. Each mistake has a clear fix when you shop with realism in mind.
Mistake: choosing highlight brightness before matching undertone
A highlight can be beautiful and still look wrong if it’s too warm or too cool on you. Match the temperature of your natural hair first. When tone is compatible, small differences read like natural variation. When it isn’t, the blend can look disconnected in daylight.
Mistake: building fullness only at the back
People see the sides more than you think. If sides are under-supported, the front lengths disconnect from the back and the dimension looks incomplete. Prioritize side distribution and styles that sweep forward slightly if you’re still refining placement.
Mistake: styling only the clip-ins and not your hair
Even perfect clip-ins won’t look natural if your own hair has a different finish. Style everything together so sheen and texture match from crown to ends. A cohesive finish is the quickest path to a believable blend.
Mistake: relying on pin-straight styling to hide transitions
Pin-straight hair can be stunning, but it reveals blend lines and contrast more easily. If you’re still perfecting placement, choose soft bends or waves so overlap hides transitions. Once placement is consistent, you can wear sleek looks with more confidence.
Mistake: skipping education on how deep bases blend
If your natural base is very dark, you need a believable root story so highlights don’t look detached. If you want dedicated guidance on seamless deep-base blending, this black clip-in blending guide helps you avoid the most common deep-root mistakes.
Mistake: overcomplicating clip-ins until they stop being fun
Clip-ins are meant to be flexible, not stressful. If you find yourself overthinking every detail, it can actually make the result look less natural because hair gets over-handled. This clip-in comedy take on mastering extensions without the drama is a surprisingly helpful reminder that the most believable hair often comes from simple placement and relaxed styling.
How to set expectations before you buy your first set
The fastest way to avoid disappointment is to understand what “full set” means, how to distribute for your density, and how to choose texture you’ll actually wear. If you want a clear, practical pre-purchase checklist, this clip-in buying primer covers the essentials without making the process feel complicated.
FAQ
Do balayage clip in hair extensions look natural on fine hair?
Yes—when contrast is soft and distribution supports the sides and mid-lengths. Fine hair usually looks most natural with a cohesive silhouette rather than extreme length. A wavy finish often blends faster because movement hides transition points.
How do I choose the right balayage tone if my roots are darker than my ends?
Match the base near your roots first, then choose highlights that mirror your warmth level. The most believable balayage looks like gradual lift rather than a sudden jump. If highlights feel too bright once installed, waves usually soften the contrast instantly.
Is balayage better than a single-color set for realism?
Often, yes—because real hair is rarely flat. Multi-tone blends create depth and reflect light more naturally, which can make hair look thicker. The most realistic results still depend on undertone harmony and a consistent finish.
Are ombre clip-ins better than balayage for dramatic looks?
Ombre tends to be more dramatic because the gradient is clearer and ends are visibly lighter. Balayage is typically softer and more scattered. Choose based on whether you want “statement ends” or “sun-kissed dimension.”
How can I make balayage clip-ins look less stripey in photos?
Style with movement: waves or brushed curls diffuse color bands. Avoid overly separated straight sections that reveal harsh contrast lines. A smooth crown with soft mid-length movement is usually the most photo-friendly approach.
How many pieces do I need for a full look?
It depends on your hair density and goal. Subtle thickening uses fewer pieces, while a full transformation needs balanced coverage across back and sides. Side support is the biggest realism factor because it connects the front lengths into the overall shape.
Do double-weft clip-ins feel heavier than other options?
They can feel denser, which some people love for fullness and others reserve for special occasions. If you’re sensitive to weight, distribute density evenly and avoid stacking thickness too low. Comfort supports realism because you adjust your hair less during the day.
Can I wear balayage clip-ins if my hair is short?
Yes, but styling matters more. Movement and overlap are the keys—waves, half-up looks, and face framing help hide the transition point. Softer contrast is typically more forgiving on shorter cuts.
How do I choose between straight and wavy balayage clip-ins?
Choose what matches your natural hair behavior. Wavy is more forgiving and hides transitions better. Straight can look sleek and premium, but it requires closer tone matching and consistent finish, especially in daylight.
How long do balayage clip-ins last with good care?
Longevity depends on wear frequency, heat use, and storage habits. Gentle detangling, minimal overwashing, and low-friction storage preserve softness. Protect the ends carefully because the light tones often live there and ends show wear first.
What’s the easiest way to make balayage look intentional fast?
Keep the crown controlled and add a soft wave through the lengths. Waves diffuse contrast and make highlights look like they belong to the hair rather than sitting on top of it. Balanced side coverage finishes the illusion by making dimension feel continuous.
Related Collections
To browse efficiently and keep your choices organized, compare by base family (black, brunette, blonde), then by texture (straight, wavy, curly), then by density (double-weft construction) and transition style (ombre vs balayage). This base-to-texture-to-coverage pathway strengthens internal category clarity and makes your final selection feel intentional rather than experimental.
Browsing the Collection
Balayage clip in hair extensions work best when they look like they belong to your real life: a base that matches your roots, highlights that suit your undertone, and a texture that behaves like your hair in motion. Choose softness over harsh contrast, distribution over stacking, and movement over perfection. When those decisions align, balayage doesn’t look like an add-on—it looks like your hair, upgraded.
When you’re ready to compare blends, textures, and coverage in one place, start at Fabulive and revisit your chosen balayage options with a clear eye for undertone harmony, side support, and a finish you can comfortably repeat.