


How To Fit Nano Tip Hair Extensions Without Damaging Your Hair


Nano tip hair extensions are loved for one simple reason: they deliver noticeable length and fullness while staying lightweight and discreet at the root. When installed correctly, they move naturally, feel comfortable, and eliminate the bulky attachment look that makes some extension methods obvious. When installed incorrectly, however, they can lead to exactly what most people want to avoid—root tension, slippage, matting, breakage, and uneven growth-out that complicates everyday styling.
This guide is a damage-prevention-first framework for fitting nano tip hair extensions properly. You’ll learn how to prepare your hair so beads hold securely without slipping, how to section and distribute weight evenly, how to clamp without crushing your natural strands, and how to maintain your install so it remains smooth and comfortable until your next appointment. Along the way, you’ll also learn when nano tips are the right choice—and when another strand method may better suit your lifestyle.
What Nano Tip Hair Extensions Actually Are
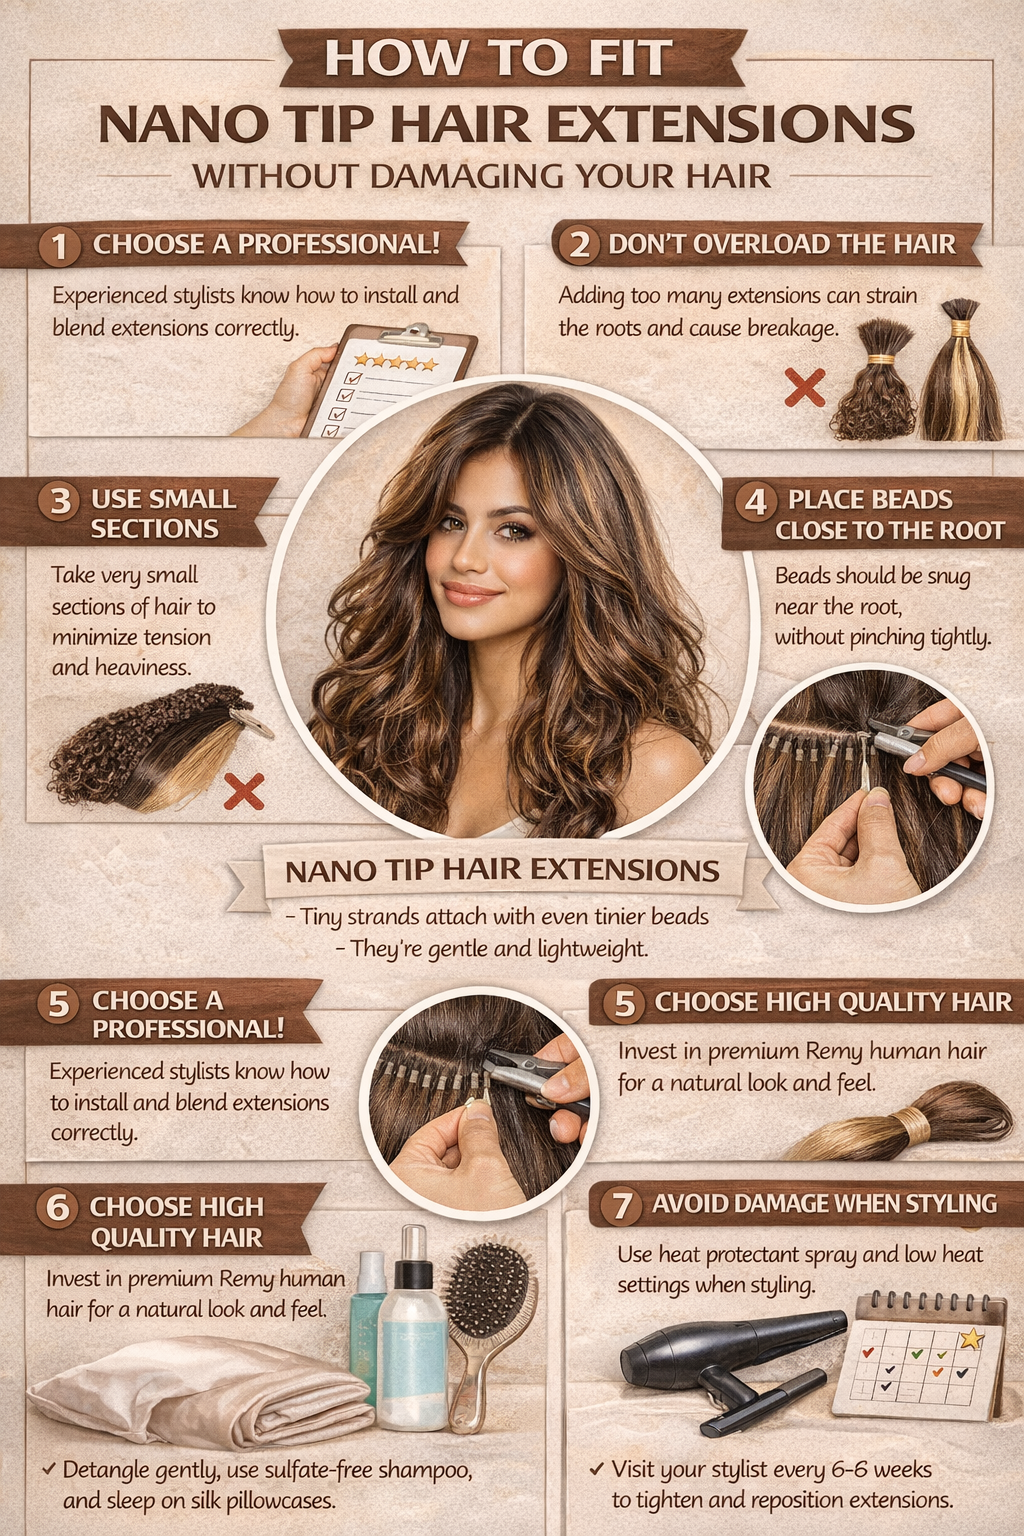
Nano tip hair extensions are a strand-by-strand method where a tiny bead secures an extension strand to a small section of your natural hair. The bead is clamped shut using professional pliers, holding the extension in place without glue, tape, or heat.
This low-profile attachment is what makes nano tips appealing. They create flexible movement, a natural root feel, and minimal bulk. However, the smaller the bead, the more important technique becomes. Nano tips do not hide uneven tension or rushed sectioning.
For a full beginner-level breakdown of how nano beads behave over time, including growth-out and maintenance expectations, read Nano bead hair extensions: a beginner’s guide to strand installs.
Who Nano Tip Hair Extensions Are Best For
Nano tips tend to work best for:
• Fine to medium hair densities
• People who want flexible parting and natural movement
• Wearers sensitive to bulky attachments
• Those committed to regular maintenance and gentle care
They may be less suitable if:
• Hair is extremely coarse and requires very high strand counts
• You frequently wear tight slick-back ponytails or buns
• Maintenance appointments are often delayed
Choosing the correct method is one of the most effective ways to prevent damage before installation even begins.
The Three Pillars Of Damage-Free Nano Tip Installs
Damage prevention has less to do with the method name and more to do with execution. Nano tips remain safe when three fundamentals are respected:
Placement – Strands must sit where your hair can comfortably support weight
Tension – Beads should be secure, never crushed or pressed against the scalp
Maintenance – Clean roots, dry bead zones, and consistent detangling
Ignoring any one of these can turn even the smallest bead into a stress point.
Choosing The Right Hair For Nano Tip Extensions
While human hair is generally preferred, compatibility matters more than labels. Look for:
• A texture that behaves like your natural hair
• A finish that matches your natural shine level
• A density that blends cleanly at the ends
If you want a real-world reference while planning strand count, length, and shade, explore pre-bonded Remy nano ring hair extensions for strand-by-strand installs.
The takeaway isn’t the product—it’s understanding how density, shade, and strand size must align with your natural hair reality.
Tools And Setup That Prevent Installation Mistakes
A clean setup matters as much as clean hair. You’ll need:
• Nano beads matched to your hair color
• Proper nano ring pliers
• Tail comb for precision sectioning
• Sectioning clips
• Clear visibility of the back of the head
Installing without visibility or rushing increases the risk of uneven tension and root stress.
Prep Day: How To Prepare Hair So Nano Tips Hold Securely
Damage prevention begins before the first bead is clamped.
• Wash hair with a clarifying or residue-removing shampoo
• Condition only mid-lengths to ends
• Dry hair completely—never apply nano tips to damp hair
• Detangle thoroughly
Avoid scalp oils and heavy root products during install week. Oils reduce bead grip and increase slippage.
Sectioning Like A Professional For Even Weight Distribution
Poor sectioning is one of the fastest paths to damage. Proper mapping:
• Distributes weight evenly across the scalp
• Avoids fragile perimeter and hairline zones
• Creates a believable blend
Start at the nape, work upward in clean horizontal rows, and keep section sizes consistent. If you wear ponytails often, reduce density near sides and temples to prevent chronic tension.
Step-By-Step Nano Tip Application Without Damage
Match the natural hair section to the strand thickness
Sections that are too thick cause pressure; sections too thin create pulling.
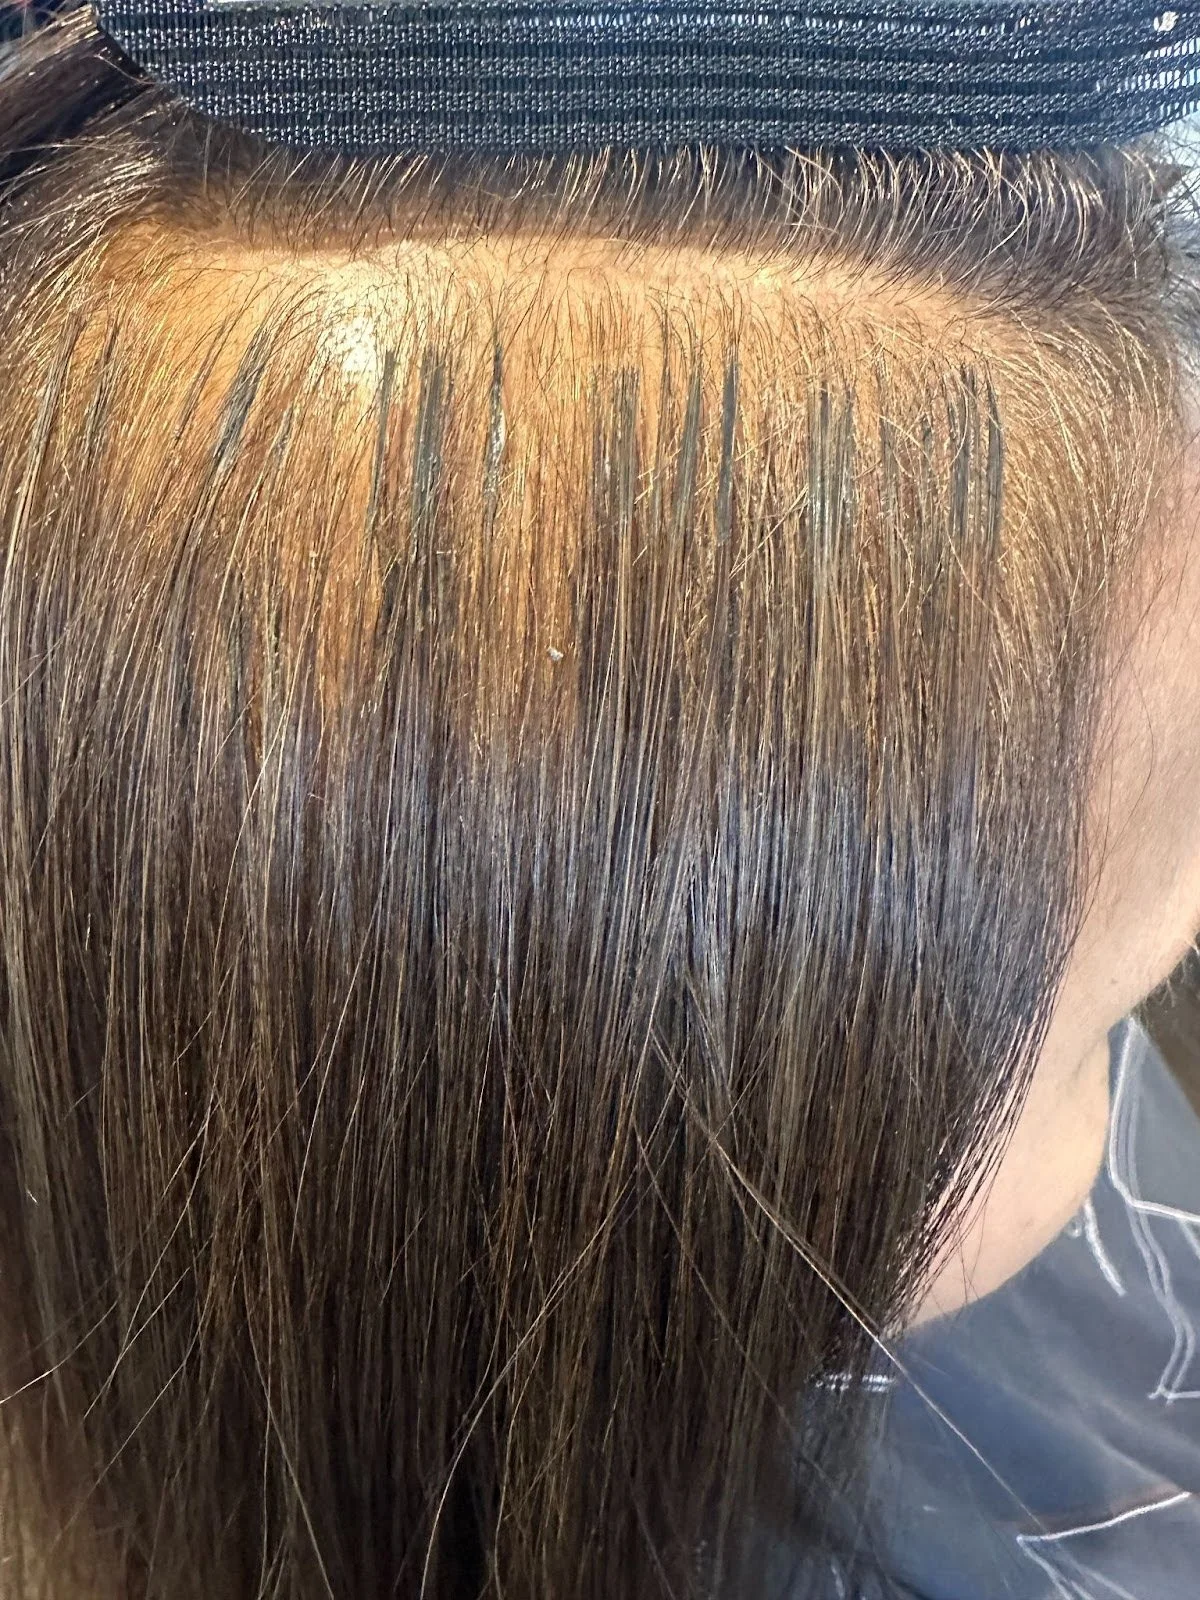
Leave a comfort gap from the scalp
Beads should not sit flush against the scalp. Natural movement requires space.
Fully seat the extension tip inside the bead
Partial insertion leads to rotation and tangling.
Clamp firmly, not aggressively
Secure the bead without crushing it. Over-tightening is a major cause of breakage.
Check comfort frequently
Pause every few strands and correct any tightness immediately.
Placement Strategies For A Seamless, Invisible Finish
• Avoid placing strands on the extreme outer perimeter
• Build density in interior zones first
• Respect your natural part and ponytail tension zones
For advanced blending strategies across strand methods, study how to achieve seamless integration when blending microlink extensions with natural hair.
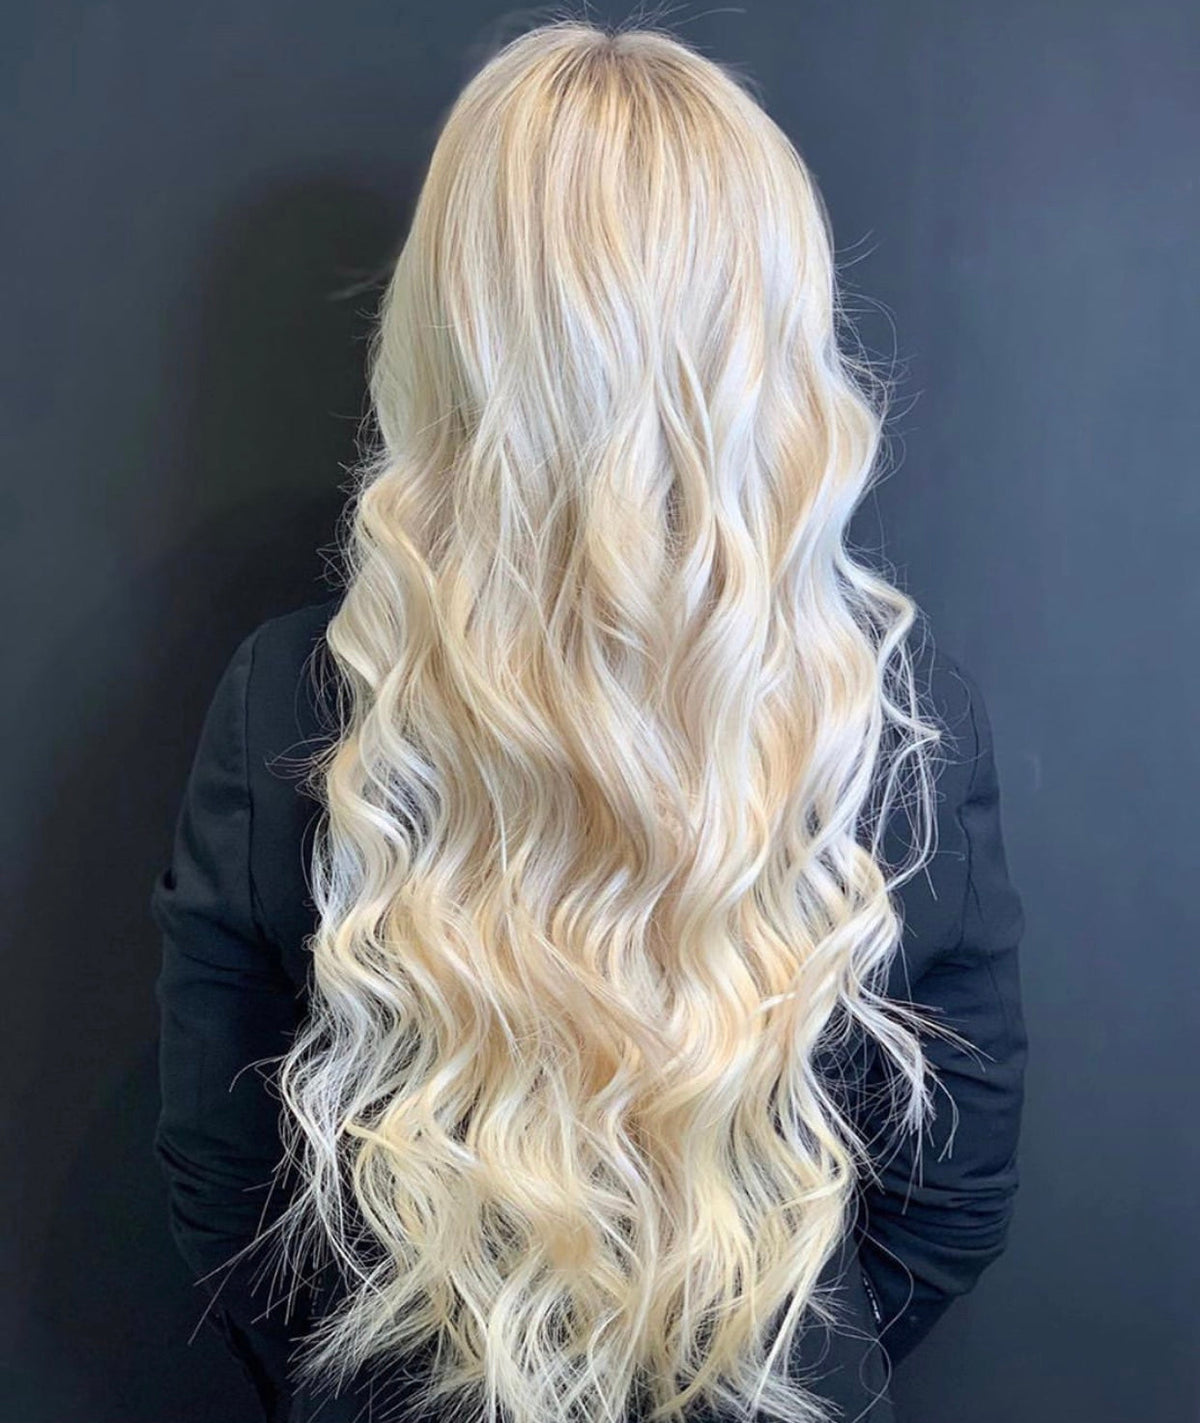
Blending The Lengths For Natural Movement
Most “extension-looking” installs fail due to shape—not color. A light blending trim:
• Softens visible transition lines
• Creates a natural taper at the ends
• Allows layers to move as one silhouette
Straight styles reveal blending issues fastest, while waves offer more forgiveness.
Shade Matching For Blondes And Multi-Tonal Hair
Blonde matching is about tone, not just lightness.
• Check color in daylight
• Match mid-length reflection
• Choose dimensional blends if your hair is highlighted
For lighter strand shades, explore blonde micro-ring and nano strand hair extensions for natural blends.

Daily Care That Prevents Matting And Breakage
• Brush gently while supporting the root
• Dry bead areas thoroughly after washing
• Sleep with hair loosely secured on satin or silk
• Never sleep with wet hair
Root friction over time is one of the most common causes of damage.
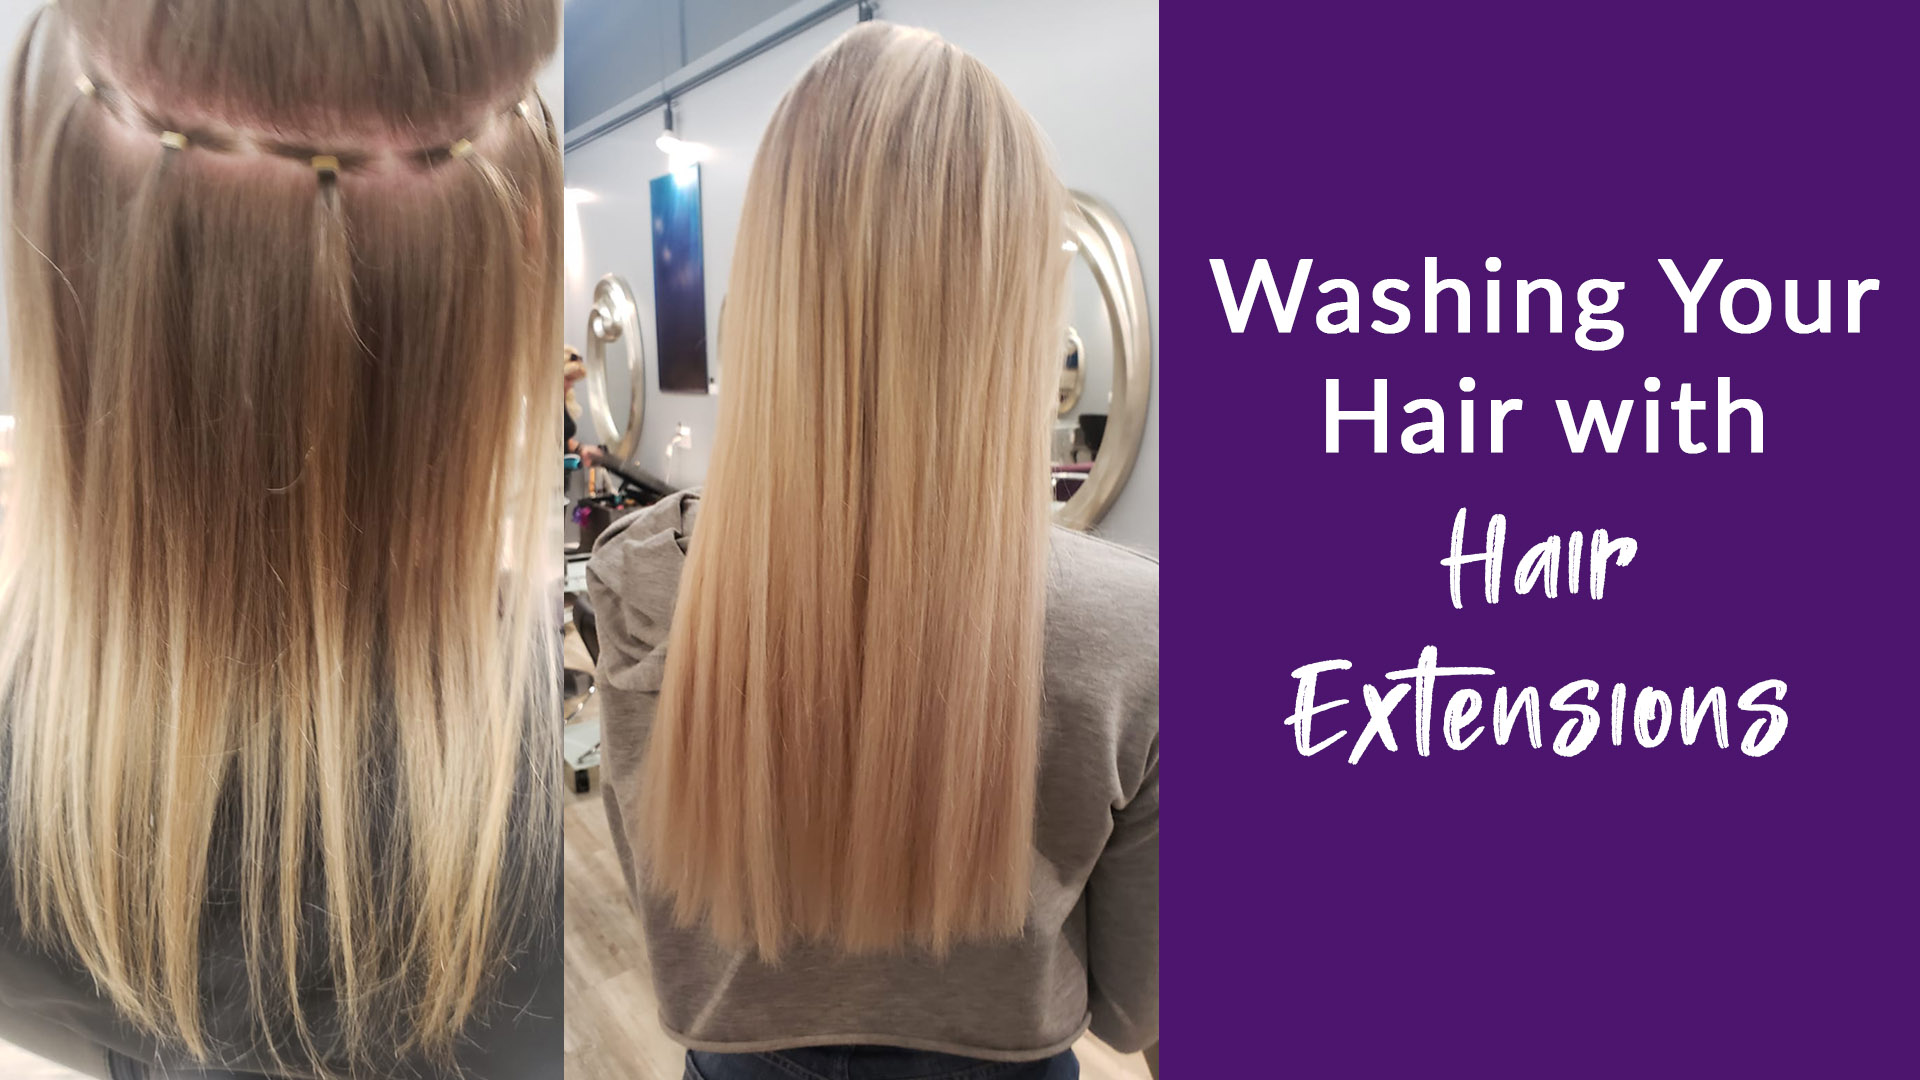
Washing Nano Tip Extensions Without Slippage
Most people do well washing 2–3 times per week.
• Shampoo the scalp gently with fingertips
• Condition mid-lengths to ends only
• Rinse thoroughly
• Blot dry—never rub
Avoid heavy masks or conditioners near bead zones.
Heat Styling Nano Tips Without Stress
• Always use heat protection
• Avoid direct heat on bead attachments
• Choose styles that last multiple days
• Use controlled airflow when blow-drying
Consistent, moderate styling is safer than frequent high-heat correction.
Why Maintenance Appointments Are Non-Negotiable
Nano tips are not a “set it and forget it” method. You’re due for maintenance if:
• Root tangling increases
• Beads rotate into visible positions
• Sections feel uneven or heavy
Delayed maintenance often leads to aggressive detangling—the biggest cause of breakage.
When Another Strand Method Might Be Smarter
Sometimes damage prevention means choosing a different method. For honest comparisons, review:
• I-tip hair extensions explained and compared for strand installs
• Nano bead hair extensions pros and cons explained clearly
Safe Removal Without Hair Loss
Always open beads in the opposite direction of the clamp. Detangle first. Never pull a strand that doesn’t slide freely. After removal, hydrate, detangle gently, and trim if needed.
Planning Your Long-Term Extension Strategy
Instead of installing maximum density every time, build gradually—especially with fine hair. Comfort and scalp health always outperform short-term fullness.
Explore future options through professional hair extensions for all application methods and learn more at Fabulive’s online beauty and hair extension hub.
Frequently Asked Questions About Nano Tip Hair Extensions
Do nano tip hair extensions damage natural hair?
When installed with correct sectioning, tension control, and maintenance, nano tips are considered a low-damage strand method.
How long do nano tip hair extensions last?
Most installs last 6–8 weeks before maintenance or repositioning is required.
Are nano tips suitable for fine hair?
Yes. Nano tips are one of the most popular options for fine hair due to their lightweight attachment.
Can I wear my hair up with nano tips?
Yes, but tight slick-back styles should be limited to avoid repeated tension.
Why do nano beads slip?
Slipping is usually caused by oily roots, incorrect clamping, or poor prep before installation.
How many strands do I need?
Strand count depends on hair density, desired length, and volume goals. A professional assessment ensures balance.
Can nano tip extensions be heat styled?
Yes, with proper heat protection and controlled temperatures.
How often should nano tips be maintained?
Every 6–8 weeks to prevent root tangling and uneven weight distribution.
Are nano tip extensions reusable?
High-quality hair can often be reused with proper care and re-tipping.