
-
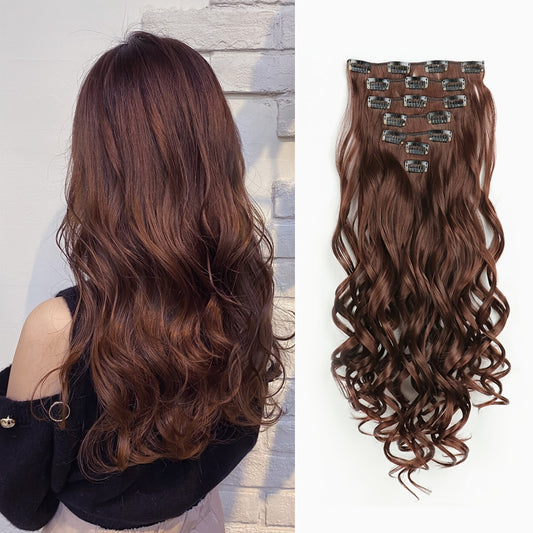
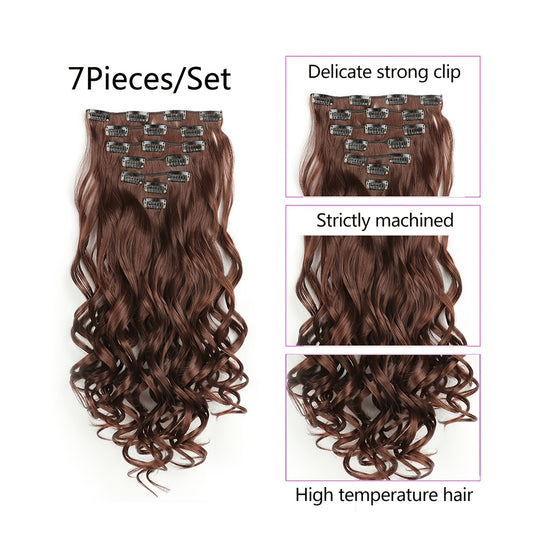
22 Inch Full Head Clip In Hair Extensions
Regular price From $105.19 USDRegular priceUnit price per$3.99 USDSale price From $105.19 USD
Blonde Clip-In Hair Extensions: The Complete Collection Guide to Seamless Blending, Realistic Tone, and On-Demand Volume
Blonde clip-in hair extensions can be the difference between “my hair is fine” and “my hair looks finished.” They add length, reinforce thin ends, and create dimensional blonde depth without the cost, commitment, and upkeep of frequent salon lightening. They’re also the shade family where shopping by a single photo fails fast: undertone mismatches show in daylight, overly bright blondes can look separate from your base, and the wrong texture can leave a visible blend line at the ends—especially when your natural hair shifts with humidity. This landing-page guide is built to function like a stylist’s buying consult. You’ll get a decision framework, shade and undertone logic, method-by-method comparisons, density planning by haircut type, troubleshooting scenarios, and wear-frequency guidance so your set looks natural in motion and stays comfortable to wear. Begin at Fabulive hair extensions for natural-looking, flexible transformations and use the sections below to browse with confidence.
Internal linking placeholder: Add link to “Color Match Help + Swatch Guidance.”
Internal linking placeholder: Add link to “Clip-In Placement Map by Head Shape.”
Internal linking placeholder: Add link to “Returns, Exchanges, and Shade-Swap Support.”
Short intro above the product grid (80–120 words)
This Blonde Clip-In Hair Extensions collection is curated for realistic tone matching, seamless blending, and wearable volume you can put in and take out on your schedule. Use the guide below to identify your best blonde undertone in daylight, choose a texture that behaves like your natural hair, and plan the number of pieces you actually need based on haircut type and density. You’ll also find styling ideas for quick daily polish and photo-ready events, plus care guidance that keeps blonde looking soft and dimensional. When you’re ready, browse blonde clip-in hair extensions for effortless length and fuller-looking ends.
What this collection is and who it’s for
Blonde clip-in hair extensions are removable wefts and pieces that attach with clips to add thickness, length, or both—without long-wear installation. That removability matters. It lets you control density (subtle for workdays, fuller for weekends), adjust placement (more support at the ends, less at the crown), and tailor tone (natural blonde, bright blonde, dimensional balayage) without touching your real hair color.
This collection is designed for several real-life profiles. It’s for natural blondes whose ends look fine in photos, even when hair is healthy. It’s for highlighted hair that has dimension but lacks fullness through the bottom third. It’s for brunettes who want to test brighter blonde tones for a season without bleaching. It’s for fine-haired shoppers who want more body without the discomfort of heavy, top-loaded volume. And it’s for anyone who needs dependable, camera-friendly hair on demand—events, travel, interviews, content creation, and occasions where hair is part of your presence.
Blonde clip-ins are also a practical solution for maintenance fatigue. If your salon color is between appointments, clip-ins can refresh the overall impression: stronger ends, more polished silhouette, and a blonde tone that looks intentional under mixed lighting. The best sets don’t look like “more hair.” They look like better hair—balanced, believable, and aligned with your routine.
Why this category matters now (freshness, trends, real-life use)
Modern blonde is not a single tone; it’s a story of dimension, softness, and realism. Trends have moved away from flat, uniform blonde toward blended highlights, root depth, and tones that hold up in daylight. Clip-ins make that trend accessible because you can add dimension without committing to a full color change. You can also build a “blonde wardrobe”: brighter for summer events, softer and more neutral for everyday, more dimensional when you want hair to read expensive rather than freshly lightened.
Real life has changed how hair is judged. Phone cameras compress depth and emphasize shine. Outdoor light reveals brassiness. Warm indoor bulbs can make cool blondes look gray, and office LEDs can expose side placement if your hair is thin near the temples. Clip-ins matter because they’re adjustable: you can shift wefts slightly for a half-up style, reduce density for comfort, or choose a texture that blends without constant heat. The category is also time-efficient. Instead of trying to style thin ends into fullness every morning, you start with a stronger silhouette and style from there.
Finally, clip-ins support low-commitment experimentation. You can explore tone changes—cooler, brighter, more dimensional—without risking damage from repeated bleaching. That flexibility aligns with how people shop now: modular upgrades that adapt to life, lighting, and mood.
How to choose the right option (Decision Framework)
Decision Framework
- Goal → length, volume, thicker ends, face framing, or dimensional color effect
- Shade/undertone → warm, neutral, cool, or ultra-cool
- Texture/finish → straight, wavy, or curly to match your natural pattern
- Construction/type → weft build, piece count, and placement map
- Weight/coverage → enough density to look real without bulk or tension
- Occasion/frequency → daily wear, weekends, travel, or special events
- Care tolerance → brushing discipline, washing frequency, and heat habits
- Budget/value → prioritize realism, reusability, and blend reliability
How to choose blonde clip-ins for thin hair right now without crown bulk
For fine or thin hair, the most believable volume is perimeter-first. Reinforce mid-lengths and ends, then keep the top lighter so your natural hair can veil wefts. Bulk at the crown is the fastest way to make clip-ins look obvious, because your natural hair can’t camouflage a heavy shelf. If you want distribution logic that keeps volume natural, use clip-in volume techniques that build fullness without top-heavy stacking and apply the principle of “shape before thickness.”
What blonde clip-ins look most natural in daylight and phone photos
Natural-looking blonde behaves consistently in two places: the top layer near the face and the bottom third where ends show in photos. Daylight is where undertone becomes obvious; phone cameras are where shine and contrast can look exaggerated. If your set looks separate, it’s usually undertone or finish mismatch. Movement can help: soft waves visually mix highlight tones and make the blend more forgiving at the ends. If you wear hair pin-straight often, prioritize a closer match to your top layer, because straight hair shows tonal differences more clearly than waves do.
How to match undertones without overthinking it
Start with your root direction. Ashy roots usually pair best with neutral-to-cool blondes. Warm roots can look more harmonious with beige, honey, or softly warm blondes. If you’re in-between, choose dimension rather than flat color; multi-tone blondes are more forgiving across lighting and seasons. Also consider your typical environment: if you spend more time in warm indoor lighting, ultra-cool blondes can read gray; if you spend time outdoors, overly warm blondes can read brassy. Matching is less about perfection and more about avoiding obvious conflict.
How many pieces you actually need by haircut type and density
Think in silhouettes. Blunt cuts need stronger perimeter support because the hemline is the visual focus. Layered cuts need a gradient so your layers merge instead of stopping above the added hair. Short hair needs overlap: a believable length increase and extra fullness are more natural than dramatic length. Medium-length hair is typically the easiest to blend because there’s enough overlap to disguise transitions. Thick hair often needs more coverage so added hair doesn’t get lost underneath. Fine hair needs fewer pieces placed strategically so the top stays natural and comfortable.
Best option for daily wear vs special occasions (one set, two roles)
Daily wear should feel light, repeatable, and comfortable—something you can install quickly and forget about. For events, you can use more pieces because styling is more structured and wear time is often shorter. If you want one set for both, choose realistic daily density and use styling to elevate for events: brushed waves, sleek straight length, or a structured half-up look. This approach keeps the result believable and prevents the “too much hair” effect that often reads less natural in blonde.
Shade, undertone, and finish selection (choose the blonde that blends)
Blonde selection is a three-part decision: tone, depth, and dimension. Tone is warm versus cool. Depth is how light the blonde is relative to your base. Dimension is whether the hair includes multiple tones that mimic natural highlights and lowlights. A dimensional blonde often blends more easily because it creates visual variation, which hides small mismatches and looks more like real hair in motion.
If you want the most forgiving blend across seasons and lighting, balayage-style dimension is often the easiest to wear. Explore balayage clip-in hair extensions for blended, salon-like dimension when your goal is a natural transition rather than a single flat blonde.
If you want an ultra-cool statement tone—icy, platinum-leaning, crisp in photos—browse white blonde clip-in hair extensions for an icy, high-impact finish. This direction looks most natural when your root is already cool or when you style with sleek polish and controlled shine.
If you prefer movement that visually mixes tones and makes blonde look more natural in daylight, consider blonde wave clip-in hair extensions for effortless dimensional movement and lean into a soft, lived-in finish rather than forcing pin-straight perfection.
It can also help to compare blonde against deeper shade families when you’re deciding contrast level. For a softer, lower-contrast look that still enhances thickness and polish, browse brown clip-in hair extensions for natural depth and easy blending. For sharper contrast and sleek silhouettes, explore black clip-in hair extensions for bold contrast and refined styling. Comparing these categories clarifies whether you want “bright blonde transformation” or “subtle polish that blends instantly.”
Texture and blend strategy (the realism layer that matters most)
Texture match is the fastest route to seamless. If texture matches, a near-perfect shade can look flawless; if texture clashes, even the right shade can look obvious at the ends. Choose the texture that behaves like your hair on an average day, not your hair on your best styling day. This reduces reliance on heat and keeps blending consistent through humidity, movement, and time.
How to blend with blunt cuts without creating a heavy shelf
Blunt cuts are about the perimeter. Build density through the lower half so the hemline looks strong, then keep higher wefts lighter. If ends look too dense compared to your natural hair, shape them—light trimming or a subtle bevel—to mirror your haircut. Avoid placing the thickest weft too high, which can create a visible shelf and make blonde look “added” rather than integrated.
How to blend with layered cuts so layers merge naturally
Layered hair needs a gradient placement map. Use lighter wefts higher and fuller wefts lower so your natural layers melt into the extension hair. If you see a line where your layers end, the solution is usually shaping and placement—not adding more hair. Soft movement helps layered hair look cohesive because it intermixes strands and reduces the “two textures” effect.
How to blend with short hair (realistic overlap and smarter goals)
Short hair can wear clip-ins beautifully when the goal is believable: fullness plus moderate length often looks more natural than dramatic length. Overlap is key—your natural hair must cover the top weft and transition into the extension hair. For expectation-setting and confidence, read why hair extensions are a game changer for short hair when blending is done intentionally and plan a silhouette that looks like a natural grow-out, not a sudden switch.
What to do if it looks obvious at the sides or part line
Side visibility is almost always placement. Wefts placed too close to the hairline show when you tuck hair behind your ears or move your head. Move placement inward, keep the top layer lighter, and use your natural hair as a veil. If the part line looks separated, check whether you’ve placed any weft too high near the crown or whether your top layer has enough hair to cover the seam. Styling cohesion matters, too: if your natural hair is straighter on top and wavier at the ends, match that pattern so the blend looks intentional rather than accidental.
Styling ideas (daily + event)
The best clip-in styles are repeatable and realistic. You want looks that take minutes, not hours, and that hold up in daylight, photos, and movement. Build two signature finishes—one for daily wear and one for events—then rotate small variations (parting, accessory, wave direction) to keep the look fresh without overworking the hair.
Quick looks
- Low ponytail with a wrapped base for thicker-looking hair without tension
- Half-up twist that lifts the crown while keeping side coverage intact
- Soft bend through mid-lengths for a blowout-inspired finish that hides transitions
- Low bun with a fuller perimeter for clean, modern profiles
If you’re new to clip-ins and want the fastest path to a routine you’ll actually repeat, use a practical clip-in guide for mastering placement without the drama to build a default map and reduce trial-and-error.
Photo-ready looks
- Brushed waves that blend highlight patterns and soften end transitions
- Sleek straight length with clean parting and shaped ends for refined polish
- High ponytail with controlled volume and smooth sides
- Structured half-up styling that showcases length while hiding wefts
If you want event hair ideas that translate cleanly to clip-ins—especially for medium-length baselines—reference prom hairstyle ideas for medium-length hair that pair beautifully with clip-ins and choose silhouettes that look intentional from every angle.
If accessories are part of your style, place them to enhance the look while protecting blending. Explore bandana hairstyle ideas that keep clip-ins discreet and styling elevated and keep wraps positioned to avoid pulling at wefts near the hairline.
If you want inspiration that focuses on shape rather than unrealistic density, browse celebrity hairstyle silhouettes that guide parting, wave direction, and polish and translate the structure into what feels comfortable and believable for you.
Care, maintenance, and longevity (how to keep blonde looking premium)
Blonde extensions look expensive when they stay soft, tangle-resistant, and naturally shiny—not coated or dry. Longevity depends on friction management, product discipline, and heat habits. Clip-ins tend to last longer than many long-wear methods because you can remove them before sleep and store them properly, but only if you treat them as reusable styling pieces rather than hair you toss in a drawer.
Start with the essentials of choosing and caring for clip-ins so you maintain softness and consistent blending over time. Read everything you need to know before buying clip-in hair extensions for long-term value and use it to set expectations around placement, comfort, and upkeep.
If your goal is speed—transforming your look for a meeting, trip, or weekend—use a quick transformation guide to clip hair extensions for on-demand styling to plan a routine that feels effortless rather than time-consuming.
Weft construction affects feel, thickness, and how easily hair blends. If you’re deciding what kind of weft build fits your hair type, consult double weft vs single weft guidance for choosing comfort and density and match the structure to your tolerance for weight and your desired fullness.
Internal linking placeholder: Add link to “Brush + Detangling Protocol (Ends Up).”
Internal linking placeholder: Add link to “Storage Routine for Tangle Prevention.”
Internal linking placeholder: Add link to “Heat Styling Best Practices for Extensions.”
For real-life longevity, follow three principles. First, reduce friction: coats, scarves, and seatbelts can rough up the outer layer; protective styles on long days preserve smoothness. Second, keep products light: heavy oils and sticky sprays can create buildup that attracts tangles and dulls blonde dimension. Third, limit repeated high heat: choose finishes that hold longer so you aren’t reheating the same sections daily. When you do use heat, keep it consistent and controlled, and always brush gently after styling to maintain a natural-looking surface.
Comparing nearby categories (textures, lengths, methods)
Comparison shopping is how you avoid regret. Different textures behave differently in light, movement, and humidity. Different lengths change how realistic your blend looks depending on your haircut baseline. And different methods have different learning curves. If you choose the category that matches your daily hair behavior, blending becomes easier and your set looks more natural with less effort.
If you want a sleek, modern finish that looks sharp with minimal styling variation, consider clip-on straight hair extensions for refined, smooth everyday styling. Straight textures look polished, but they show mismatches more easily because the surface is uniform—so shade matching and end shaping matter more.
If you want the most forgiving blend for highlight patterns and day-to-day movement, explore clip-on wavy hair extensions for effortless blending and natural dimension. Waves visually mix tones and reduce the appearance of a blend line at the ends, especially in blonde where tonal shifts can be more noticeable.
If your natural hair is curly or you want authentic curl volume without forcing heat patterns, browse curly clip-in hair extensions for curl-pattern blending and full-bodied volume. The key is matching curl pattern and direction so your natural hair and extensions respond similarly throughout the day.
Method comparisons matter, too. Some shoppers consider halo hair because it can feel simple, but clip-ins typically offer more placement control for layered haircuts and side blending. Use halo hair extensions vs clip-ins guidance for choosing the right method to weigh comfort, realism, and how much customization you want in daily wear.
To understand what “seamless blending” should look like from a placement perspective, it helps to read a clear benchmark—even if it’s written about a different shade family. Use the ultimate seamless blending guide for clip-ins as a placement benchmark and apply the same rules to blonde: stay away from hairlines, build density in layers, and shape ends so the perimeter looks like one haircut.
Featured picks and use-case recommendations
Featured picks are most helpful when they map to real situations: you want dimensional blonde that blends in daylight, high-impact blonde for photos, natural blonde for daily wear, bronde gradient for a softer transition, a curly ponytail for quick texture, or clip-in bangs for face framing without cutting your hair. Choose your use case first, then refine for undertone and texture so the result feels cohesive with your routine.
For multi-tone realism that blends into highlighted hair and looks natural across mixed lighting, consider blonde mix human hair clip-ons for believable dimensional blending and style with movement so tones visually intermix.
If you want a bold, bright statement blonde that photographs crisply and pairs well with sleek styling, explore Barbie blonde human hair clip-ons for high-impact photo-ready brightness and keep shine controlled so the tone reads intentional rather than reflective.
If your priority is daily wearability and a blonde that can pass as “my hair” in everyday settings, choose natural blonde clip-in extensions for low-stress daily blending and focus on end shaping to match your haircut silhouette.
For a softer transition that mimics salon color without dye commitment, consider chocolate brown to caramel blonde clip-ins for a believable bronde gradient and wear them with a bend or wave so the tonal shift looks natural in motion.
If you want a fast texture upgrade for casual days, travel, or quick event styling, use a short curly ponytail clip-in for instant texture and brown-blonde dimension and blend by matching curl direction rather than flattening your natural pattern.
For face framing without committing to a haircut, try a blonde clip-in bangs extension for instant fringe without cutting your hair and style the top layer so the bangs read cohesive with your part and finish.
Conversion-aware CTA (non-salesy): If you’re unsure which featured option fits your day-to-day styling, start by choosing your goal—volume, length, or tone change—then pick the texture you wear most often. That single decision reduces blending issues more than chasing the “perfect blonde name.”
Buying guidance and common mistakes to avoid
Buying blonde clip-ins is easiest when you buy like a stylist: define constraints, then choose shade and texture, then finalize piece count and placement logic. Constraints include your baseline hair density, your haircut shape, your tolerance for heat styling, and how often you plan to wear the hair. A set that looks incredible online can disappoint if it demands constant styling to blend or if the undertone clashes in daylight.
Common mistake: choosing an ultra-cool blonde for a warm base, then wondering why it looks gray indoors. Common mistake: choosing a warm blonde for a cool base, then seeing brassiness in sunlight. Common mistake: ignoring texture match and heat-styling daily to force a blend; this often shortens lifespan and makes blonde look dry. Common mistake: overloading the crown with thick wefts; this creates bulk and makes side seams more visible. Common mistake: neglecting end shaping; if the extension ends are denser than your natural ends, the perimeter can look like a second haircut.
Another overlooked factor is weft build versus comfort. If you’re sensitive to weight or you have fine hair near the temples, prioritize a placement map that spreads density across the lower half rather than concentrating it high. If you are building an event look, add density lower first and reassess before adding higher wefts. The best-looking hair is often the hair that is placed with restraint and shaped to match the haircut silhouette.
Internal linking placeholder: Add link to “How to Choose Your Set by Hair Density.”
Internal linking placeholder: Add link to “Shade Matching in Daylight Checklist.”
Internal linking placeholder: Add link to “Beginner Clip-In Placement Tutorial.”
FAQ
How do I choose a blonde that won’t look brassy in daylight?
Check your hair in indirect sunlight and identify whether your base reads warm, neutral, or cool. Choose a blonde that follows that undertone direction, and lean into dimension if your hair is highlighted. Brushed waves often help tones visually mix, reducing the appearance of brassiness.
What’s the most natural-looking blonde choice for fine hair?
Fine hair typically looks best with gradual density and multi-tone blonde rather than heavy, bright blocks of color. Keep crown coverage light and reinforce mid-lengths and ends. Wavy textures often blend more naturally because they disguise transitions without constant heat.
How many clip-in wefts do I need for a full look?
It depends on your hair density and haircut shape. Blunt cuts usually need stronger perimeter support, while layered cuts need gradient placement so layers merge. Start with enough to close visible gaps in movement, then add only if side photos still look thin.
Can clip-ins look seamless if my hair is short?
Yes, when the length increase is believable and your natural hair can overlap the top weft. Prioritize fullness and a moderate length change, and choose a texture that matches your day-to-day hair behavior. Light shaping to match your haircut silhouette is often the key to realism.
Are clip-ins better than halo hair for obvious blending issues?
Clip-ins usually offer more control because you can distribute density and adjust placement around layers and sides. Halo hair can be simple, but it may be less customizable for side blending and certain haircut shapes. The best method is the one you can install comfortably and consistently.
How do I stop clip-ins from showing at the sides?
Move wefts slightly inward, keep the top layer lighter, and use your natural hair as a veil. Avoid placing wefts too close to the hairline, especially near the temples. Style your natural hair and extensions together so they share the same bend direction and finish.
What texture is most forgiving for blending blonde highlights?
Wavy textures are often the most forgiving because movement visually mixes tones and softens transitions. Straight textures look very polished but require more precise shade matching and end shaping. Curly textures can be extremely seamless when curl pattern is matched.
How do I keep blonde clip-ins from looking dry?
Minimize friction, avoid heavy buildup products, and reduce repeated high heat. Brush gently from ends upward and store the hair neatly to prevent tangling. A consistent, light-touch routine typically keeps blonde looking softer and more dimensional.
Can I wear clip-ins every day?
You can, as long as placement is comfortable and you remove them before sleep. Daily wear works best when you choose a repeatable placement map and avoid excessive heat styling. Many people rotate between lighter daily placement and fuller event placement to protect comfort and longevity.
How do I make an event hairstyle look expensive, not overdone?
Choose one statement element—sleek length, brushed waves, or a structured half-up—and keep everything else cohesive. Use controlled shine rather than heavy gloss products. The most premium event hair looks intentional and comfortable, not heavy.
Browse the Collection
Blonde clip-in hair extensions look premium when they’re chosen as a system: undertone aligned with your base, texture matched to your natural movement, and density placed where your haircut needs support. Use the decision framework to avoid crown bulk, prioritize perimeter realism, and choose dimension that holds up in daylight. Then browse the collection with a clear goal—thicker ends, more length, brighter tone, or softer blend—so the set you choose feels effortless to wear and natural to look at, from every angle.