


How To Get The Perfect Blowout At Home With Extensions
1. Introduction – Why A Blowout Is The Ultimate Glam Look
A salon-quality blowout is one of the most timeless, confidence-boosting hairstyles you can wear. It delivers smoothness, volume, and movement in a way few other styles can, instantly elevating your overall look. Whether you prefer sleek and polished hair or soft, bouncy body with flow, a well-executed blowout creates that effortlessly glamorous finish that works for everyday wear, events, and professional settings alike. The challenge, however, is achieving those same results at home—especially when hair extensions are involved. Extensions require more intention, from heat control to airflow direction, because improper techniques can shorten their lifespan or lead to frizz and tangling. When done correctly, extensions actually enhance a blowout by adding density, structure, and longevity. This guide breaks down the professional approach to getting a flawless blowout at home while protecting your extensions, using proven salon techniques and extension-safe products sourced from https://www.fabulive.com/collections/hair-extensions.
2. Prepping Your Hair – The Foundation Of A Long-Lasting Blowout
A successful blowout always begins with proper preparation. Clean hair that is balanced—not overly dry or overly moisturized—responds best to heat styling. For extensions, sulfate-free shampoos are essential because they cleanse without stripping moisture, which keeps the hair flexible and smooth under airflow. Conditioning should focus on mid-lengths and ends to prevent heaviness at the roots that can flatten volume. Extensions benefit from lightweight hydration rather than rich creams that cause buildup. After washing, excess water should be gently pressed out using a microfiber towel or cotton T-shirt to minimize friction. Rubbing hair aggressively increases frizz and tangling, especially around extension attachment points. Allowing hair to air-dry to about 50–60 percent before blow-drying significantly reduces heat exposure and helps preserve extension integrity. A lightweight heat protectant should always be applied evenly through the lengths to shield both natural hair and extensions from thermal stress and moisture loss.
3. The Best Tools For A Salon-Worthy Blowout
Professional results depend heavily on the tools you use. A high-quality blow dryer with adjustable heat and speed settings is essential for controlling airflow and preventing overheating. Ionic blow dryers help reduce frizz by breaking down water molecules faster, while ceramic technology distributes heat evenly to avoid hot spots that can damage extensions. A dryer that combines both technologies offers the best balance of smoothness and protection. Brushes play an equally important role. A round brush creates lift and movement, making it ideal for voluminous blowouts, while a paddle brush is better for sleek, straight finishes. For extensions, mixed or boar bristle brushes are preferred because they glide smoothly without snagging. Styling products should be purposeful and lightweight. Heat protectants with thermal shielding up to 400–450°F protect hair fibers, while volumizing mousses and root-lifting sprays add structure without stiffness. Heavy creams and oils should be avoided before drying, as they weigh hair down and reduce airflow efficiency.
4. Sectioning Your Hair For A Flawless Blowout
Sectioning is the foundation of professional blow-drying. Attempting to dry all hair at once leads to uneven results, frizz, and unnecessary heat exposure. Hair should be divided into clean, manageable sections that allow precise airflow and tension control. A standard method is to divide hair into bottom, middle, and top sections, clipping away layers not being worked on. If you are wearing clip-in extensions such as https://www.fabulive.com/products/hair-extensions-clip, they should be applied before styling so they blend naturally during drying. Working in sections prevents tugging on extension bonds and allows each layer to dry smoothly and completely. Using sturdy sectioning clips keeps hair organized and reduces tangling, especially important for layered extension installations.
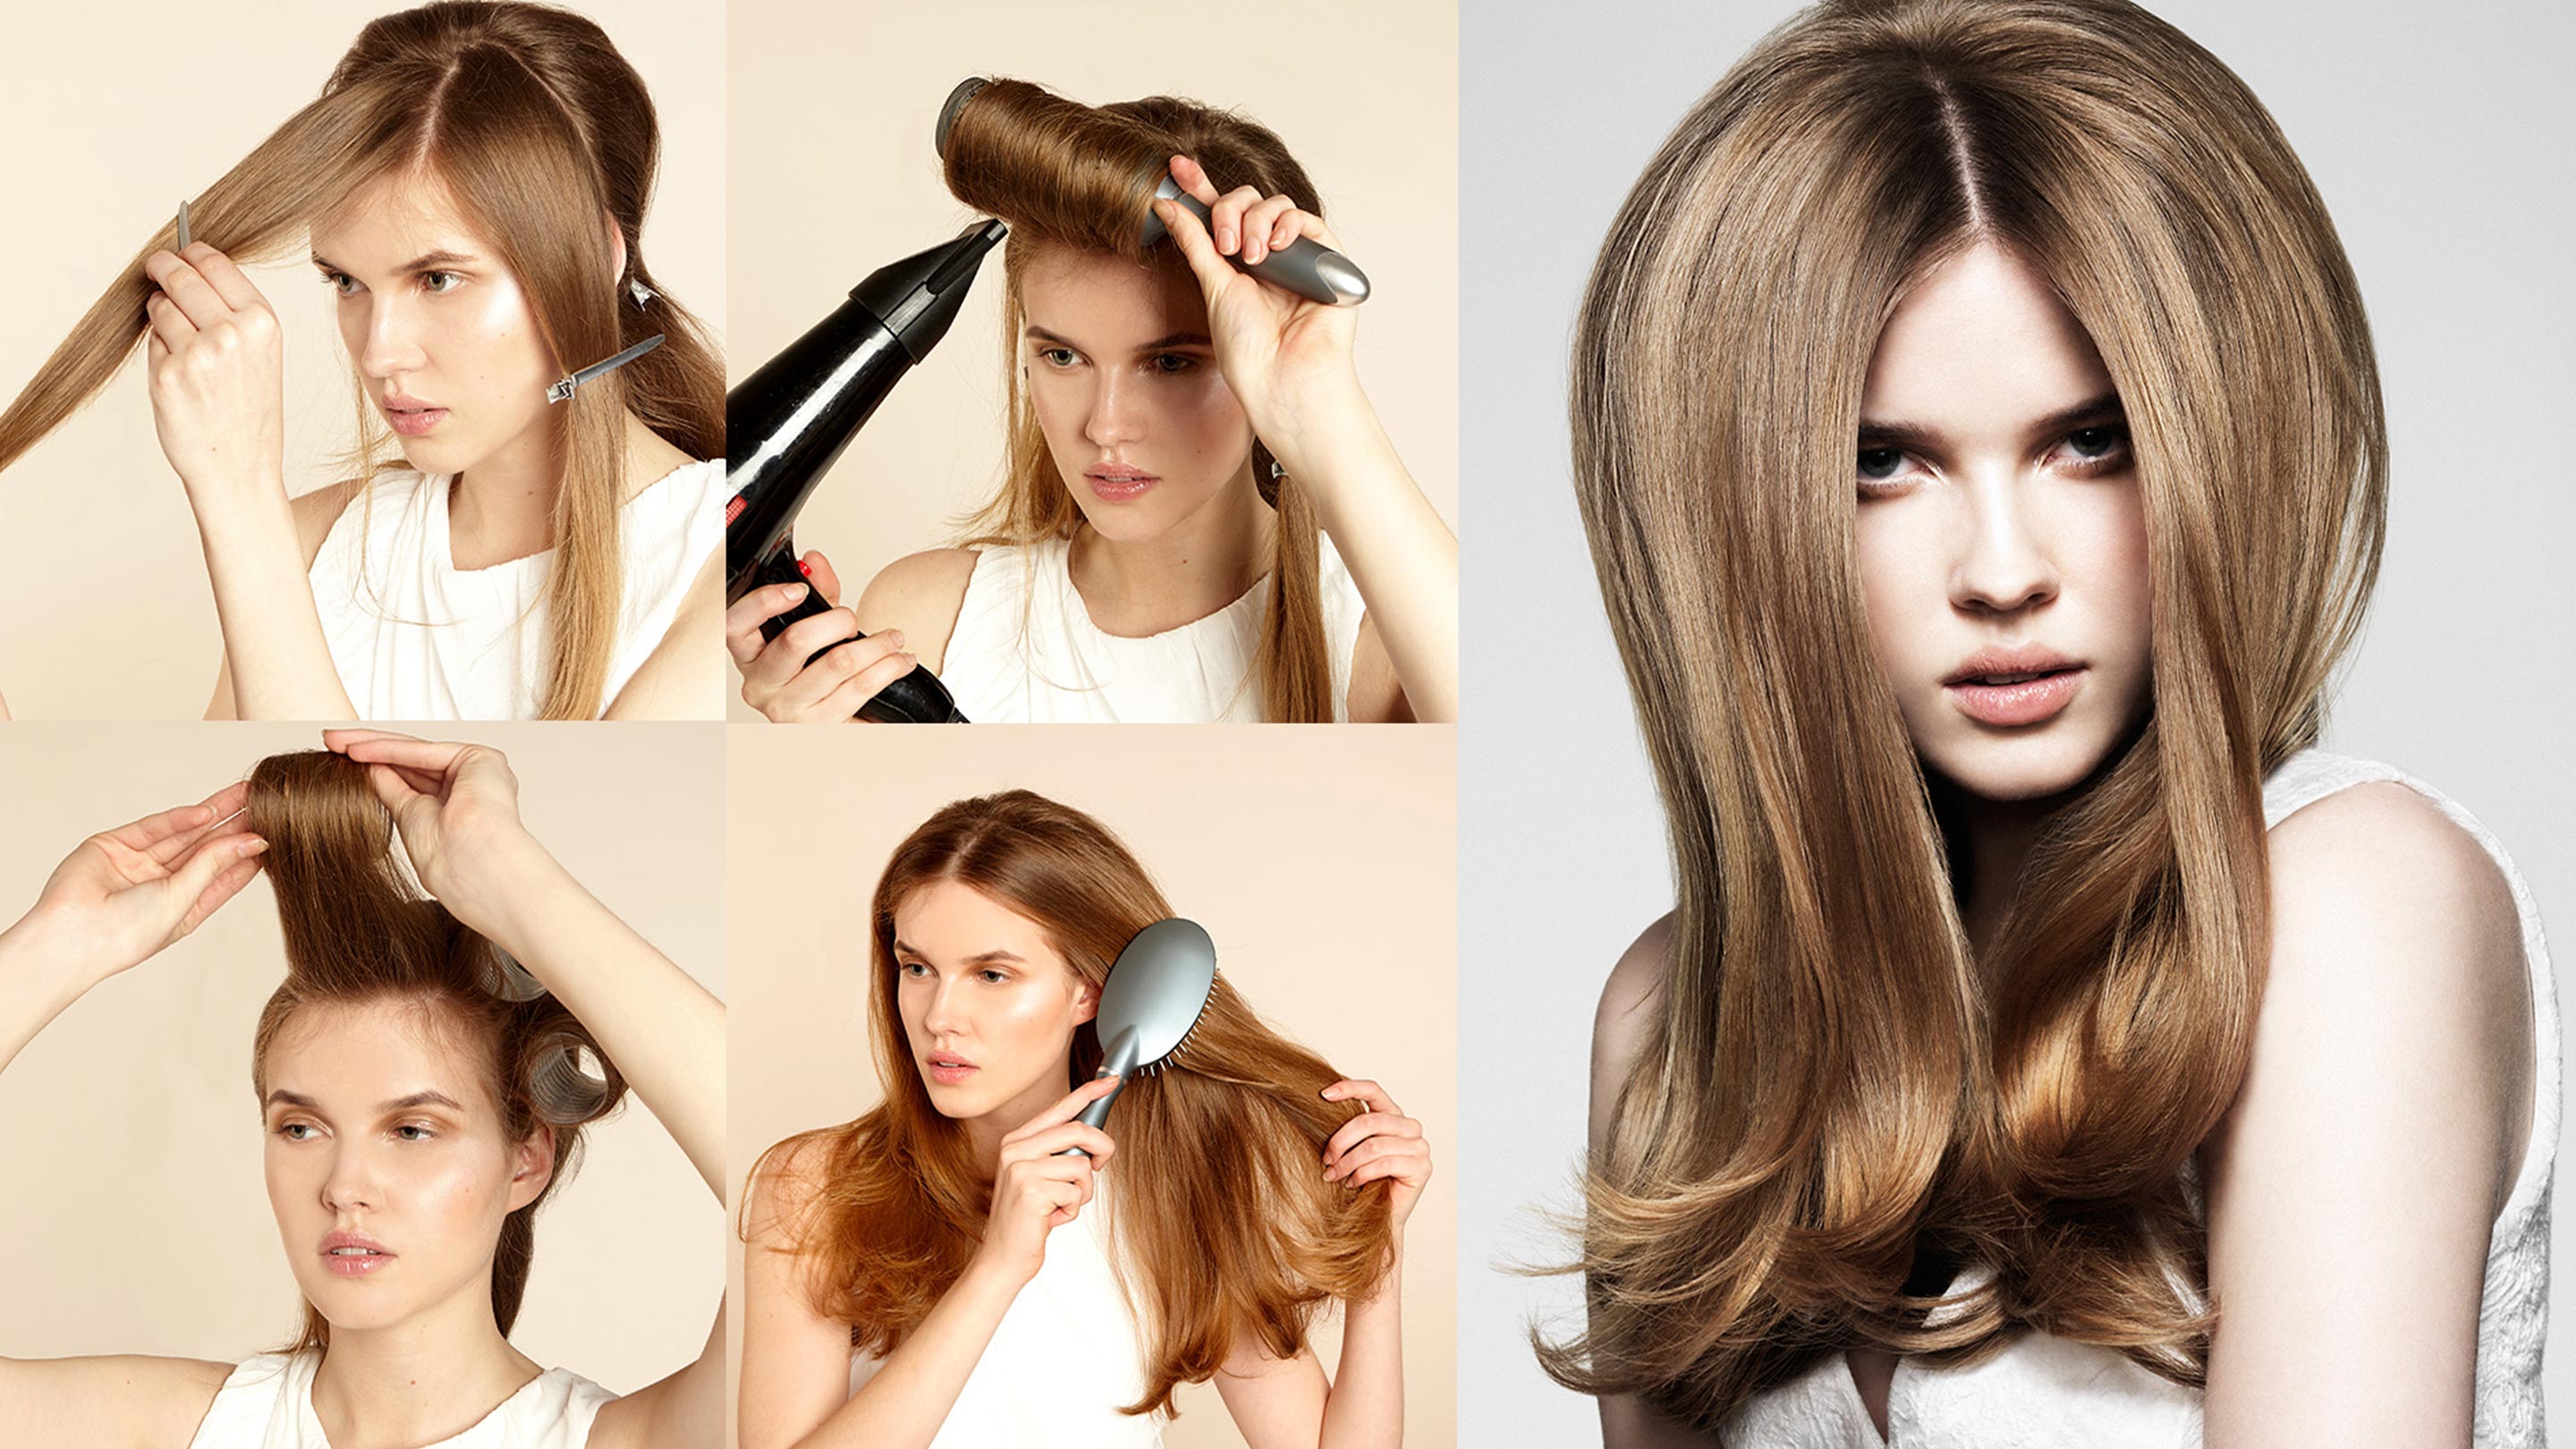
5. Blow-Drying Techniques For Smoothness And Volume
Technique is what separates an average blowout from a salon-level result. The tension method is a professional staple that smooths hair without excessive heat. By gently pulling hair taut with a brush and directing airflow downward along the shaft, the cuticle lies flat, increasing shine and reducing frizz. For volume, roots should be lifted while drying, directing airflow upward briefly before smoothing the lengths downward. This creates lift without roughing the cuticle. Extensions require controlled tension—pulling too hard strains attachment points and causes shedding over time. Medium heat is ideal for extensions, paired with a concentrator nozzle that focuses airflow precisely. The dryer should remain about an inch away from the hair to avoid overheating. Using the cool-shot function at the end of each section helps set the shape, lock in volume, and extend the life of the blowout.
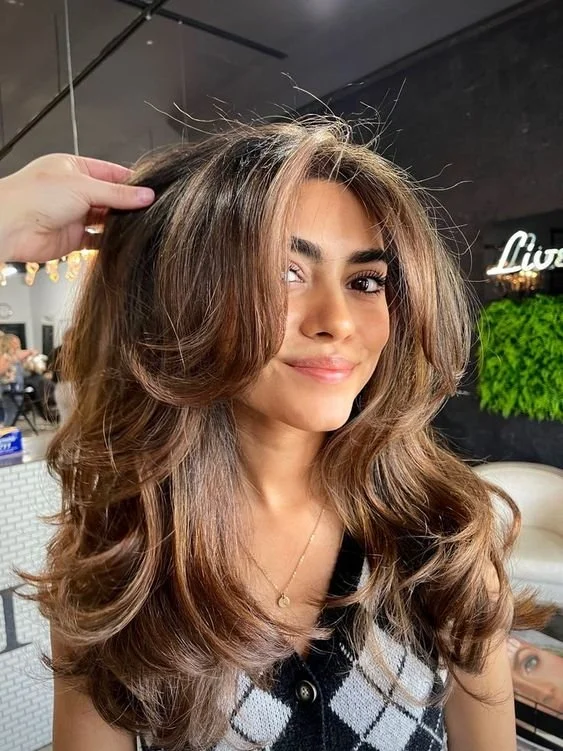
6. Celebrity-Inspired Blowout Techniques That Work With Extensions
Some of the most iconic blowouts seen on red carpets rely on consistent fundamentals rather than excessive heat. Voluminous styles inspired by Hollywood waves, like those detailed in https://www.fabulive.com/blogs/news/hollywood-waves-hair-tutorial-classic-glam-in-minutes, begin with strategic sectioning and large round brushes. Soft, flowing movement comes from alternating brush direction and allowing hair to cool fully before manipulation. Polished royal-style blowouts rely on even airflow and smooth tension, while more relaxed, beachy finishes use texture sprays applied sparingly after drying. Across all styles, stylists emphasize preparation, patience, and minimal product buildup to maintain hair health and longevity.
7. Finishing Touches – Locking In The Style For All-Day Hold
Finishing techniques determine whether a blowout lasts hours or days. Once hair is fully dry, a brief blast of cool air seals the cuticle and enhances shine. Lightweight, flexible-hold hairsprays maintain movement while controlling flyaways without stiffness. Finishing serums or oils should be used sparingly and applied only to the ends, never the roots, to avoid collapsing volume. Velcro rollers are a professional trick for extending volume at the crown—placing them in freshly dried sections and allowing hair to cool adds lift that lasts significantly longer.
8. Maintaining Your Blowout For Multiple Days
A blowout can last several days with proper care. Dry shampoo should be applied preventatively rather than reactively—using it before oil buildup begins helps preserve volume and freshness. Sleeping on silk or satin pillowcases reduces friction and moisture loss, protecting both natural hair and extensions. Hair should be loosely secured in a high ponytail or soft bun using a scrunchie to prevent creasing and flattening. Morning refreshes should rely on minimal heat, using dry shampoo, light airflow, or Velcro rollers rather than full restyling. Understanding extension longevity, as outlined in https://www.fabulive.com/blogs/news/how-long-do-hair-extensions-last, helps tailor maintenance routines that extend both style and wear time.
9. Common Blowout Questions Answered
Blowouts on extensions are best limited to one or two times per week to avoid cumulative heat damage. Frizz control begins with proper prep and anti-humidity products, especially in warm climates. Hot tools can be used for touch-ups, but only on low heat with heat protectant. Extension-friendly styling habits preserve hair quality while maintaining polished results. Choosing the correct extension weight also impacts blowout success, and guides such as https://www.fabulive.com/blogs/news/how-many-grams-of-hair-extensions-do-you-need-for-a-full-head help ensure balanced volume without stress on natural hair.
10. Conclusion – Achieving The Ultimate Blowout At Home
A flawless blowout at home is completely achievable when the right techniques, tools, and products are used—especially with hair extensions. Proper preparation, controlled heat, thoughtful sectioning, and professional airflow direction are the pillars of a long-lasting, salon-quality result. Extensions enhance blowouts by adding density and structure, making volume easier to achieve and maintain. With mindful aftercare, including silk sleep protection and dry shampoo refreshes, your blowout can last for days without compromising hair health. By mastering these techniques and using quality extensions, you can enjoy effortlessly glamorous hair anytime, right from home.

